
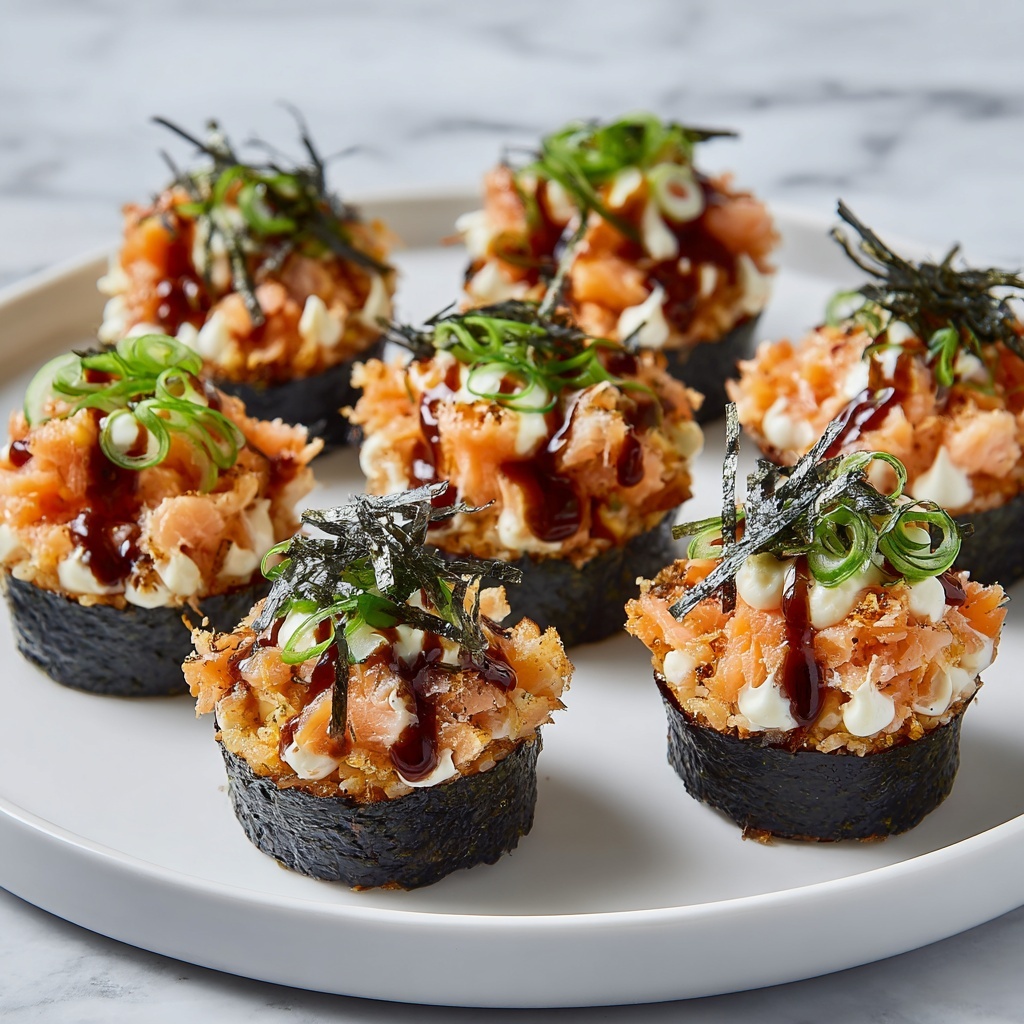
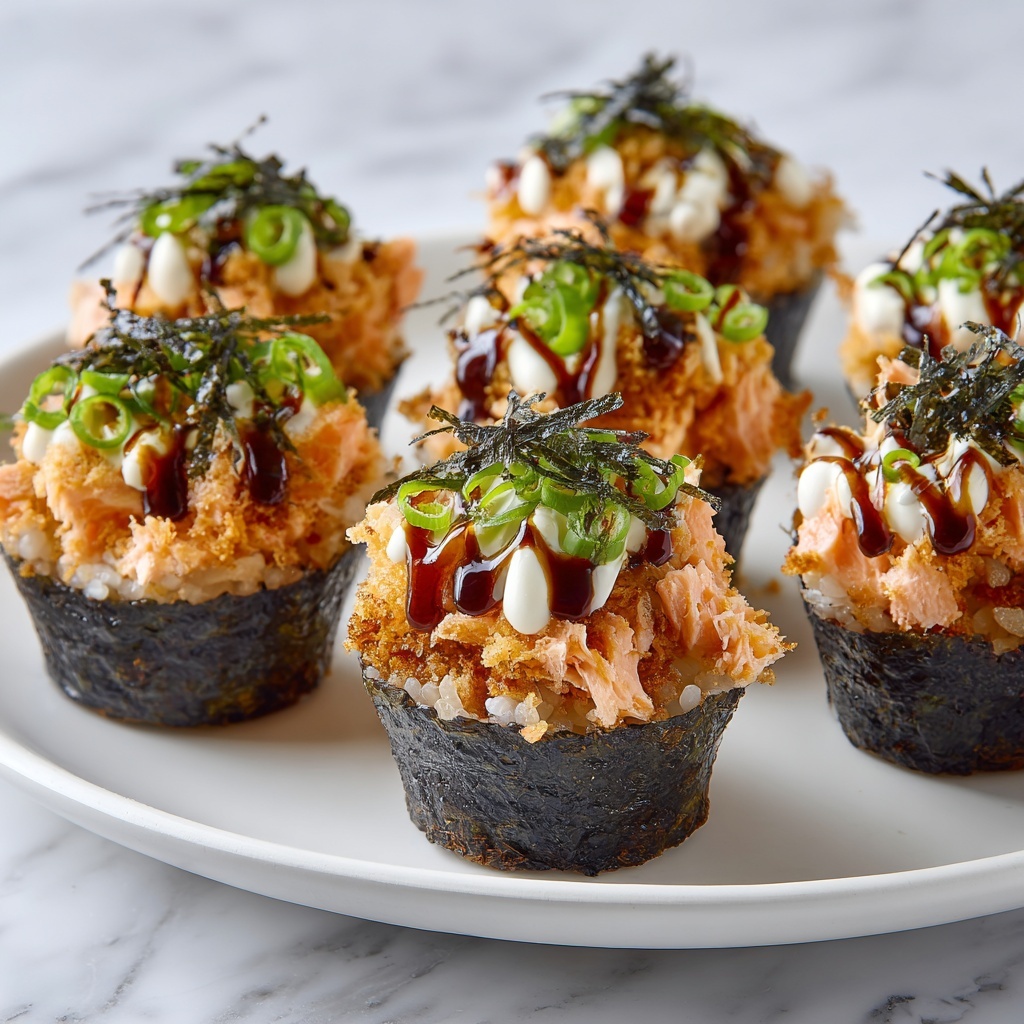
If you’re looking for a fun and flavorful way to enjoy sushi at home, you have to try this Easy Baked Salmon Sushi Cups Recipe. It takes all the essentials of classic sushi and transforms them into delightful, bite-sized cups that are both easy to make and impressive to serve. With tender baked salmon nestled on a bed of seasoned sushi rice inside crispy nori cups, each bite bursts with texture and umami flavor. This recipe is perfect for casual dinners, parties, or when you want to treat yourself to something special without a lot of hassle.
Ingredients You’ll Need
This Easy Baked Salmon Sushi Cups Recipe keeps things simple but packed with flavor by using a handful of fresh ingredients that come together beautifully. Each ingredient plays a crucial role, from tender salmon cubes to the subtle sweetness of the sushi rice, creating a balanced taste and texture that’s truly irresistible.
- 2 lbs salmon, cubed: Choose fresh, firm salmon for the best texture and flavor in your sushi cups.
- 2 tablespoons light soy sauce: Adds a savory depth and enhances the umami in the salmon marinade.
- 2 tablespoons Kewpie mayo: This creamy Japanese mayo brings richness and balances the spices perfectly.
- 2 tablespoons Sriracha (adjust to taste): Adds just the right amount of heat to wake up your taste buds.
- 2 teaspoons sesame oil: Imparts a nutty aroma and flavor that elevates the salmon mixture.
- Optional twist – 1 tablespoon miso paste or 1 teaspoon grated ginger: For an extra layer of complexity and brightness.
- 3 cups uncooked sushi rice: The foundation of any sushi dish, it’s sticky and slightly sweet.
- 2 tablespoons rice vinegar: Adds a mild tang that perfectly seasons the rice.
- 4 teaspoons white sugar: Balances the acidity of the vinegar for that classic sushi rice taste.
- Optional twist – 1 teaspoon mirin or a pinch of salt: Enhances the flavor of the rice if you want to experiment.
- 6 large nori sheets (cut into quarters): Crispy seaweed cups hold everything together with a subtle ocean flavor.
- Furikake seasoning, for garnish: Adds a crunchy, flavorful pop at the end.
- 2 green onions, finely sliced: Provides a fresh note and beautiful color contrast.
- Cooking spray: Helps the nori cups crisp up nicely during baking.
- Optional twist – diced avocado, mango chunks, or a drizzle of eel sauce: These toppings bring freshness, sweetness, and extra umami.
How to Make Easy Baked Salmon Sushi Cups Recipe
Step 1: Prepare the Sushi Rice
Start by cooking the sushi rice according to the package instructions. While it’s still warm, gently stir in the rice vinegar and sugar until everything is nicely combined. Let the rice cool slightly so it’s easy to handle but still sticky enough to hold shape. This step is crucial because perfectly seasoned sushi rice is the foundation of your cups.
Step 2: Marinate the Salmon
In a mixing bowl, toss the cubed salmon with light soy sauce, Kewpie mayo, Sriracha, sesame oil, and if you want to add a twist, stir in miso paste or grated ginger. Let the salmon soak up these flavors while you prep your muffin tin and nori sheets. The marinade infuses the salmon with that signature sweet, spicy, and umami punch that makes these cups unforgettable.
Step 3: Prep the Muffin Tin and Nori
Preheat your oven to 400°F (200°C). Lightly spray the muffin tin with cooking spray to help the nori sheets crisp up and release easily after baking. Cut the nori sheets into quarters, and gently press each square into one of the muffin tin cups, forming a neat little bowl. This crispy seaweed base will hold all your sushi ingredients perfectly.
Step 4: Assemble the Cups
Spoon about a tablespoon of the seasoned sushi rice into each nori cup and gently press down so it fills the base evenly. Follow with a generous scoop of the marinated salmon mixture on top. The contrast between the soft rice and salmon with the crunchy nori makes each bite simply irresistible.
Step 5: Bake to Perfection
Pop the assembled cups into the oven and bake for 13 to 15 minutes until the salmon is cooked through and just starting to turn golden. The baking step brings all the flavors together and ensures a warm, comforting bite that’s a perfect fusion of texture and taste.
Step 6: Garnish and Final Touches
Once out of the oven, sprinkle each sushi cup with furikake seasoning and sliced green onions for a burst of flavor and color. If you want to get creative, top them off with diced avocado, juicy mango chunks, or lightly drizzle eel sauce for that sweet-savory finish. These little details take your sushi cups to the next level.
How to Serve Easy Baked Salmon Sushi Cups Recipe
Garnishes
Garnishes like furikake and green onions are more than just pretty toppings—they add crunch, color, and a pop of freshness. For an extra treat, avocado and mango offer creamy and sweet contrasts that brighten the overall dish. Don’t forget a drizzle of eel sauce if you love a touch of indulgence.
Side Dishes
These sushi cups pair beautifully with a light cucumber salad or a seaweed salad to keep the meal refreshing. A bowl of miso soup or a simple edamame appetizer also complements the flavors perfectly without overpowering the delicate salmon cups.
Creative Ways to Present
Serve these sushi cups on a sleek platter sprinkled with sesame seeds or alongside small bowls of soy sauce and wasabi for dipping. For a party, arrange them on a tiered tray or place edible flowers around for visual wow-factor. These presentation tips make your Easy Baked Salmon Sushi Cups Recipe the star of any occasion.
Make Ahead and Storage
Storing Leftovers
If you have any leftover sushi cups, store them in an airtight container in the refrigerator for up to two days. Because the seaweed cups may lose some crispness, it’s best to enjoy leftovers cold or at room temperature rather than reheated.
Freezing
Freezing isn’t recommended for this Easy Baked Salmon Sushi Cups Recipe since the texture of both the rice and nori can become soggy or tough once thawed. For best results, make this recipe fresh.
Reheating
If you prefer your sushi cups warm, reheat them gently in a preheated oven at 350°F (175°C) for about 5 minutes, just enough to warm the salmon without drying it out. Avoid microwaving as it can make the nori rubbery and the rice unevenly heated.
FAQs
Can I use another type of fish besides salmon?
Absolutely! While salmon is perfect for this recipe due to its rich flavor and texture, you can try tuna, yellowtail, or even cooked shrimp to switch things up. Just adjust the cooking time as needed for different seafood.
Is it necessary to bake the salmon, or can I use raw salmon?
You can use raw salmon if it’s sushi-grade and you’re comfortable with raw fish. If so, skip the baking step and assemble everything chilled. Baking adds warmth and a different texture that many find delicious, but raw works too.
Can I make the rice ahead of time?
Yes, you can cook the sushi rice a few hours before assembling the cups. Just be sure to keep it covered and at room temperature so it doesn’t dry out. Re-season with a little rice vinegar if needed before assembling.
What if I don’t have Kewpie mayo?
You can substitute regular mayonnaise mixed with a tiny bit of rice vinegar or lemon juice for a similar tang, but Kewpie mayo is creamier and less sweet, which really compliments the salmon marinade beautifully.
How spicy are these sushi cups?
The heat comes from Sriracha, which you can adjust to your preference. If you prefer milder, reduce the amount or omit it altogether. The mayo helps tone down some spice as well, balancing the flavors perfectly.
Final Thoughts
This Easy Baked Salmon Sushi Cups Recipe is one of those dishes that feels fancy without the fuss, perfect for sharing with friends or indulging on a cozy night in. It beautifully combines familiar sushi flavors with a fun, bite-sized presentation that’s both satisfying and yummy. I can’t wait for you to try this recipe and enjoy all those layers of flavor and texture—your taste buds will thank you!
Print
Easy Baked Salmon Sushi Cups Recipe
- Prep Time: 15 minutes
- Cook Time: 15 minutes
- Total Time: 30 minutes
- Yield: 24 sushi cups
- Category: Appetizer
- Method: Baking
- Cuisine: Japanese Fusion
- Diet: Halal
Description
These Easy Baked Salmon Sushi Cups are a delightful fusion of classic sushi flavors and convenient baking. Featuring tender cubed salmon marinated in a flavorful mix of soy sauce, Kewpie mayo, Sriracha, and sesame oil, nestled inside crunchy nori cups filled with sushi rice, then baked to perfection. Garnished with furikake and green onions, these bite-sized treats are perfect for parties or a fun appetizer.
Ingredients
Salmon Marinade
- 2 lbs salmon, cubed
- 2 tablespoons light soy sauce
- 2 tablespoons Kewpie mayo
- 2 tablespoons Sriracha (adjust to taste)
- 2 teaspoons sesame oil
- Optional: 1 tablespoon miso paste or 1 teaspoon grated ginger
Sushi Rice
- 3 cups uncooked sushi rice
- 2 tablespoons rice vinegar
- 4 teaspoons white sugar
- Optional: 1 teaspoon mirin or a pinch of salt
Assembly & Garnishes
- 6 large nori sheets (cut into quarters)
- Cooking spray
- Furikake seasoning, for garnish
- 2 green onions, finely sliced
- Optional: diced avocado, mango chunks, or a drizzle of eel sauce
Instructions
- Cook the sushi rice: Rinse and cook the sushi rice according to package directions. While still warm, gently fold in the rice vinegar and sugar until fully combined. Let the rice cool to room temperature before assembling.
- Marinate the salmon: In a medium bowl, combine the cubed salmon with light soy sauce, Kewpie mayo, Sriracha, sesame oil, and if using, miso paste or grated ginger. Mix well and allow to marinate while preparing other components.
- Prepare muffin tin: Preheat your oven to 400°F (200°C). Lightly spray a muffin tin with cooking spray to prevent sticking.
- Form the nori cups: Cut each large nori sheet into four equal squares. Press each nori square firmly into the muffin tin cups to create little sushi cups that will hold the rice and salmon mixture.
- Fill the cups: Spoon about one tablespoon of the prepared sushi rice into each nori cup and gently press it down to form a base. Then, spoon the marinated salmon mixture evenly over the rice in each cup.
- Bake the sushi cups: Place the muffin tin in the preheated oven and bake for 13 to 15 minutes, or until the salmon is cooked through and has a slight golden tint.
- Garnish and serve: Remove from the oven and let cool slightly. Garnish each sushi cup with furikake seasoning, sliced green onions, and any optional toppings such as diced avocado, mango chunks, or a drizzle of eel sauce. Serve warm or at room temperature.
Notes
- Make sure sushi rice is properly cooled before assembling to avoid soggy nori.
- Adjust the amount of Sriracha based on your preferred spice level.
- If you don’t have Kewpie mayo, regular Japanese mayo or a mild mayo can be substituted.
- Optional ingredients like miso paste or grated ginger add depth to the salmon marinade but can be omitted for a simpler flavor.
- The nori cups can be made a few hours ahead and stored covered until ready to fill and bake.
- For a gluten-free version, substitute light soy sauce with tamari or coconut aminos.


