
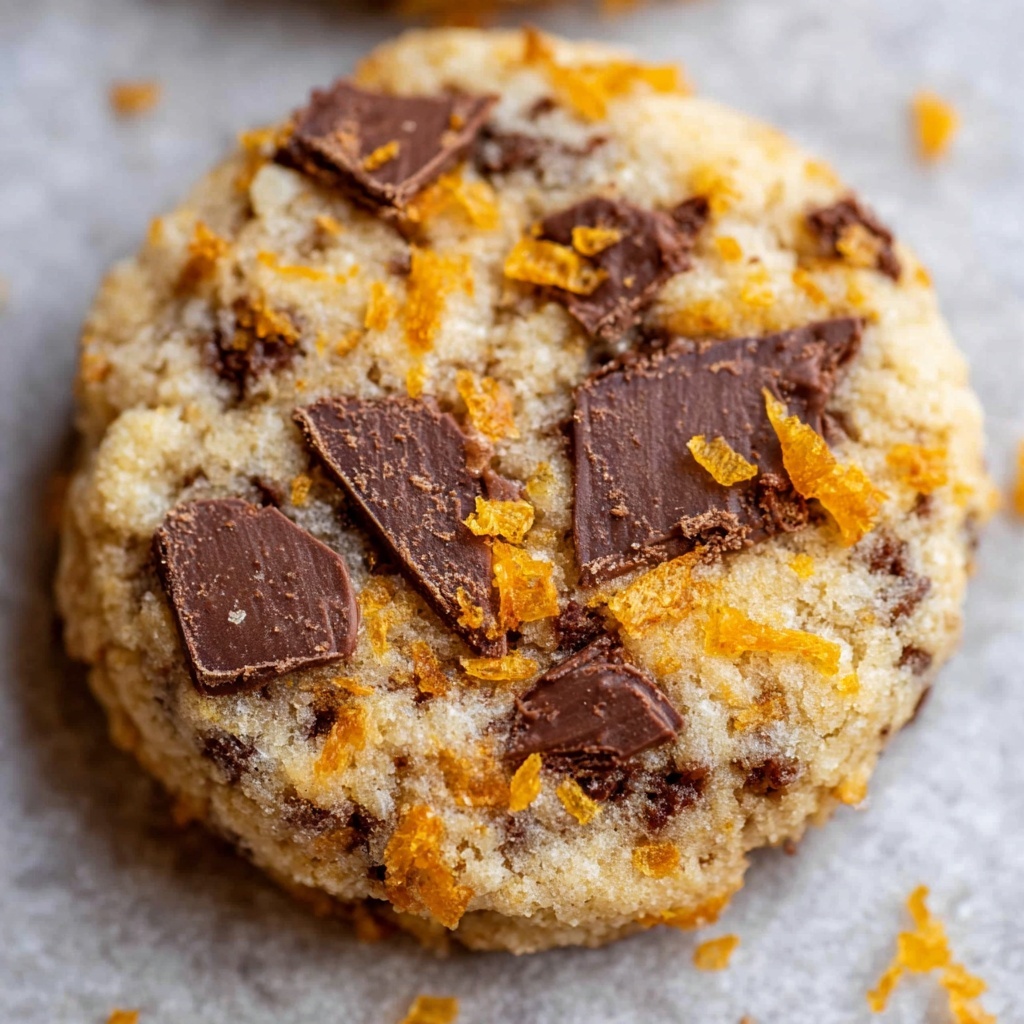
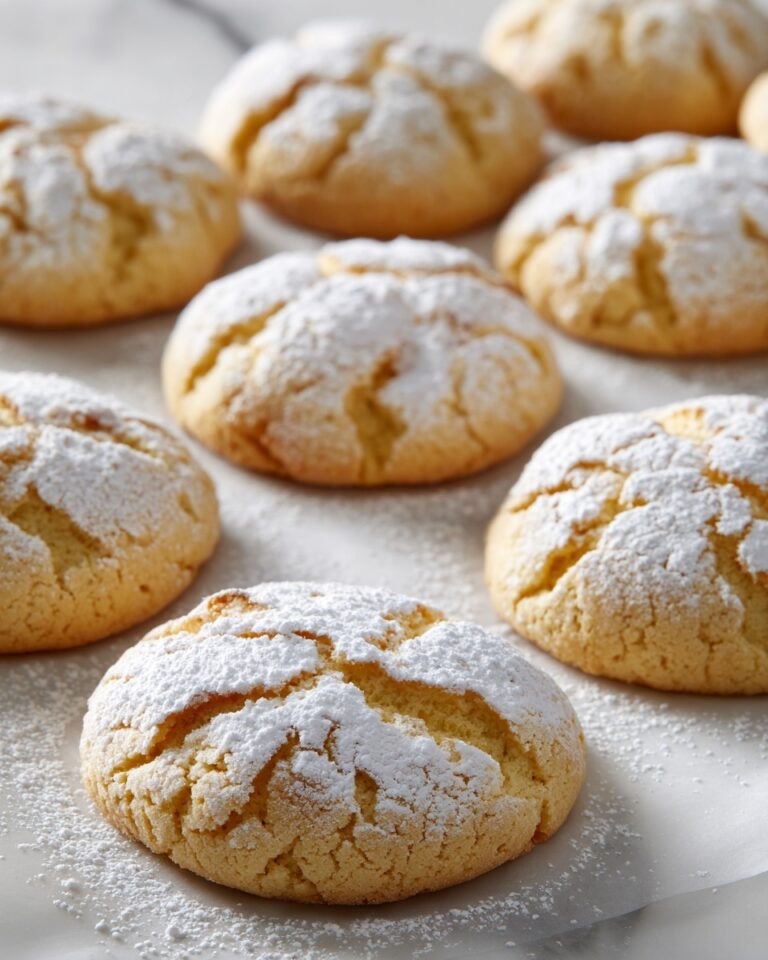
If you are on the hunt for a cookie that perfectly blends rich peanut butter flavor and the irresistible crunch of Butterfinger candy, look no further! This Peanut Butter Butterfinger Cookies Recipe captures all that gooey, crunchy magic in every single bite. Imagine a chewy, soft cookie loaded with chunks of Butterfinger bars, offering a delightful peanut buttery taste with crispy candy bursts that dance between your teeth. This recipe is an absolute favorite to bake when you want a memorable treat that’s both nostalgic and fresh, perfect for sharing or savoring all on your own.
Ingredients You’ll Need
Ingredients You’ll Need
What’s amazing about the Peanut Butter Butterfinger Cookies Recipe is how simple the ingredients are, yet each plays a crucial role. From creamy peanut butter that delivers the heart of the flavor, to the baking essentials that give you soft, perfectly textured cookies, every component is thoughtfully chosen.
- 3/4 cup butter (softened): Using softened butter helps create a smooth, creamy dough for the most tender cookies.
- 1/2 cup granulated sugar: Adds sweetness and helps with the classic cookie crunch.
- 1/2 cup packed brown sugar: Brings a subtle caramel depth and extra moisture for chewiness.
- 1 cup peanut butter: Choose a classic creamy peanut butter (Jif is a winner) for balanced flavor and texture.
- 1 large egg: Binds all the ingredients together for stability.
- 1 1/2 teaspoons vanilla extract: Elevates every flavor note with warm, fragrant sweetness.
- 1 1/2 cups all-purpose flour: Provides structure, spooned and leveled for precision.
- 1/2 teaspoon baking soda: Helps the cookies rise and spread just right.
- 1/2 teaspoon baking powder: Works alongside baking soda to give the perfect texture.
- 1/4 teaspoon kosher salt: Balances the sweetness and enhances all the flavors.
- 16 ounces chopped Butterfinger candy: The star of the show, adding a crispy, crunchy peanut butter candy boost.
How to Make Peanut Butter Butterfinger Cookies Recipe
Step 1: Cream the Butter
Start by beating 3/4 cup of softened butter until it’s smooth and creamy. This creates the perfect base for a soft cookie texture and ensures your sugars blend easily.
Step 2: Add Sugars and Beat Until Fluffy
Next, mix in the granulated sugar and brown sugar. Beat this mixture for about 2 minutes until fluffy and free of any butter lumps. This step builds the cookie’s structure and sweetness foundation.
Step 3: Mix in the Peanut Butter
Peanut butter is the heart of this recipe. Add a full cup of your favorite creamy peanut butter and mix well to combine that luscious nutty richness into the dough.
Step 4: Add Egg and Vanilla
Incorporate one large egg and the vanilla extract. These add moisture and a fragrant depth, which keep your cookies flavorful and tender.
Step 5: Combine Dry Ingredients
Spoon and level the all-purpose flour into your measuring cup, then add it to the wet ingredients without stirring. Sprinkle baking soda, baking powder, and salt over the flour, then stir lightly to break up any clumps. This step ensures your cookies rise and spread perfectly.
Step 6: Mix Dry Ingredients into Dough Carefully
Using your mixer on low speed, blend the dry ingredients into the dough just until they start to come together but still show some flour spots. Overmixing can make cookies tough, so avoid going too far here.
Step 7: Fold in Chopped Butterfinger Pieces
Now for the magic! Add the chopped Butterfinger pieces and fold them in gently so the dough stays soft but studded with that classic candy crunch. If you can, use Butterfinger Bits from the baking aisle for convenience, or chop up 2 candy bars finely yourself.
Step 8: Chill the Dough
Cover the dough and chill it for 15 minutes up to 24 hours. This rest period lets the flavors marry and firms up the dough so it’s easier to scoop.
Step 9: Prepare Your Oven and Baking Sheets
Preheat the oven to 350°F and line two baking sheets with parchment paper or silicone mats to prevent sticking and promote even baking.
Step 10: Shape and Arrange the Cookies
Form the dough into balls about 2 inches in diameter, packing the scoop a little for fuller cookies. Place them at least an inch or two apart on your sheets to give them room to spread.
Step 11: Bake, Flatten if Needed, and Cool
Bake for about 10 minutes, until the edges are set but the centers remain shiny and puffy. If they haven’t spread enough, gently press them down with a spatula either right after baking or just before. Let cool on the pan for 5 minutes, then transfer to a wire rack to finish cooling. Patience here rewards you with the right chewy, crunchy texture.
Step 12: Enjoy!
These cookies are best enjoyed at room temperature once the Butterfinger candy has softened slightly but not melted into chewiness. They’re a peanut buttery crispity perfection you’ll want to make again and again.
How to Serve Peanut Butter Butterfinger Cookies Recipe
Garnishes
If you want to impress, sprinkle a few extra Butterfinger crumbles on top of the cookies right after baking for a crunchy, inviting look. A light dusting of powdered sugar can add a festive touch while enhancing the peanut flavor subtly.
Side Dishes
Serve these cookies alongside a cold glass of milk or a warm cup of coffee or tea for a fantastic flavor contrast. They also pair wonderfully with vanilla ice cream for an indulgent dessert twist.
Creative Ways to Present
Try arranging these cookies on a platter layered with sheets of parchment and adding fresh fruit like strawberries or sliced bananas for a playful, colorful display. Gift them wrapped in pretty cellophane tied with a ribbon for sweet homemade presents your friends will adore.
Make Ahead and Storage
Storing Leftovers
Keep your Peanut Butter Butterfinger Cookies fresh by storing them in an airtight container at room temperature. They’ll stay delicious for up to 3 days, maintaining their chewiness and crisp candy texture.
Freezing
This recipe freezes beautifully! Freeze cookie dough balls in a ziplock bag for up to 3 months, baking them straight from frozen with an extra minute or two added to the time. You can also freeze baked cookies in a sealed container for up to 4 weeks; just thaw at room temperature before enjoying.
Reheating
Warm up your cookies slightly in the oven at 300°F for 5 minutes to refresh their softness and bring back that just-baked smell without making the candy too melty or chewy. Enjoy them as if they just came out of the oven again!
FAQs
Can I use natural peanut butter for this recipe?
It’s best to use classic creamy peanut butter rather than natural varieties because natural peanut butter tends to be oilier and less stable, which can affect the cookie texture.
What can I substitute if I can’t find Butterfinger Bits?
You can chop up two full-size Butterfinger bars by hand to get that perfect mix of crunchy candy pieces. Just aim for small to medium chunks so they break down nicely but still give crunch.
How do I prevent my cookies from being too flat or spreading too much?
Chilling the dough before baking helps control spreading. Also, avoid overmixing your dough, which can cause excess gluten development making cookies tough and over-spread.
Why do the cookies need to cool before eating?
Butterfinger candy melts in the oven and is quite gooey right out, so cooling allows the candy pieces to set, resulting in that signature crisp-tender texture that’s out of this world.
Can I make this recipe gluten-free?
Absolutely! Swap out the all-purpose flour for a gluten-free baking blend that measures cup-for-cup the same way, and your cookies will come out just as wonderful.
Final Thoughts
If you’re looking to bake something truly crave-worthy that combines buttery peanut flavor with the crunch and sweetness of Butterfinger candy, this Peanut Butter Butterfinger Cookies Recipe is your go-to. It’s a wonderful treat for any occasion and is sure to become a beloved favorite. So grab those ingredients, get baking, and prepare for a cookie experience you won’t forget!
Print
Peanut Butter Butterfinger Cookies Recipe
- Prep Time: 15 minutes
- Cook Time: 10 minutes
- Total Time: 25 minutes
- Yield: 25 cookies
- Category: Cookies
- Method: Baking
- Cuisine: American
Description
These Peanut Butter Butterfinger Cookies are a delightful treat combining creamy peanut butter dough with crunchy chunks of Butterfinger candy bars. Soft and chewy with a perfect crisp edge, these cookies are easy to make and perfect for peanut butter lovers craving a sweet, crunchy bite.
Ingredients
Wet Ingredients
- 3/4 cup butter, softened (1 and 1/2 sticks)
- 1/2 cup granulated sugar
- 1/2 cup brown sugar, packed
- 1 cup peanut butter (preferably Jif, not natural)
- 1 large egg
- 1 and 1/2 teaspoons vanilla extract
Dry Ingredients
- 1 and 1/2 cups all-purpose flour, spooned and leveled
- 1/2 teaspoon baking soda
- 1/2 teaspoon baking powder
- 1/4 teaspoon kosher salt
Add-ins
- 16 ounces Butterfinger candy, chopped finely (about 2 regular-sized Butterfinger bars or 2 (8-ounce) bags of Butterfinger Bits)
Instructions
- Cream the butter: In a large bowl or stand mixer, beat 3/4 cup of softened butter until smooth and creamy, scraping down the sides frequently to ensure even mixing.
- Add sugars: Add 1/2 cup granulated sugar and 1/2 cup packed brown sugar to the creamed butter. Beat for about 2 minutes until the mixture is fluffy and no butter chunks remain, scraping the bowl as needed.
- Mix in peanut butter: Add 1 cup peanut butter and beat until fully incorporated, making sure to scrape the sides of the bowl again.
- Add egg and vanilla: Beat in 1 large egg and 1 and 1/2 teaspoons vanilla extract until just combined, scraping the bowl occasionally.
- Prepare dry ingredients: Spoon and level 1 and 1/2 cups all-purpose flour into a measuring cup. Add the flour to the mixing bowl but do not stir yet. Sprinkle 1/2 teaspoon baking soda, 1/2 teaspoon baking powder, and 1/4 teaspoon kosher salt evenly over the flour, then stir these dry ingredients together briefly with a teaspoon, breaking up clumps.
- Combine dry ingredients into dough: Turn the mixer on low to mix the dry ingredients into the dough gently. Stop once the dough just begins to come together, even if some flour is still visible, to avoid overmixing which can toughen cookies. Scrape the bowl bottom and sides once.
- Add chopped Butterfingers: Fold in 16 ounces chopped Butterfinger candy bars until just barely incorporated. The Butterfingers should resemble coarse crumbs if chopped by hand.
- Chill the dough: Cover the bowl and chill the dough in the refrigerator for 15 minutes up to 1 hour, or up to 24 hours if desired. This helps the cookies hold shape and enhances flavor.
- Preheat oven and prepare baking sheets: Heat oven to 350°F (175°C). Line two baking sheets with parchment paper or silicone baking mats to prevent sticking.
- Shape cookie dough balls: Use a 2-inch cookie scoop or spoon to portion dough into balls, slightly over packed for generous cookies.
- Arrange on baking sheets: Place dough balls at least 1 to 2 inches apart on the prepared baking sheets to allow for spreading.
- Bake the cookies: Bake at 350°F for about 10 minutes. The cookies are done when edges are set and the centers are no longer shiny but still puffy.
- Optional pressing: If cookies have not spread enough during baking, gently press each cookie with a spatula after removing from oven or 2 minutes before they finish baking to flatten.
- Add finishing Butterfinger crumbles: Top baked cookies with any remaining Butterfinger pieces for extra crunch if available.
- Cool cookies: Let cookies cool on baking sheets for at least 5 minutes before transferring them to wire racks to cool completely.
- Serving note: These cookies are best enjoyed at room temperature rather than warm to avoid a chewy melted Butterfinger texture.
- Storage: Store any leftovers in an airtight container at room temperature for up to 3 days.
- Freezing: Cookie dough balls freeze well for up to 3 months in a ziplock bag; bake directly from frozen with an extra 1–2 minutes in the oven. Baked cookies also freeze for up to 4 weeks when sealed; thaw at room temperature before serving.
Notes
- Use regular peanut butter (such as Jif) rather than natural to achieve the best texture.
- If you can’t find Butterfinger Bits, chop about two 8-ounce Butterfinger candy bars into small pieces.
- Do not overmix dough after adding flour to avoid tough cookies.
- Chilling dough improves cookie shape and flavor, but is optional.
- If cookies do not spread enough, gently press them with a spatula after baking to flatten.
- Cookies are best eaten at room temperature rather than warm for optimal texture.
- Dough and baked cookies freeze well, making advance preparation easy.

