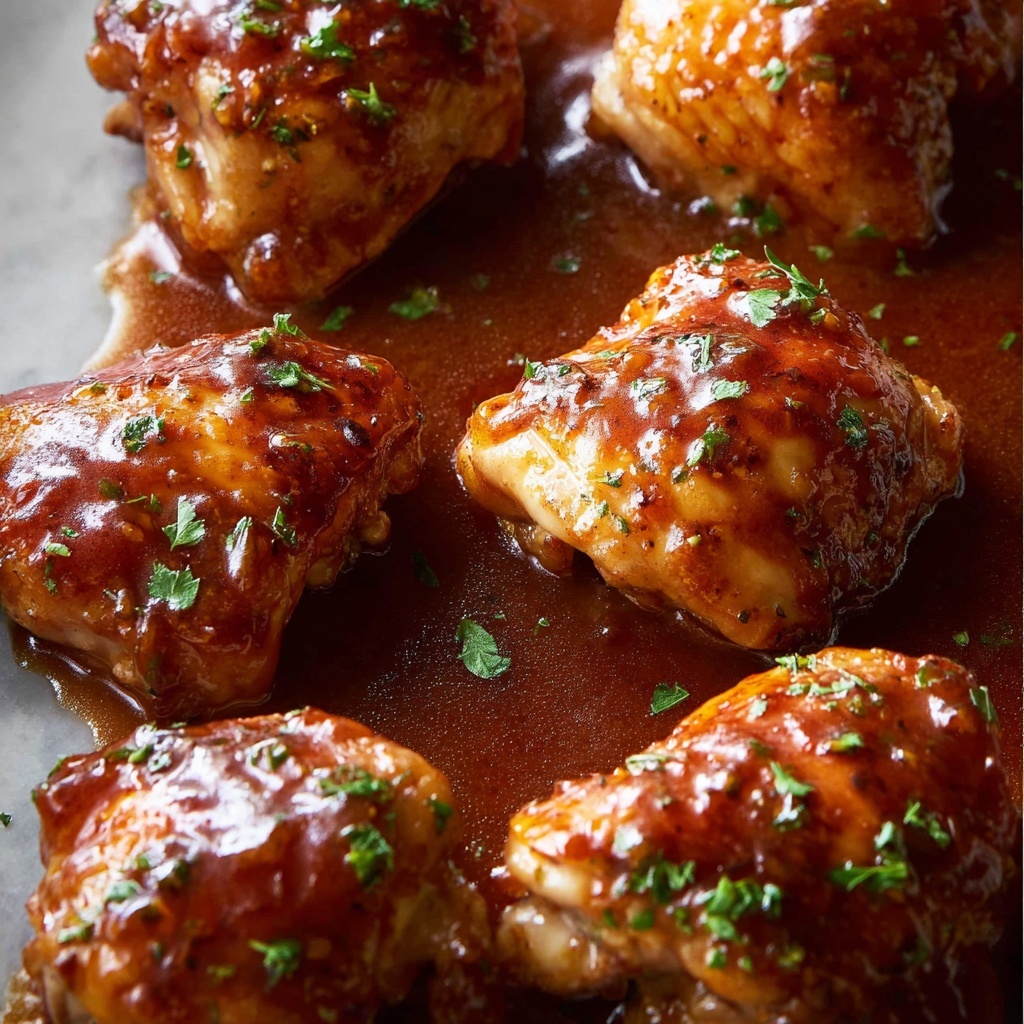
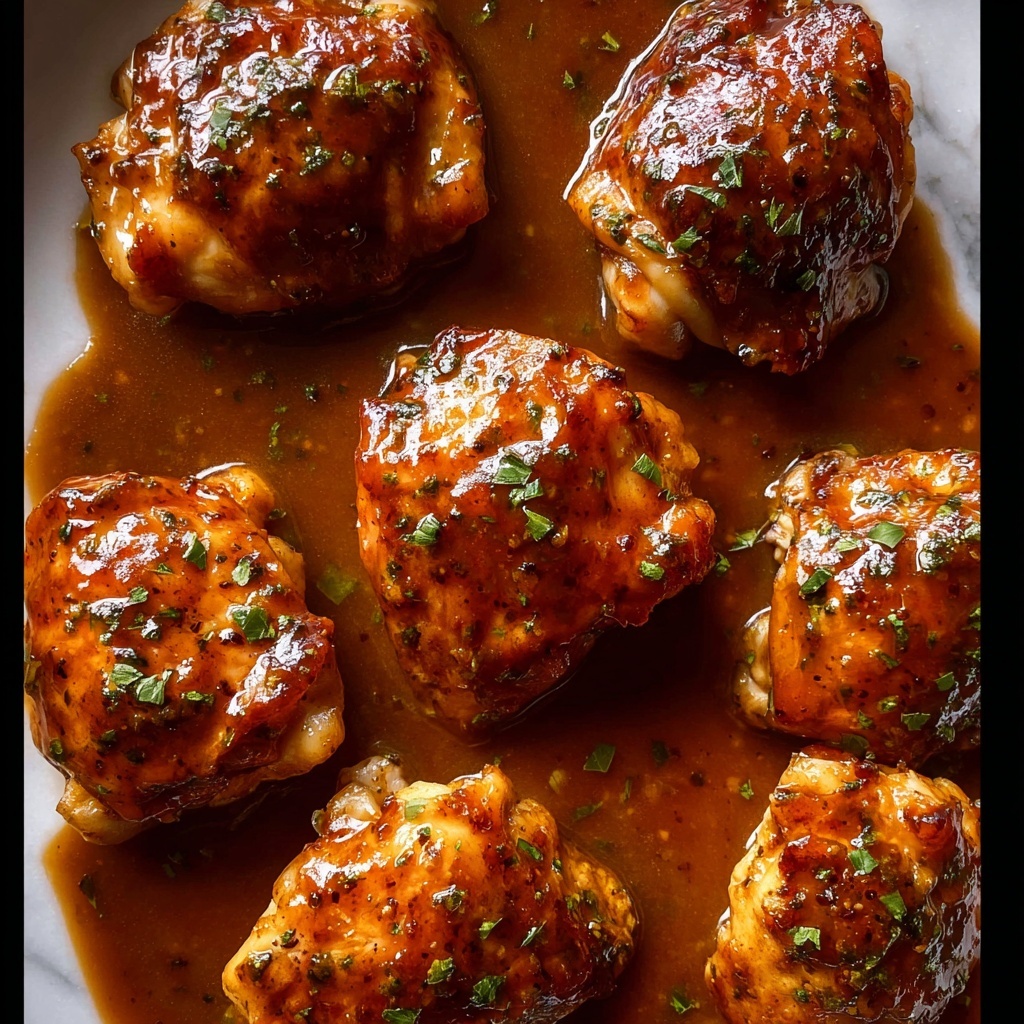
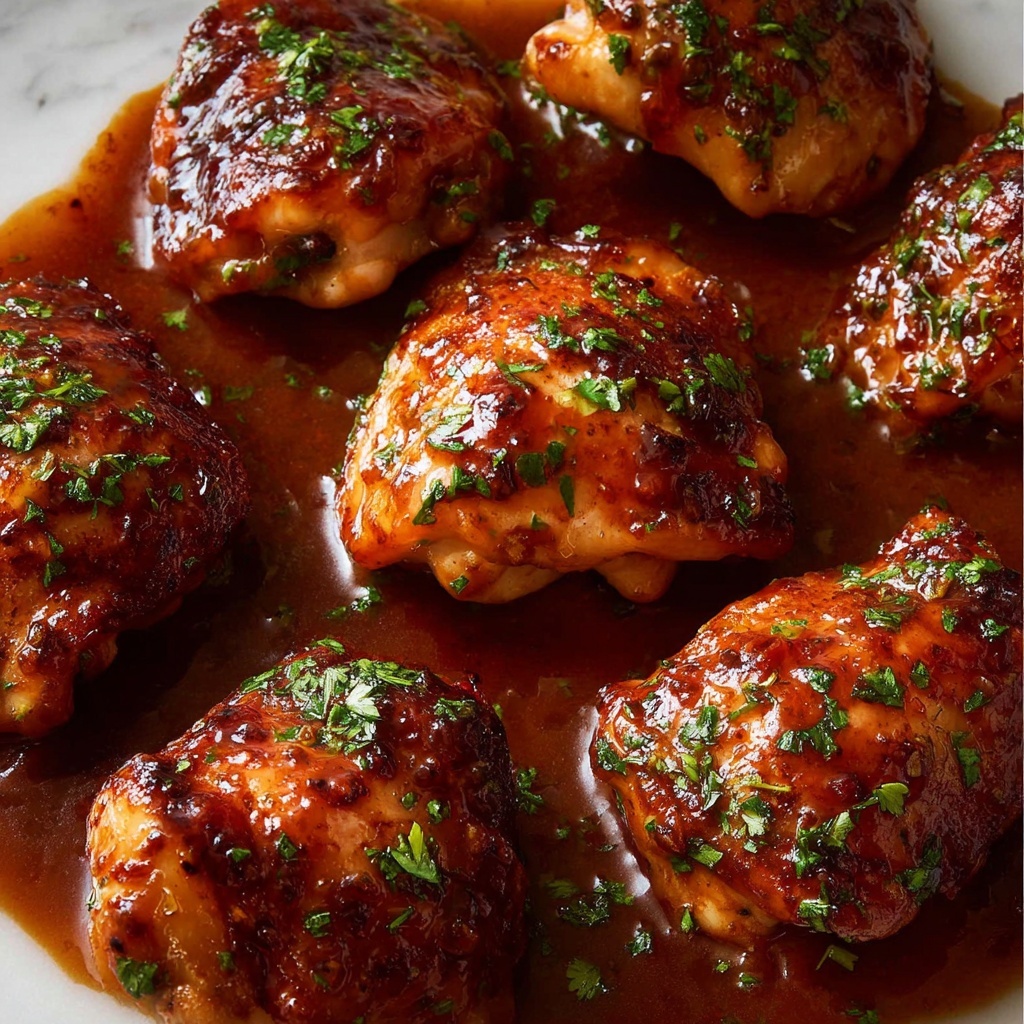
If you love juicy, flavor-packed chicken with a delightful sticky glaze that clings to every bite, then this Sticky Baked Chicken Thighs Recipe is about to become one of your all-time favorites. It’s an incredibly simple yet impressive dish that brings together sweet, tangy, and savory flavors in a way that makes your taste buds sing. Whether it’s a busy weeknight or a lazy weekend dinner, these chicken thighs bake up perfectly tender inside with a sticky, caramelized crust that’s impossible to resist. I’m so excited to share this recipe because it’s reliable, quick, and wonderfully satisfying every time.
Ingredients You’ll Need
For this Sticky Baked Chicken Thighs Recipe, all you need are some straightforward ingredients, but each one plays a crucial role in building that unforgettable flavor and texture. From the tang of apple cider vinegar to the umami punch of soy sauce, these pantry staples come together beautifully to create a sticky glaze that’s perfect for coating tender chicken.
- 700g / 1.4lb chicken thighs (skinless, boneless): Easy-to-eat and super juicy, boneless thighs cook evenly and absorb the glaze wonderfully.
- 1/4 cup ketchup: Adds a sweet tomato base that thickens and balances the glaze.
- 3 tbsp brown sugar (lightly packed): Provides delicious caramelization and depth of sweetness.
- 1.5 tbsp soy sauce (all purpose or light): Brings a salty, savory richness without overpowering the other flavors.
- 1 tbsp apple cider vinegar: Cuts through the sweetness with a bright, tangy note for balance.
- 1 tbsp olive oil: Helps keep chicken moist and lends a smooth texture to the glaze.
- 2 tsp Worcestershire sauce: Adds complexity and a subtle smoky undertone.
- 2 cloves garlic (minced): Fresh garlic infuses the glaze with a warm, aromatic punch that complements the chicken perfectly.
How to Make Sticky Baked Chicken Thighs Recipe
Step 1: Preheat Your Oven
Start by preheating your oven to 220°C/420°F (200°C fan). This high temperature helps create that beautiful caramelized crust on the outside of the chicken while keeping the inside juicy and tender. Trust me, the crispy browned edges are where the magic begins.
Step 2: Prepare the Chicken in the Pan
Grab a pan large enough to lay the chicken thighs flat without crowding—crowding means steaming instead of baking, and nobody wants that. Line your pan with foil for easiest cleanup later, then gently place the thighs in a single layer, skin side up if they had skin, but the boneless version works just as well here.
Step 3: Mix and Apply the First Glaze
Combine all your glaze ingredients—ketchup, brown sugar, soy sauce, apple cider vinegar, olive oil, Worcestershire sauce, and minced garlic—in a bowl until smooth. Spoon about two-thirds of this delicious glaze evenly over the top of each chicken thigh, making sure the underside stays bare for now. This juicy coating is going to work its magic in the oven.
Step 4: Bake the Chicken
Pop your pan into the oven and bake for 15 minutes. This initial baking lets the chicken cook through gently and the glaze start to thicken and cling to the thighs. You want them nearly cooked but not fully caramelized yet, so keep an eye on that beautiful color.
Step 5: Prepare to Broil
Once the baking time is up, take the pan out. Switch your oven to the grill or broiler setting on high and move the rack to about 20 cm (8 inches) from the heat source. This step is key for getting that signature sticky, caramelized surface that makes this recipe so special.
Step 6: Apply the Second Glaze and Pan Juices
Spoon the flavorful pan juices over the chicken to keep it moist and extra tasty. Then, spread or dab the reserved remaining glaze carefully on top of each thigh. This second coat means every bite will be bursting with that sticky, finger-licking sauce we’re after.
Step 7: Broil Until Caramelized
Place the pan back in the oven and broil for 8 to 10 minutes. Keep a close watch—the glaze should bubble, darken, and get that gorgeous caramelized crust. This is where the sticky texture and intense flavors really come alive, making your kitchen smell irresistible.
Step 8: Rest Before Serving
Once the thighs look beautifully caramelized, remove them from the oven and let them rest uncovered for a few minutes. This resting allows the juices to redistribute and the glaze to set slightly, so every bite remains tender and sticky in all the right ways. Don’t forget to pour those wonderful pan juices over the top when serving for an extra boost of flavor.
How to Serve Sticky Baked Chicken Thighs Recipe
Garnishes
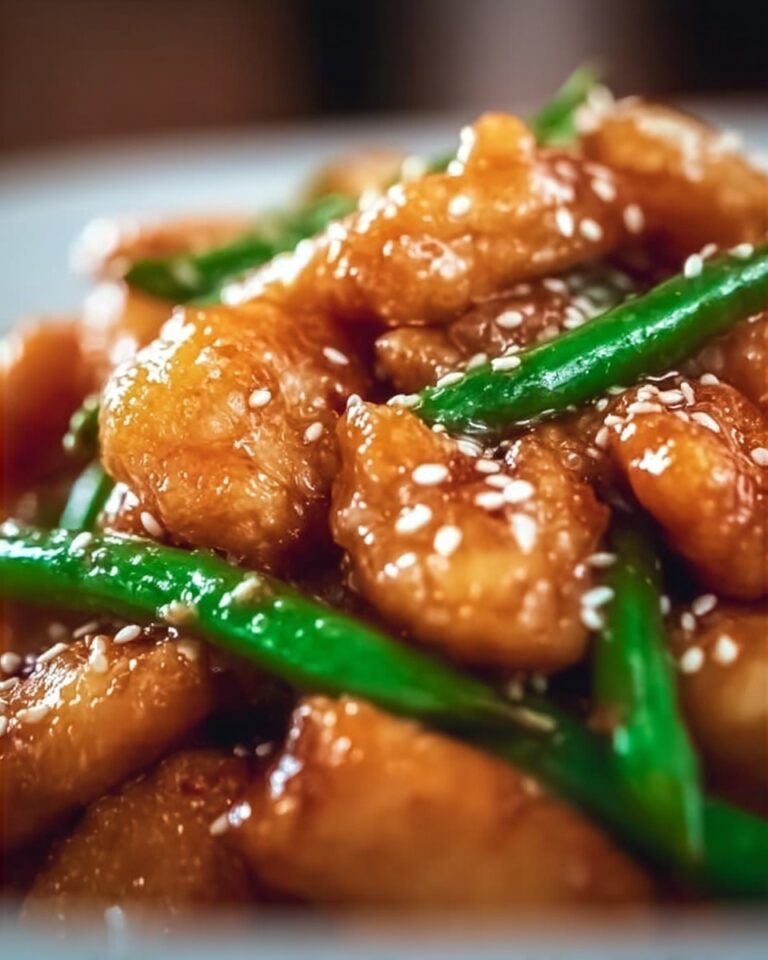
Adding a fresh garnish like chopped green onions or sesame seeds not only boosts the presentation but adds a lovely pop of flavor and texture contrast. A sprinkle of freshly chopped cilantro or a small handful of microgreens can brighten the rich glaze and make your plate look restaurant-worthy.
Side Dishes
The beauty of this sticky chicken is that it pairs wonderfully with so many classic sides. Try fluffy steamed jasmine rice or coconut rice to soak up the glaze, roasted vegetables for a hearty veggie boost, or even a crisp cucumber salad to add a refreshing crunch. Mashed potatoes or garlic butter noodles also complement the sweet and tangy flavors perfectly.
Creative Ways to Present
For a fun twist, serve the chicken thighs sliced over a bed of warm quinoa or toss them into a bright Asian-inspired salad with shredded cabbage and a zesty dressing. You can even use them as a filling for lettuce wraps or soft tortillas, topped with crunchy pickled veggies for a casual yet vibrant meal. The possibilities are endless with this wonderfully versatile Sticky Baked Chicken Thighs Recipe!
Make Ahead and Storage
Storing Leftovers
Once cooked and cooled, place leftover chicken thighs in an airtight container and refrigerate. They will keep well for up to 3 to 4 days, making them perfect for quick lunches or dinners throughout the week. The glaze may thicken in the fridge but reheats beautifully.
Freezing
If you want to save some for later, these chicken thighs freeze wonderfully. Wrap them tightly in foil or transfer to a freezer-safe container with some of the pan juices to prevent drying out. They’ll stay good for up to 2 months. Just thaw overnight in the fridge before reheating.
Reheating
To bring the sticky goodness back to life, gently reheat the chicken thighs in a skillet over medium-low heat with a splash of water or broth, covered, until warmed through. Alternatively, you can warm them in the oven at 175°C/350°F for about 10 minutes. Avoid microwaving if possible, so the glaze stays sticky and the chicken remains tender.
FAQs
Can I use chicken drumsticks instead of thighs?
Yes! Chicken drumsticks work well with this recipe and offer a fun variation. Just adjust the cooking time slightly to ensure they cook through, as drumsticks can be thicker than boneless thighs.
What if I prefer dark soy sauce instead of light?
Dark soy sauce has a sweeter and stronger flavor that can overpower the glaze. It’s best to stick to light or all-purpose soy sauce here to maintain the balance of sweet, savory, and tangy flavors.
Is it possible to make this recipe gluten-free?
Absolutely! Just be sure to use a gluten-free soy sauce (such as tamari) and verify that your Worcestershire sauce is gluten-free, as some versions contain wheat.
Can I prepare the glaze in advance?
Yes, the glaze can be mixed ahead of time and stored in the fridge for up to 2 days. This makes dinner prep even quicker when you’re ready to bake the chicken.
How do I know when the chicken is fully cooked?
The chicken is done when it reaches an internal temperature of 74°C (165°F). Baking followed by broiling as in this recipe usually cooks the thighs perfectly, but a meat thermometer is always a reliable tool to be certain.
Final Thoughts
This Sticky Baked Chicken Thighs Recipe holds a special place in my kitchen because it’s both simple and spectacular. It’s the kind of dish that impresses guests while being easy enough for a busy night. Once you try these sticky, caramelized thighs yourself, I’m confident they’ll become a regular go-to. So go ahead, give this recipe a whirl—it’s comfort food at its absolute best, with a delicious sticky twist you won’t forget.
Print
Sticky Baked Chicken Thighs Recipe
- Prep Time: 5 minutes
- Cook Time: 25 minutes
- Total Time: 30 minutes
- Yield: 4 servings
- Category: Main Dish
- Method: Baking
- Cuisine: American
Description
Deliciously sticky baked chicken thighs coated in a sweet and tangy glaze made with ketchup, brown sugar, soy sauce, and apple cider vinegar. This simple oven-baked recipe yields caramelized, juicy chicken perfect for a quick weeknight dinner.
Ingredients
Chicken
- 700g / 1.4lb skinless, boneless chicken thighs (5–7 pieces)
Glaze
- 1/4 cup ketchup
- 3 tbsp brown sugar (lightly packed)
- 1.5 tbsp soy sauce (all purpose or light, NOT dark)
- 1 tbsp apple cider vinegar
- 1 tbsp olive oil
- 2 tsp Worcestershire sauce
- 2 cloves garlic, minced
Instructions
- Preheat Oven: Preheat your oven to 220°C/420°F (or 200°C fan).
- Prepare Pan: Use a pan large enough to fit the chicken thighs lying flat without overlapping. Line the pan with foil for easier cleanup, and place the chicken thighs in the pan.
- Mix Glaze and Apply First Coat: In a bowl, combine ketchup, brown sugar, soy sauce, apple cider vinegar, olive oil, Worcestershire sauce, and minced garlic to make the glaze. Spoon about two-thirds of the glaze over the top surface of each chicken thigh, leaving the undersides uncoated. Reserve the remaining glaze for later.
- Bake Chicken: Place the pan in the preheated oven and bake the chicken for 15 minutes.
- Prepare for Broiling: Remove the pan from the oven. Change the oven setting to grill (broil) on high and adjust the oven shelf so that the chicken will be about 20cm (8 inches) from the heat source.
- Apply Second Glaze and Pan Juices: Spoon the pan juices over the chicken, then spoon or dab the reserved remaining glaze onto the chicken thighs to enhance flavor and stickiness.
- Broil for Caramelization: Broil the chicken thighs for 8 to 10 minutes or until the surface is nicely caramelized and sticky.
- Rest and Serve: Remove the chicken from the oven and let it rest uncovered for a few minutes before serving. Serve alongside the pan juices for extra flavor.
Notes
- Use skinless and boneless chicken thighs for even cooking and easier preparation.
- For a smoky flavor, you can briefly char the chicken on a grill pan before baking, but this is optional.
- Adjust the brown sugar quantity if you prefer a sweeter or less sweet glaze.
- If you only have dark soy sauce, reduce the quantity as it is saltier and stronger in flavor than light soy sauce.
- Broiling time may vary depending on your oven’s strength; keep a close eye to prevent burning.
- Resting the chicken helps retain its juices and enhances tenderness.


