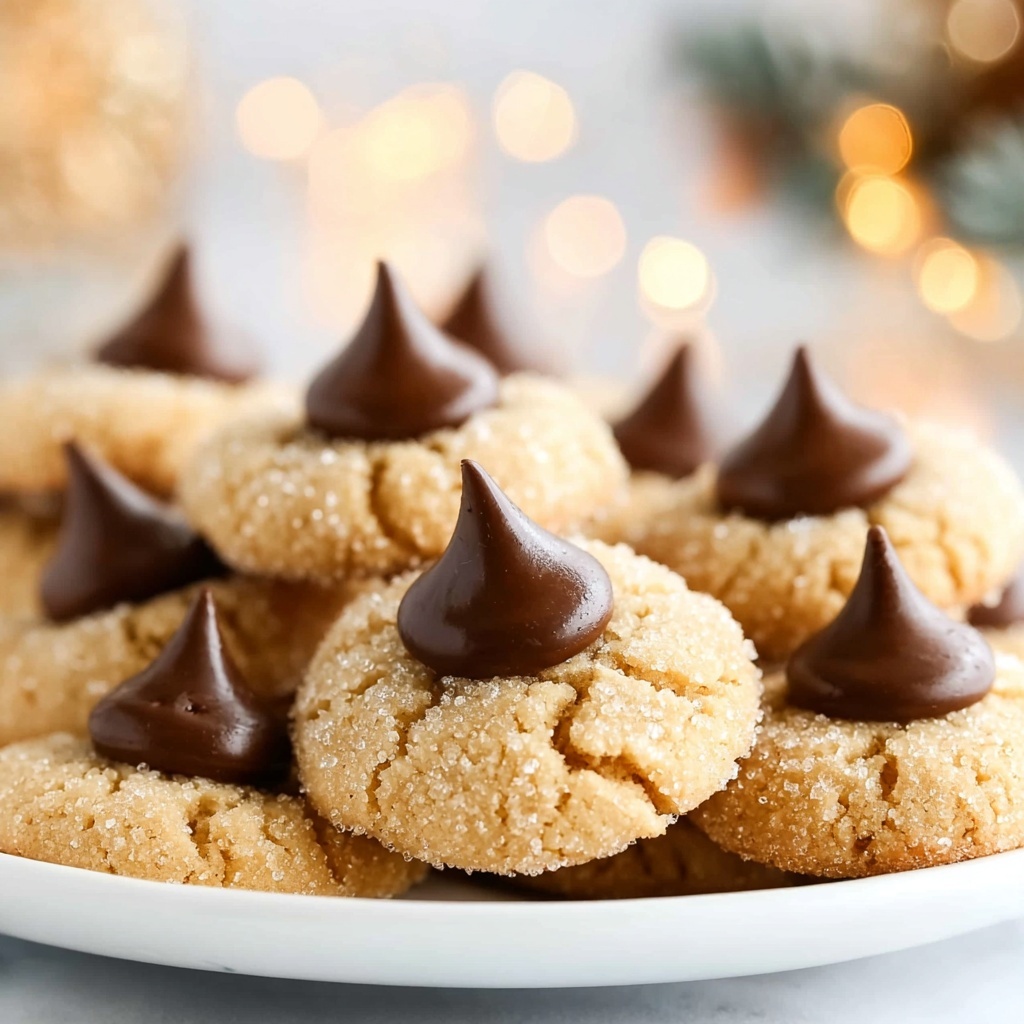
If you’re on the hunt for a warm, nostalgic treat that combines nutty richness and chocolatey joy, look no further than this Classic Peanut Butter Blossoms Recipe. These tender peanut butter cookies crowned with a melty chocolate kiss are a sweetheart of a dessert that’s simple to make yet irresistibly delightful. Perfect for holidays, gatherings, or simply when you want a bit of sweetness with a comforting homemade touch, this recipe has a way of bringing smiles and fond memories with every bite.
Ingredients You’ll Need
Getting your ingredients ready for the Classic Peanut Butter Blossoms Recipe is a breeze. Each item plays a key role in building the cookie’s signature texture, flavor, and that iconic look.
- All-purpose flour: The sturdy base that gives our cookies structure without weighing them down.
- Baking soda: Helps the cookies rise just right for a soft, pillowy texture.
- Salt: Enhances the overall flavor by balancing the sweetness.
- Butter (softened): Adds rich creaminess and keeps the cookies moist and tender.
- Granulated sugar: For sweetness and a slight crunch on the outside.
- Brown sugar (packed): Brings in a subtle caramel depth and chewiness.
- Egg: Binds the ingredients and adds to the cookie’s soft texture.
- Creamy peanut butter: The star ingredient that delivers that classic peanut flavor and silky richness.
- Pure vanilla extract: Infuses warmth and rounds out all the flavors beautifully.
- Granulated sugar (for rolling): Gives a sparkly, delightful crust as the cookies bake.
- Chocolate kisses: The iconic finishing touch, melting slightly into the cookie for that perfect chocolate-peanut butter harmony.
How to Make Classic Peanut Butter Blossoms Recipe
Step 1: Prep Your Oven and Baking Sheets
Start by heating your oven to 375°F and lining a few baking sheets with parchment paper or silicone mats. This ensures your cookies bake evenly and won’t stick, setting the stage for those flawless peanut butter blossoms.
Step 2: Make the Cookie Dough
Mix the dry ingredients—flour, baking soda, and salt—in a medium bowl and set it aside. In a separate large bowl, cream together the softened butter, both sugars, egg, creamy peanut butter, and vanilla extract until the mixture is light and well combined. Adding the dry ingredients gradually, blend on low speed just until everything forms a crumbly cookie dough. The key here is not overmixing; overworked dough leads to tougher cookies, and we want soft, tender bites every time.
Step 3: Shape the Cookies and Bake
Roll your dough into one-inch balls—this size ensures that you’ll get nice, evenly baked cookies. Then, generously roll each ball in granulated sugar to create a delicate crunchy coating that adds a slight sparkle once baked. Place the sugared balls roughly two inches apart on your prepared baking sheets, so they have room to spread. Bake them one tray at a time for 8 to 10 minutes, or until the bottoms are just turning a light golden color. Resist the urge to bake longer; overbaked cookies lose their charming softness.
Step 4: Add the Chocolate Kiss and Cool
Right after the cookies come out of the oven, gently press a chocolate kiss into the center of each cookie. The warmth of the cookie will slightly melt the chocolate, creating that signature soft blossom look. Let the cookies sit on the baking sheet for five minutes to set the chocolate before transferring them carefully to a wire rack to cool completely. This cooling step helps the cookie maintain its shape and texture.
How to Serve Classic Peanut Butter Blossoms Recipe
Garnishes
While the traditional chocolate kiss is a star garnish, you can sprinkle a pinch of flaky sea salt over the top to enhance the peanut and chocolate flavors with a subtle contrast. Alternatively, a light dusting of powdered sugar adds a festive, snowy touch perfect for holidays.
Side Dishes
These cookies pair wonderfully with a glass of cold milk or a cozy cup of hot cocoa—both of which complement the rich peanut butter and chocolate flavors beautifully. For brunch or afternoon tea, serve them alongside fresh fruit or a creamy yogurt parfait to balance the sweetness.
Creative Ways to Present
For a charming dessert platter, arrange the Classic Peanut Butter Blossoms Recipe cookies on a bright, colorful plate with sprigs of fresh mint or edible flowers. Gift them in decorative tins layered with parchment paper for special occasions. You can even sandwich two cookies with a layer of chocolate or peanut butter frosting for an indulgent twist that friends and family will rave about.
Make Ahead and Storage
Storing Leftovers
Once cooled, store your cookies in an airtight container at room temperature to keep them soft and fresh. They stay delicious for up to a week, making it easy to enjoy bites of happiness with no hassle.
Freezing
If you want to make a big batch ahead of time, you can freeze the cookie dough balls before baking. Simply place them on a baking sheet until firm, then transfer them to a freezer-safe bag. When ready, bake from frozen, adding a couple of extra minutes to the baking time to get that perfect texture.
Reheating
To enjoy warm, melty Classic Peanut Butter Blossoms Recipe cookies, pop them in a microwave for 10 to 15 seconds or briefly warm in a low oven. This revives the cookie’s softness and brings the chocolate kiss back to its gooey glory.
FAQs
Can I use natural peanut butter instead of creamy?
Absolutely! Natural peanut butter works, but keep in mind it has more oil and might affect the dough’s texture slightly. You may want to chill the dough a bit longer before baking to prevent spreading.
Do I have to use chocolate kisses, or can I substitute?
Chocolate kisses are traditional and melt beautifully, but you can swap them with mini chocolate chips or chocolate discs if you prefer. Just add them immediately after baking for the best results.
Why did my cookies turn out hard instead of soft?
Overbaking is often the culprit. Be sure to bake the cookies just until the bottoms are lightly golden. Slight underbaking when you first take them out is okay—they will firm up as they cool but remain soft inside.
Can I make these cookies gluten-free?
Yes! Substitute the all-purpose flour with a gluten-free baking blend that measures cup-for-cup like regular flour. This keeps the texture close to the original, but results may vary slightly.
How long do these cookies last at room temperature?
Stored properly in an airtight container, these cookies stay fresh and soft for about 5 to 7 days. Beyond that, they may start to lose their tenderness, so enjoy them sooner rather than later!
Final Thoughts
I really can’t recommend this Classic Peanut Butter Blossoms Recipe enough—it’s a timeless treat that’s as heartwarming as it is delicious. Whether it’s your first time making them or you’re revisiting a beloved favorite, these cookies promise to bring comfort and joy. So grab your ingredients, preheat your oven, and let yourself indulge in the simple pleasure of homemade peanut butter blossoms. You’ll be so glad you did!
Print
Classic Peanut Butter Blossoms Recipe
- Prep Time: 30 minutes
- Cook Time: 10 minutes
- Total Time: 40 minutes
- Yield: 36 cookies
- Category: Dessert
- Method: Baking
- Cuisine: American
Description
Classic Peanut Butter Blossoms are soft, chewy peanut butter cookies topped with a signature chocolate kiss, perfect for holiday treats or any time you crave a nostalgic, sweet snack. These cookies combine the rich flavors of peanut butter and chocolate into a delightful treat that’s easy to bake and loved by all ages.
Ingredients
Dry Ingredients
- 1 1/2 cups all-purpose flour
- 1/2 teaspoon baking soda
- 1/4 teaspoon salt
Wet Ingredients
- 1/3 cup butter, softened
- 1/2 cup granulated sugar
- 1/2 cup packed brown sugar
- 1 large egg
- 3/4 cup creamy peanut butter
- 1 teaspoon pure vanilla extract
For Rolling and Garnish
- 1/4 cup granulated sugar
- 36 chocolate kisses
Instructions
- Prep: Preheat your oven to 375°F (190°C) and line several baking sheets with parchment paper or silicone mats to prevent sticking and make cleanup easier.
- Make cookie dough: In a medium bowl, whisk together the flour, baking soda, and salt. In a separate large bowl, use a hand mixer to cream the softened butter, granulated sugar, brown sugar, egg, creamy peanut butter, and vanilla extract until the mixture is light and fluffy. Gradually add the flour mixture to the wet ingredients and mix on low speed just until combined. Be careful not to overmix; the dough should be crumbly but hold together to ensure soft cookies.
- Shape and bake cookies: Roll the dough into 1-inch balls, then roll each ball in the 1/4 cup of granulated sugar to coat. Place the balls on the prepared baking sheets, spacing them about 2 inches apart to allow for spreading. Bake one tray at a time for 8-10 minutes or until the bottoms are lightly golden. Avoid overbaking to keep the cookies soft and chewy.
- Decorate: As soon as the cookies come out of the oven, gently press one chocolate kiss into the center of each cookie. Let the cookies cool on the baking sheets for 5 minutes before transferring them to wire racks to cool completely. This allows the chocolate kiss to set and the cookies to firm up slightly.
Notes
- Do not overmix the dough to keep the cookies soft and chewy.
- Press the chocolate kisses into warm cookies to ensure they stick well without melting completely.
- Spacing cookies about 2 inches apart allows for even spreading without merging.
- Using parchment paper or silicone mats prevents sticking and makes cleanup easier.
- For extra flavor, you can chill the dough for 30 minutes before baking.


