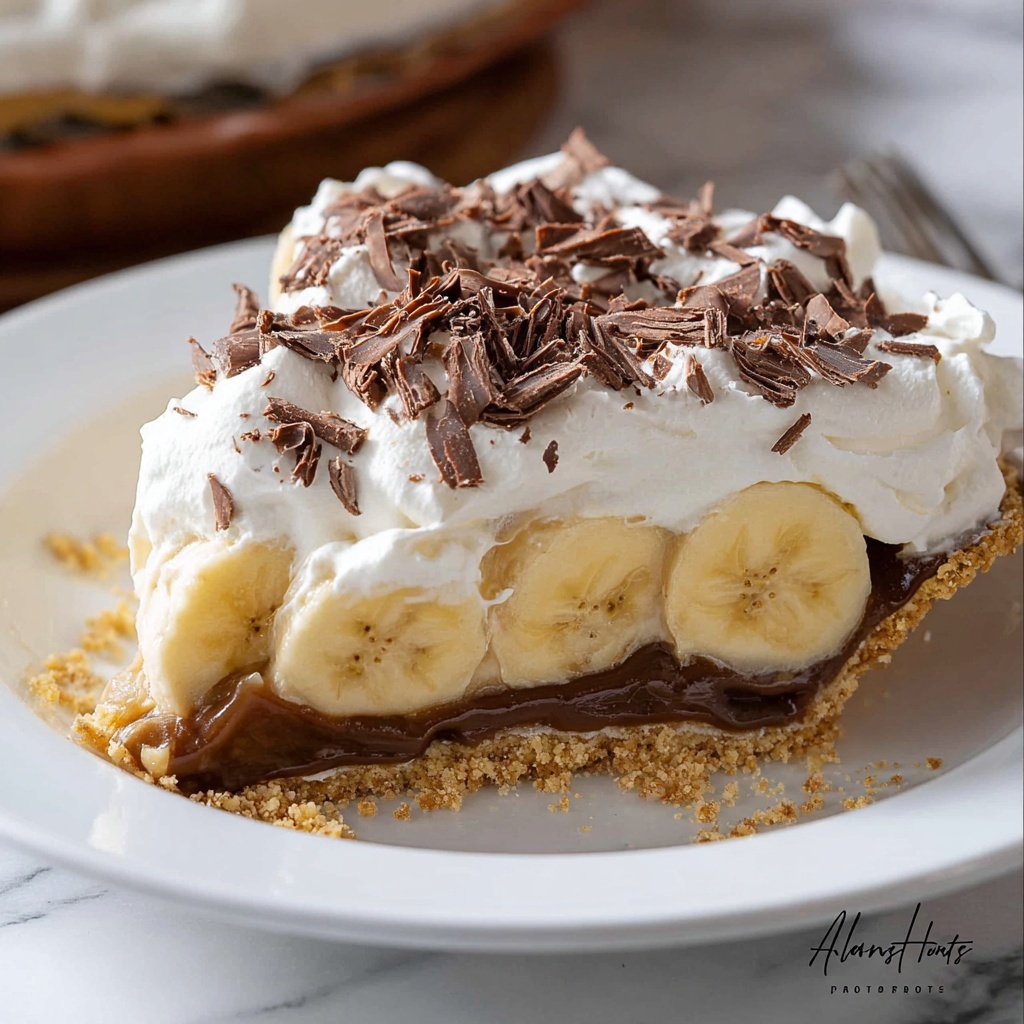
If you have a sweet tooth and love the perfect blend of creamy, caramel, and fruity flavors, then this Banoffee Pie Recipe is going to become your new favorite indulgence. Imagine a buttery graham cracker crust cradling a luscious layer of homemade dulce de leche, topped with ripe bananas and crowned with fluffy whipped cream. Every bite is a dreamy dance of textures and tastes that feels so special yet is incredibly simple to make. Whether you’re impressing guests or treating yourself, this Banoffee Pie Recipe brings pure joy and comfort in every slice.
Ingredients You’ll Need
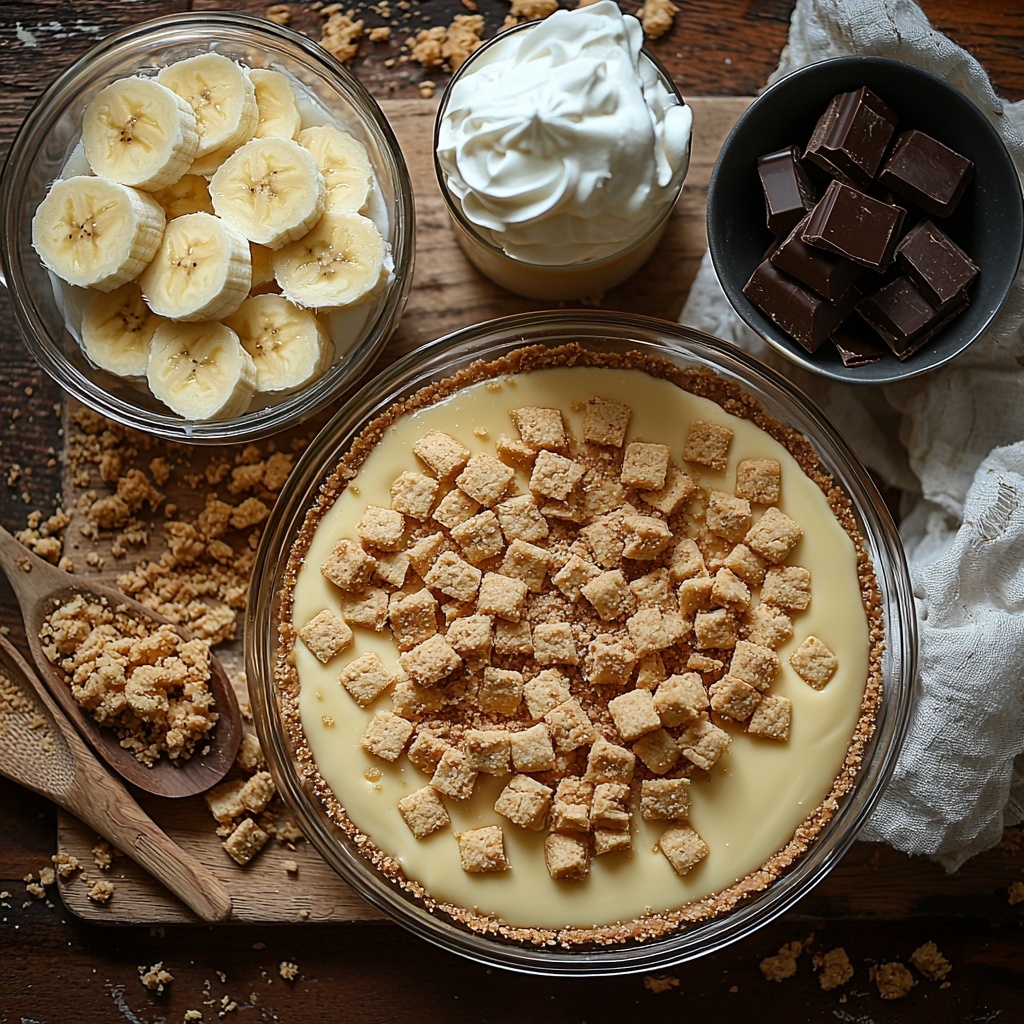
Creating this Banoffee Pie Recipe requires just a handful of simple, classic ingredients. Each one shines on its own but together, they build layers of irresistible flavor and texture — from the crunchy crust to the silky caramel and fresh bananas.
- Graham cracker crumbs (1 1/2 cups): The crunchy base that holds everything together with buttery goodness.
- Unsalted butter, melted (1/2 cup): Adds richness and helps bind those crumbs into the perfect crust.
- Sweetened condensed milk (1 can, 14 oz): The magic in making your own dulce de leche for that sweet, caramel center.
- Ripe but firm bananas (3): The fresh, fruity layer that balances sweetness with natural creaminess.
- Heavy whipping cream (1 1/2 cups): To whip into light, cloud-like topping that makes the pie feel decadent.
- Powdered sugar (2 tablespoons): Sweetens the whipped cream just enough without overpowering the other flavors.
- Dark chocolate (optional): For elegant shavings that add a hint of bitterness and a lovely visual contrast.
How to Make Banoffee Pie Recipe
Step 1: Prepare the Crust
Start by mixing your graham cracker crumbs with the melted butter until every crumb is coated and holds together when pressed. Press this mixture firmly into a 9-inch pie dish, creating an even layer that will become the crunchy, buttery foundation of your Banoffee Pie Recipe. Pop it into the fridge for 30 minutes to chill and set up nicely.
Step 2: Make the Dulce de Leche
This step takes a little patience but is so worth it. Simmer the sweetened condensed milk over low heat for about 45 to 60 minutes, stirring regularly. Watch as it thickens slowly into a rich, golden caramel known as dulce de leche. Once you’ve reached that perfect consistency, let it cool completely before spreading it over the chilled crust.
Step 3: Layer the Caramel
Spread the cooled dulce de leche evenly over your chilled graham cracker crust. This sweet, creamy caramel layer is the heart of the Banoffee Pie Recipe and adds such an addictive depth of flavor with its silky texture.
Step 4: Add the Bananas
Slice your bananas evenly and arrange them neatly over the luscious caramel. The bananas bring a fresh, fruity contrast to the rich dulce de leche, making each bite perfectly balanced and vibrant.
Step 5: Whip the Cream
Using a mixer or a whisk, beat the heavy whipping cream with the powdered sugar until soft peaks form. This whipped cream layer is light and airy, providing a cooling finish to the rich layers below.
Step 6: Top and Garnish
Spread the freshly whipped cream over your banana layer, smoothing it out evenly. If you want to add a little extra flair and depth, sprinkle some dark chocolate shavings on top. It’s a beautiful touch that also adds a subtle bittersweet note.
Step 7: Chill Before Serving
Before diving in, refrigerate the pie for 1 to 2 hours. This chilling time helps the flavors meld together and sets the whipped cream perfectly, ensuring every slice is clean and satisfying.
How to Serve Banoffee Pie Recipe
Garnishes
Adding a garnish to your Banoffee Pie Recipe can make it look even more inviting. Freshly grated dark chocolate or a dusting of cocoa powder adds visual appeal and a subtle bitterness to counteract the sweetness. For a pop of color, consider sprinkling crushed nuts like toasted pecans or a few fresh mint leaves on top.
Side Dishes
This pie is usually a star on its own, but if you want to elevate the dessert experience, serve it alongside a scoop of vanilla bean ice cream or a drizzle of espresso for contrast. Light, fresh fruit salads also pair nicely if you want a palate cleanser in between rich bites.
Creative Ways to Present
If you’re feeling adventurous, turn the Banoffee Pie Recipe into individual parfait-style servings by layering crust crumbs, dulce de leche, banana slices, and whipped cream in clear glasses. It’s a lovely way to impress guests or add a personal touch to each dessert plate.
Make Ahead and Storage
Storing Leftovers
Any leftover Banoffee Pie Recipe is best kept covered in the refrigerator. Be sure to seal it tightly with plastic wrap or store it in an airtight container to prevent the pie from absorbing any fridge odors. It keeps well for up to 3 days, although it’s so delicious you might not have any leftovers!
Freezing
Freezing Banoffee Pie is not recommended because the bananas and whipped cream don’t freeze well and can become watery or mushy upon thawing. For best results, enjoy the pie within a few days of making it fresh.
Reheating
This dessert is best served cold, so reheating isn’t necessary. If you want to refresh the texture, simply whip a little extra cream and add some fresh banana slices before serving again.
FAQs
Can I use a different type of crust for this Banoffee Pie Recipe?
Absolutely! While the graham cracker crust is traditional and provides a wonderful buttery crunch, you can also use digestive biscuits or even a pre-made pastry crust if you prefer. Just make sure it’s firm enough to hold all those delicious layers.
Is it safe to simmer sweetened condensed milk on the stove?
Yes, simmering sweetened condensed milk gently on low heat is safe, but it’s very important to stir frequently and keep the heat low to prevent scorching. This slow cooking transforms it into luscious dulce de leche, the key ingredient in this Banoffee Pie Recipe.
Can I substitute the bananas with another fruit?
Bananas are classic here because of their creamy texture and mild sweetness that pairs perfectly with caramel. However, you could experiment with sliced pears or peaches if you’re feeling creative, though it won’t be a traditional Banoffee Pie Recipe anymore.
How long can I prepare this pie in advance?
This pie is great for making a few hours ahead or even the day before. Just be sure to cover and chill it properly to keep the layers fresh and the whipped cream firm.
What if I don’t have time to make dulce de leche from scratch?
If you’re short on time, store-bought dulce de leche works just fine and still gives you that rich caramel flavor. Making your own adds a little freshness and home-cooked magic but feel free to use what’s convenient for you.
Final Thoughts
There’s something truly special about a Banoffee Pie Recipe that brings comfort and delight with every bite. It’s simple enough to make on a weekday but impressive enough for any occasion. Once you try it, you’ll understand why this dreamy dessert has such a devoted following. So go ahead, gather your ingredients, and treat yourself and those you love to a slice of this golden, creamy, fruity heaven. Your taste buds will thank you!
Print
Banoffee Pie Recipe
- Prep Time: 20 minutes
- Cook Time: 60 minutes
- Total Time: 1 hour 20 minutes plus chilling time
- Yield: 8 servings
- Category: Dessert
- Method: Stovetop
- Cuisine: British
Description
An indulgent and creamy Banoffee Pie featuring a buttery graham cracker crust, luscious homemade dulce de leche, fresh banana slices, and topped with fluffy whipped cream and optional dark chocolate shavings. Perfectly chilled for a rich and satisfying dessert.
Ingredients
Crust
- 1 1/2 cups graham cracker crumbs
- 1/2 cup unsalted butter, melted
Dulce de Leche
- 1 (14 oz) can sweetened condensed milk
Filling
- 3 ripe but firm bananas
Topping
- 1 1/2 cups heavy whipping cream
- 2 tablespoons powdered sugar
- Dark chocolate for shavings (optional)
Instructions
- Prepare the crust: Mix graham cracker crumbs with melted butter until well combined. Press this mixture firmly into the base of a 9-inch pie dish to form an even crust. Place the crust in the refrigerator to chill for 30 minutes, allowing it to set.
- Make the dulce de leche: Pour the sweetened condensed milk into a saucepan and gently simmer over low heat for 45 to 60 minutes, stirring regularly to prevent burning. Continue until the milk thickens and turns a rich golden caramel color. Remove from heat and let it cool completely.
- Assemble dulce de leche layer: Spread the cooled dulce de leche evenly over the chilled graham cracker crust, ensuring a smooth and thick layer.
- Add banana slices: Peel and slice the bananas, then arrange the slices evenly over the dulce de leche layer to cover it completely.
- Whip the cream: In a mixing bowl, beat the heavy whipping cream and powdered sugar together until soft peaks form, creating a light and fluffy texture.
- Top the pie: Spread the whipped cream gently over the bananas to form the top layer. Optionally, garnish with dark chocolate shavings for added flavor and decoration.
- Chill and serve: Refrigerate the assembled pie for 1 to 2 hours to allow it to set well before slicing and serving.
Notes
- Ensure bananas are ripe but firm to prevent them from becoming mushy under the whipped cream.
- Stir the condensed milk regularly while simmering to avoid scorching and achieve a smooth caramel.
- You can prepare the dulce de leche ahead of time and store it in the refrigerator.
- For a quicker option, use store-bought dulce de leche.
- Adjust the powdered sugar in whipped cream according to your sweetness preference.
- Dark chocolate shavings are optional but add a pleasant contrast in flavor and texture.


