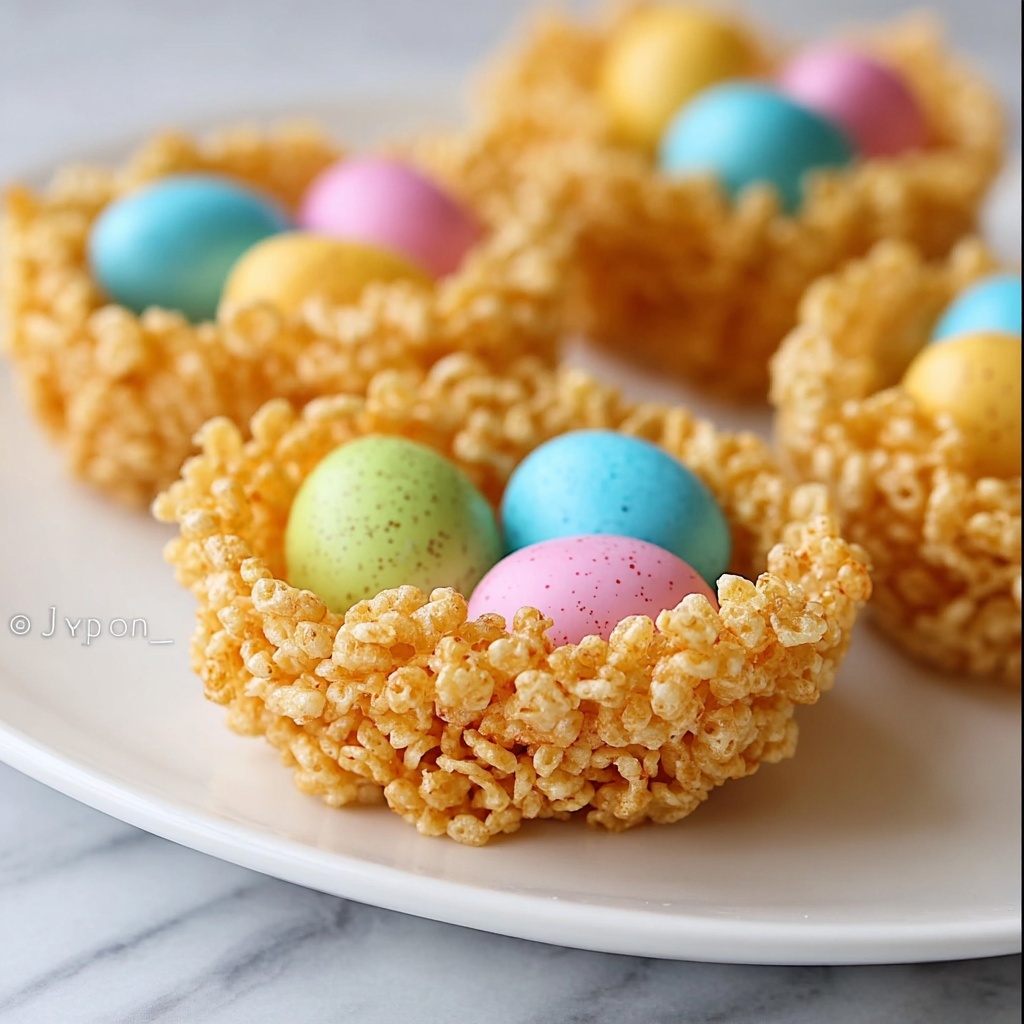
If you’re searching for a delightfully simple and irresistibly sweet treat to celebrate spring, look no further than the Krispies Easter Egg Nests Recipe. This classic, nostalgic dessert takes the humble Rice Krispies treat to a festive level, creating adorable, crunchy nests filled with colorful candy eggs that bring joy both to the eyes and the taste buds. Perfect for kids and adults alike, these nests are quick to whip up, making them a fantastic Easter activity or last-minute dessert that doesn’t skimp on fun or flavor.
Ingredients You’ll Need
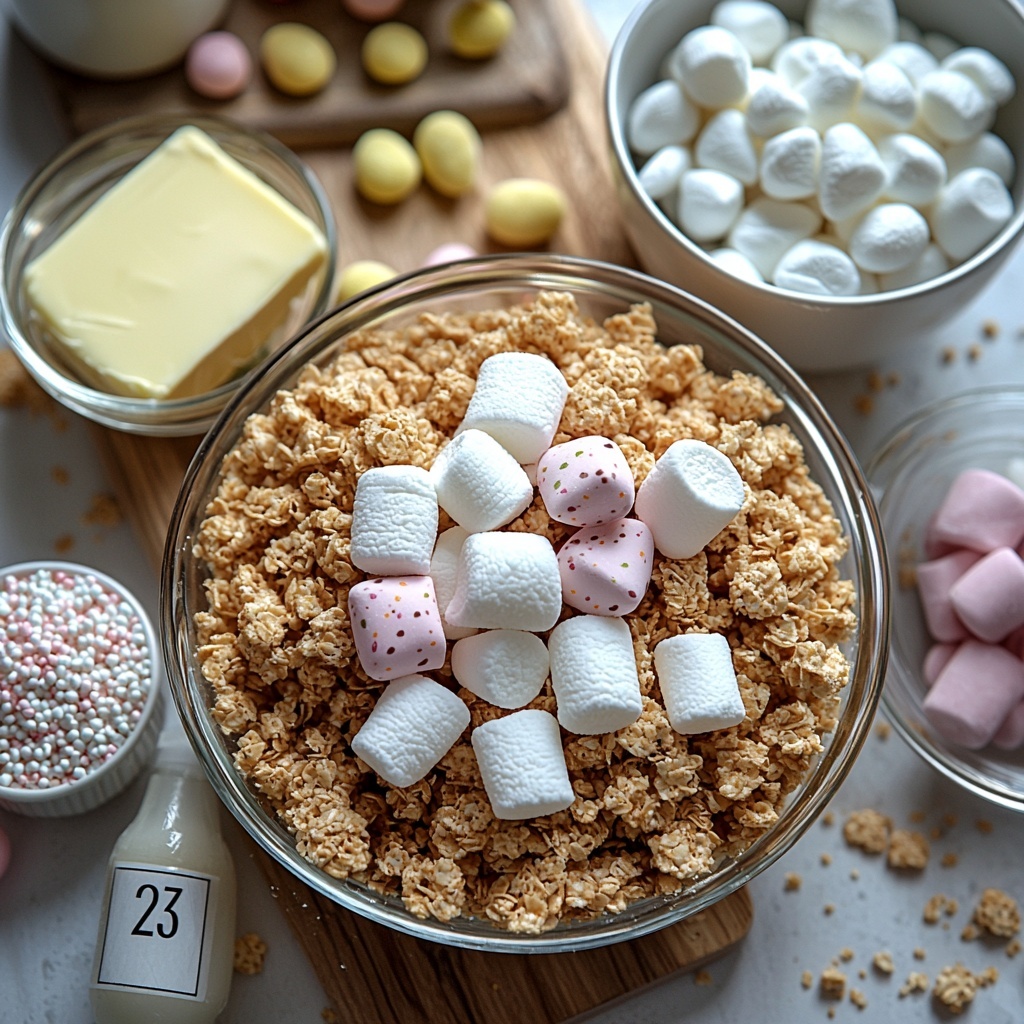
Gathering just a handful of straightforward but essential ingredients sets you up for success with this recipe. Each one plays a crucial role: butter for that rich creaminess, marshmallows as the sweet, gooey binder, Rice Krispies cereal for the crunch, and candy-coated chocolate eggs to offer the festive pop of color and chocolaty surprise.
- 4 tablespoons unsalted butter: Adds richness and helps melt the marshmallows evenly, preventing stickiness.
- 5 cups mini marshmallows: The glue that holds everything together with a perfect, sweet softness.
- 6 cups Rice Krispies cereal: Gives the nests their iconic crispy texture that’s light and airy.
- 1 cup candy-coated chocolate eggs: Provides vibrant pastel colors and a chocolatey bite right in the center of each nest.
- 1/2 cup white chocolate chips (optional): A luscious finishing drizzle to elevate presentation and add extra sweetness.
- Nonstick spray or butter for shaping: Keeps your hands from sticking so shaping nests is a breeze.
How to Make Krispies Easter Egg Nests Recipe
Step 1: Melt the Butter
Start by melting the unsalted butter in a large saucepan over medium heat. This step is important because the butter ensures the marshmallows melt smoothly and prevents them from sticking or burning as you stir.
Step 2: Add and Melt the Marshmallows
Next, toss in the mini marshmallows and stir constantly until they are completely melted and you have a smooth, glue-like mixture. The key here is patience—keep stirring so the marshmallows don’t scorch at the bottom.
Step 3: Stir in the Rice Krispies Cereal
Once your marshmallow mixture is ready, remove it from the heat, then immediately stir in the Rice Krispies cereal. Mix until every flake is thoroughly coated in marshmallow to ensure crispy, crunchy nests that hold their shape.
Step 4: Shape Your Nests
Spray your hands lightly with nonstick spray or rub butter on them to prevent sticking. Scoop about 1/4 cup of the mixture and mold it into a nest shape, gently pressing the center to create a little dip where the eggs will sit. This is where your nests start to come to life!
Step 5: Add the Candy Eggs
While the nests are still warm and pliable, carefully press the candy-coated chocolate eggs into the center of each nest, giving them that signature Easter charm and a delicious surprise in every bite.
Step 6: Optional White Chocolate Drizzle
If you want to add a special touch, melt the white chocolate chips and drizzle them over the tops of the nests for a pretty, sweet finish that looks as good as it tastes.
Step 7: Let the Nests Cool and Set
Allow your nests to cool at room temperature until they firm up completely. This resting time lets all the flavors meld and the structure solidify so your nests hold together perfectly when served.
How to Serve Krispies Easter Egg Nests Recipe
Garnishes
Beyond candy eggs, sprinkle your nests with pastel-colored edible glitter or tiny sugar flowers to make them extra festive. A dusting of powdered sugar can mimic a light sprinkle of spring snow for a charming seasonal touch.
Side Dishes
Serve your Krispies Easter Egg Nests alongside fresh fruit slices or a creamy vanilla yogurt dip. The fresh flavors balance the sweetness and add some refreshing contrast for a well-rounded Easter snack table.
Creative Ways to Present
Make your nests stand out by placing them in colorful cupcake liners, or serve them on a bed of shredded coconut colored green to resemble grass. Presenting them on a pretty platter or in an Easter basket elevates the fun and makes sharing even more special.
Make Ahead and Storage
Storing Leftovers
If you have any leftover nests (though they rarely last), store them in an airtight container at room temperature. This keeps them fresh and crisp for a few days, so you can enjoy their delightful crunch anytime.
Freezing
You can freeze the nests by wrapping them individually in plastic wrap and placing them in a freezer-safe container or bag. When you’re ready, thaw them at room temperature—this is a great way to prep your Easter treats ahead of time.
Reheating
These treats are best enjoyed as they are, without reheating, since warming might soften the crispy texture. If you do prefer them a little warm, pop them briefly in an oven at low heat, but watch closely to avoid melting the chocolate eggs inside.
FAQs
Can I substitute the butter with margarine or oil?
While butter provides the best flavor and texture, you can use margarine in a pinch, but avoid oils as they won’t solidify and can make the nests greasy or too soft.
What if I don’t have mini marshmallows?
Regular-sized marshmallows will work too, but you might need to cut them into smaller pieces for faster and more even melting.
Can I use other cereals instead of Rice Krispies?
You can experiment with cereals like Cocoa Krispies or even cornflakes, but keep in mind that texture and taste will vary—Rice Krispies give that classic light and crispy bite.
Are the candy eggs necessary?
The candy-coated eggs are what transform this into a festive Easter treat, but you can swap them out for jelly beans or small chocolate chips depending on your preference or what you have on hand.
How long do the Krispies Easter Egg Nests last?
Stored properly at room temperature, they stay fresh for about 3-4 days. After that, the marshmallows can harden and the candy eggs might lose their crunch.
Final Thoughts
This Krispies Easter Egg Nests Recipe is one of those simple bites that delivers so much happiness with very little fuss. It’s perfect for sharing with family, involving the kids in the kitchen, or bringing a touch of springtime charm to any gathering. I highly encourage you to give it a try and watch how these crispy, sweet nests bring a little extra joy to your Easter celebrations.
Print
Krispies Easter Egg Nests Recipe
- Prep Time: 10 minutes
- Cook Time: 10 minutes
- Total Time: 20 minutes
- Yield: 12 nests
- Category: Dessert
- Method: Stovetop
- Cuisine: British
- Diet: Vegetarian
Description
Delight in these charming Krispies Easter Egg Nests, a fun and easy no-bake treat perfect for Easter celebrations. Crispy Rice Krispies are enveloped in melted marshmallow and butter, shaped into nests, and topped with colorful candy-coated chocolate eggs. A drizzle of white chocolate adds extra sweetness and visual appeal, making these nests a festive and irresistible snack for kids and adults alike.
Ingredients
Base
- 4 tablespoons unsalted butter
- 5 cups mini marshmallows
- 6 cups Rice Krispies cereal
Toppings
- 1 cup candy-coated chocolate eggs (like Cadbury Mini Eggs or M&M’s)
- 1/2 cup white chocolate chips (optional)
For Shaping
- Nonstick spray or butter for shaping
Instructions
- Melt Butter: In a large saucepan, melt the unsalted butter over medium heat until fully liquefied and warm, providing the base for the marshmallow mixture.
- Add Marshmallows: Add the mini marshmallows to the melted butter and stir constantly. Continue stirring until the marshmallows have fully melted and the mixture is smooth without any lumps.
- Mix in Cereal: Remove the saucepan from heat. Stir in the Rice Krispies cereal carefully, making sure each piece is evenly coated with the marshmallow mixture, creating a sticky, cohesive mix.
- Shape Nests: Lightly grease your hands with nonstick spray or butter to prevent sticking. Take about 1/4 cup of the mixture and shape it into small nest forms. Press the center gently with your finger to create a dip resembling a bird’s nest.
- Add Candy Eggs: While the nests are still warm and soft, place several candy-coated chocolate eggs into the center dip of each nest, arranging them attractively.
- Drizzle White Chocolate (Optional): If desired, melt the white chocolate chips in a microwave-safe bowl or double boiler until smooth. Drizzle the melted white chocolate over the top of the nests for a decorative touch.
- Cool and Set: Allow the nests to cool at room temperature. This will let them firm up and hold their shape, ready to be served or gifted.
Notes
- Grease your hands well to prevent the sticky mixture from adhering while shaping the nests.
- You can substitute mini marshmallows with regular-sized, but melting time may be slightly longer.
- For added flavor, consider incorporating a teaspoon of vanilla extract into the melted marshmallow mixture.
- Store finished nests in an airtight container at room temperature for up to 3 days to maintain freshness.
- The optional white chocolate drizzle adds sweetness and visual appeal but can be omitted for a simpler treat.


