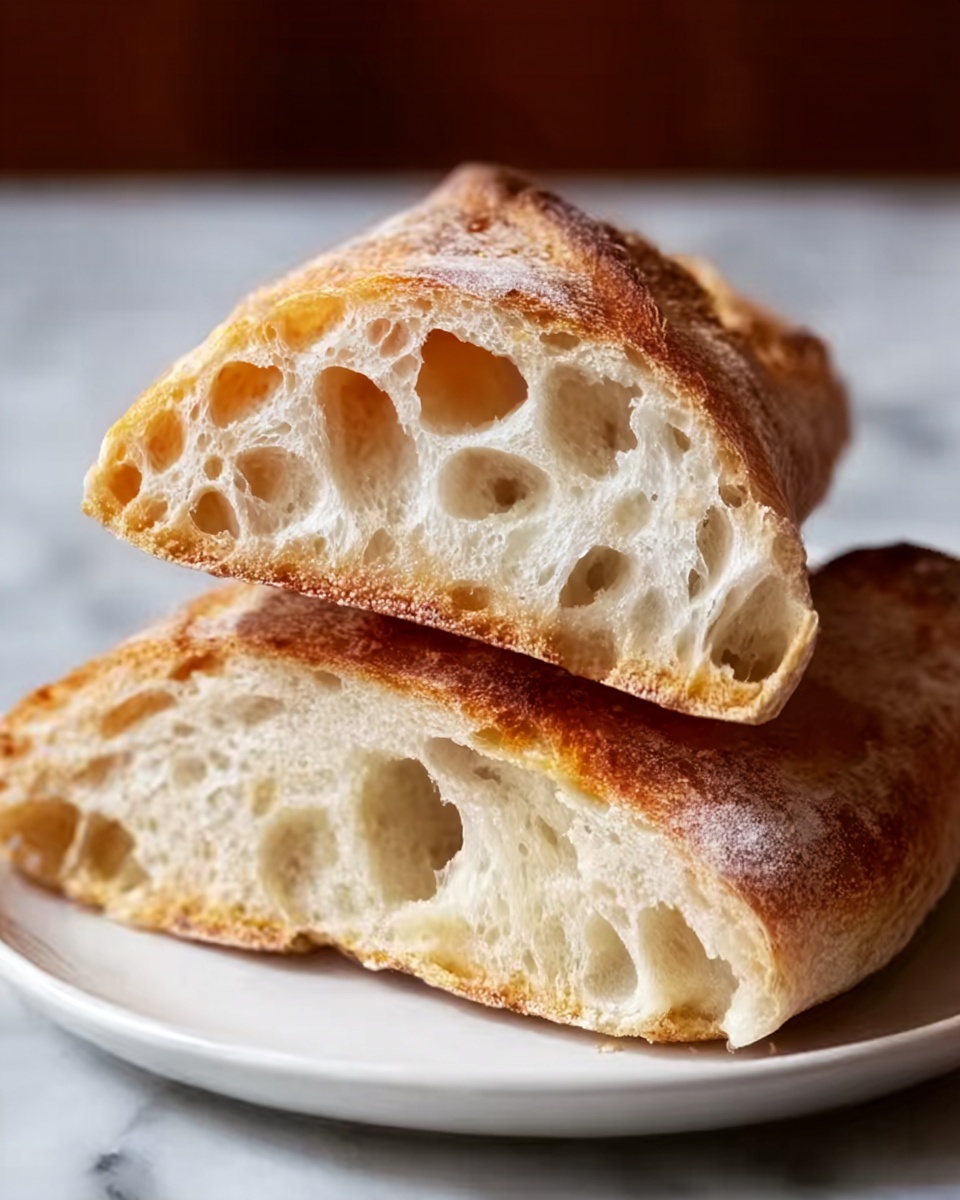
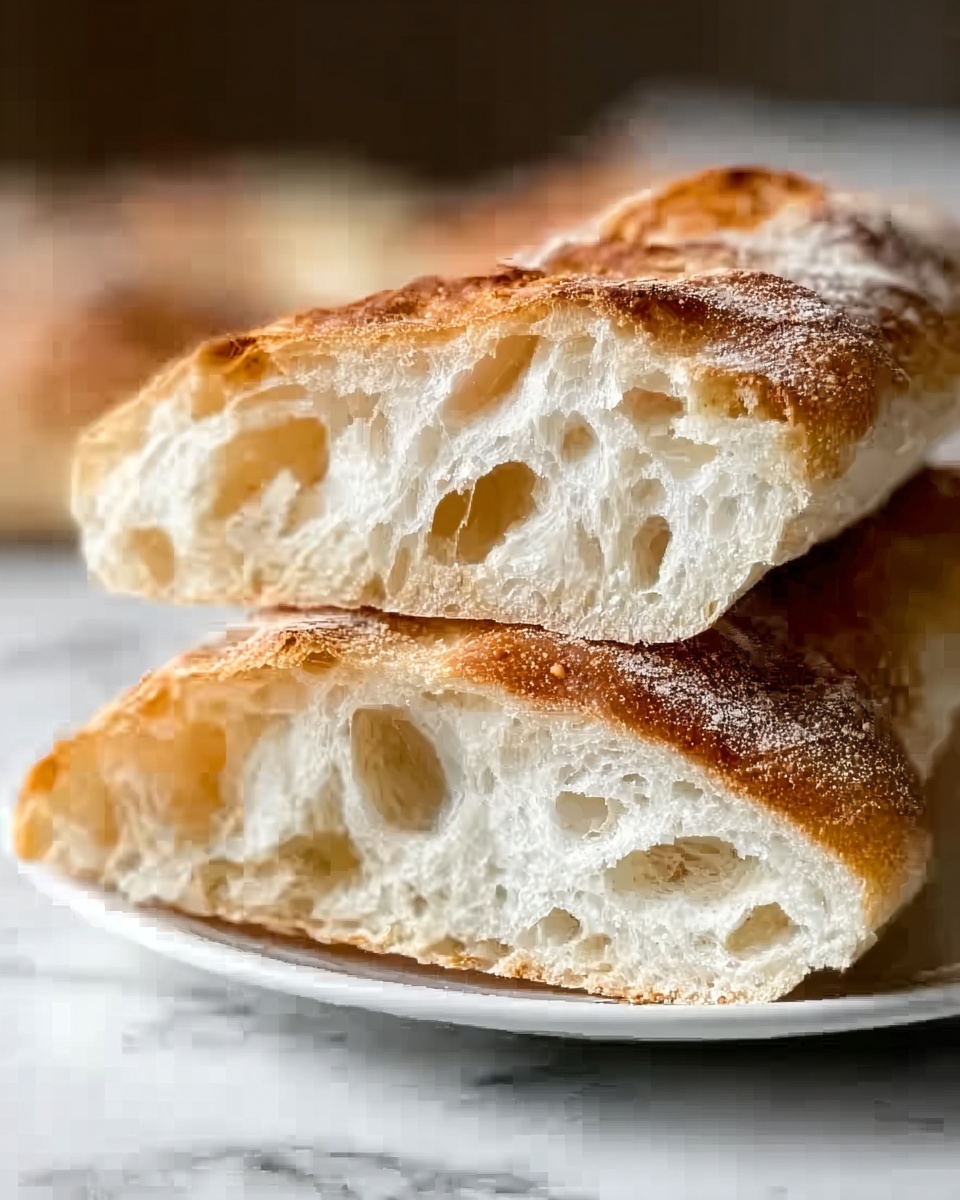
If you love the idea of biting into a warm, golden loaf with a perfectly crisp crust and a soft, airy interior, then this Rustic Italian Crusty Bread Recipe is exactly what you need in your baking repertoire. It captures the heart of traditional Italian baking with simple, wholesome ingredients that come together to create a bread that feels both hearty and elegant. Whether you’re a seasoned baker or just starting out, this recipe will guide you through making a crusty bread that’s perfect for dipping, sandwiches, or simply enjoying with a pat of butter and good company.
Ingredients You’ll Need
The magic of this Rustic Italian Crusty Bread Recipe lies in its simplicity. With just a handful of pantry staples, you’ll achieve a loaf bursting with flavor and texture. Each ingredient plays an important role — from the yeast that helps the dough rise to the olive oil that adds richness and moisture.
- 4 cups all-purpose flour: Provides the structure and chewiness essential to rustic bread.
- 1 ½ tsp active dry yeast: The vital leavening agent that makes the dough rise beautifully.
- 1 ½ cups warm water (110°F / 43°C): Activates the yeast and hydrates the flour to form the dough.
- 2 tsp sea salt: Enhances flavor and strengthens the dough’s gluten network.
- 2 tbsp extra virgin olive oil: Adds a subtle richness and helps keep the crust tender.
How to Make Rustic Italian Crusty Bread Recipe
Step 1: Activate the Yeast
Start by combining warm water and active dry yeast in a large mixing bowl. Let it sit for about 5 minutes until it becomes frothy. This step is crucial because it ensures your yeast is alive and ready to do its magic in helping your dough rise.
Step 2: Mix the Dough
Next, stir in the all-purpose flour and sea salt until a shaggy dough forms. Don’t worry if it looks rough at this point — that’s exactly what you want before you start kneading.
Step 3: Knead the Dough
Turn the dough out onto a floured surface and knead it for approximately 10 minutes. This process develops the gluten, giving the bread its signature chewiness and elasticity. You’ll know it’s ready when the dough is smooth and springs back to the touch.
Step 4: First Rise
Place your kneaded dough in a bowl lightly coated with olive oil, cover it with a damp cloth, and set it somewhere warm. Allow it to double in size — this usually takes about an hour, but patience yields the best bread.
Step 5: Shape the Loaf
Gently punch down the dough to release excess gas and then shape it into a round loaf. This rustic shape will give your bread a charming, homemade look once it’s baked.
Step 6: Second Rise
Before baking, let the shaped dough rest on a cloth-covered baking sheet for another 30 minutes. This second rise helps create a lighter texture inside the loaf.
Step 7: Score the Top
Use a sharp knife to make a few slashes on the top of your loaf. These cuts allow steam to escape and encourage that iconic rustic crackly crust as the bread bakes.
Step 8: Bake to Perfection
Pop your loaf onto a preheated baking stone or sheet and bake at 450°F (230°C) for 30-35 minutes. When done, the bread should be beautifully golden brown and sound hollow when tapped on the bottom — a true sign of a perfectly baked crusty loaf.
How to Serve Rustic Italian Crusty Bread Recipe

Garnishes
This Rustic Italian Crusty Bread Recipe shines wonderfully on its own, but you can elevate it with simple garnishes like a drizzle of high-quality extra virgin olive oil, a sprinkle of sea salt flakes, or even a rub of fresh garlic for extra flavor and aroma.
Side Dishes
Because it’s so versatile, this bread pairs perfectly with a multitude of dishes. Try it alongside a rich tomato basil soup, a hearty bowl of minestrone, or use it to scoop up a delicious balsamic and olive oil dipping sauce. It also makes for an excellent companion to charcuterie plates and fresh cheeses.
Creative Ways to Present
For a rustic yet inviting table display, slice your loaf thickly and place it in a linen-lined basket to keep it warm. You can also hollow out the loaf to serve as a bread bowl for dips or spreads — making it not only the star of the table but also functional and fun!
Make Ahead and Storage
Storing Leftovers
If you have any bread left over (though that’s hard to believe), store it in a paper bag at room temperature to keep the crust crisp while preventing the loaf from becoming too dry. Avoid plastic bags as they trap moisture and soften the crust.
Freezing
This Rustic Italian Crusty Bread Recipe freezes beautifully when wrapped tightly in plastic wrap and then placed in a resealable freezer bag. Freeze the loaf whole or cut into slices for easier thawing and use later.
Reheating
To refresh your bread, preheat your oven to 350°F (175°C), lightly moisten the crust by spritzing it with water, and warm it for 10-15 minutes. This will revive the crust’s crunch and bring back the bread’s just-baked charm.
FAQs
Can I use bread flour instead of all-purpose flour?
Yes! Bread flour has more protein and can give your Rustic Italian Crusty Bread Recipe a chewier texture and better rise, but all-purpose flour works just fine and is more accessible.
Do I have to use a baking stone?
No, you can bake the bread on a regular baking sheet if you don’t have a stone. The stone helps create a crispier crust by evenly distributing heat, but your bread will still turn out delicious on a sheet.
Why is the water temperature important when activating yeast?
Water between 105°F and 115°F is warm enough to activate yeast but not so hot that it kills it. Using the right temperature ensures your dough rises properly for that perfect texture.
How do I know when the bread is fully baked?
Look for a deep golden brown crust and tap the bottom of the loaf; it should sound hollow. This sound means the inside has baked through and isn’t doughy.
Can I add herbs or olives to the dough?
Absolutely! Adding ingredients like rosemary, thyme, or chopped olives can add wonderful flavors to this Rustic Italian Crusty Bread Recipe. Just fold them in during the mixing stage to distribute evenly.
Final Thoughts
This Rustic Italian Crusty Bread Recipe is one of those treasures that brings the warmth of an Italian kitchen right into your home. With simple ingredients, straightforward steps, and absolutely fantastic results, it invites you to enjoy the comforting ritual of baking and eating bread fresh from your oven. I encourage you to give it a try — your taste buds will thank you, and your kitchen will smell like a little slice of Italy.
Print
Rustic Italian Crusty Bread Recipe
- Prep Time: 15 minutes
- Cook Time: 35 minutes
- Total Time: 1 hour 50 minutes
- Yield: 12 servings
- Category: Bread
- Method: Baking
- Cuisine: Italian
Description
This Rustic Italian Crusty Bread recipe yields a classic artisan loaf characterized by its crisp crust, chewy texture, and rich, simple flavors. Made with basic pantry ingredients like all-purpose flour, active dry yeast, sea salt, and extra virgin olive oil, it’s perfect for anyone looking to bake authentic Italian-style bread at home. The process involves a straightforward yeast activation, dough kneading, rising, shaping, and high-temperature baking on a stone or sheet for a beautifully golden crust.
Ingredients
Dough Ingredients
- 4 cups all-purpose flour
- 1 ½ tsp active dry yeast
- 1 ½ cups warm water (110°F / 43°C)
- 2 tsp sea salt
- 2 tbsp extra virgin olive oil
Instructions
- Activate the Yeast: In a large mixing bowl, combine the warm water and active dry yeast. Let it sit for about 5 minutes until the mixture becomes frothy, signaling that the yeast is alive and ready.
- Mix the Dough: Stir in the all-purpose flour and sea salt until a shaggy dough forms, ensuring all ingredients are incorporated.
- Knead the Dough: Transfer the dough onto a floured surface and knead for about 10 minutes until the dough is smooth and elastic, which develops the gluten for structure.
- First Rise: Place the kneaded dough into a bowl lightly coated with olive oil, cover it with a damp cloth, and let it rise in a warm spot until it doubles in size, approximately 1 hour.
- Shape the Loaf: Gently punch down the risen dough to release air, then shape it into a round loaf.
- Second Rise: Preheat your oven to 450°F (230°C). Let the shaped loaf rest under a cloth for an additional 30 minutes to allow a final proofing.
- Score the Loaf: Using a sharp knife, make slashes on the top surface of the loaf—this helps control the bread’s expansion as it bakes and adds an artisan look.
- Bake the Bread: Bake the loaf on a preheated stone or baking sheet for 30-35 minutes. The bread is done when it turns golden brown and sounds hollow when tapped.
Notes
- Use a baking stone if available for better heat distribution and crust texture.
- Ensure the water temperature is not too hot to avoid killing the yeast; 110°F (43°C) is ideal.
- Letting the dough rest after shaping is crucial for a loftier bread.
- For extra crust crispiness, place an oven-safe dish with water in the oven to create steam during baking.
- Cooling the bread completely before slicing helps maintain its structure and texture.


