Description
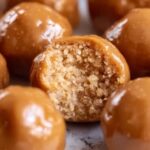
Delightful no-bake Butterfinger Balls made with crushed Butterfinger candy bars, creamy peanut butter, and a rich chocolate coating. These bite-sized treats are perfect for parties, holidays, or anytime you crave a sweet, crunchy indulgence.
Ingredients
Scale
Mixture Ingredients
- 2 cups crushed Butterfinger candy bars (approximately 16 fun-sized bars)
- 1 cup powdered sugar
- 1 cup graham cracker crumbs
- 1/2 cup melted butter
- 1 cup peanut butter
Dipping Ingredients
- 2 cups semi-sweet chocolate chips
- 1 tablespoon vegetable shortening (optional, for smoother dipping)
Decoration
- Additional crushed Butterfinger pieces
- Chocolate sprinkles
Instructions
- Prepare the Mixture: In a large bowl, combine the powdered sugar, graham cracker crumbs, crushed Butterfinger pieces, melted butter, and peanut butter. Mix thoroughly until all ingredients are well incorporated into a uniform mixture.
- Form the Balls: Shape the mixture into 1-inch diameter balls using your hands or a small scoop, then place them on a parchment-lined baking sheet evenly spaced apart.
- Chill: Refrigerate the balls for 30 minutes to firm up the mixture, which makes them easier to dip without falling apart.
- Melt the Chocolate: In a microwave-safe bowl, melt the semi-sweet chocolate chips by microwaving in 30-second intervals, stirring in between each interval. If desired, add the tablespoon of vegetable shortening to the chocolate to achieve a smoother and shinier consistency.
- Dip the Balls: Remove the chilled balls from the refrigerator. Using a fork or dipping tool, fully coat each ball in the melted chocolate, allowing excess chocolate to drip off before placing it back onto the parchment-lined baking sheet.
- Set and Decorate: While the chocolate is still wet, sprinkle additional crushed Butterfinger pieces or chocolate sprinkles on top for extra texture and decoration.
- Allow to Set: Let the dipped balls sit at room temperature until the chocolate has fully hardened. To speed up this process, refrigerate the balls for about 15 minutes until set.
Notes
- Use fun-sized Butterfinger bars for easy crushing and consistent texture.
- Vegetable shortening is optional but helps create a smoother, shinier chocolate coating.
- Store the finished Butterfinger Balls in an airtight container in the refrigerator to keep fresh.
- For best results, consume within a week.
- Handle the balls gently while dipping to prevent breaking.