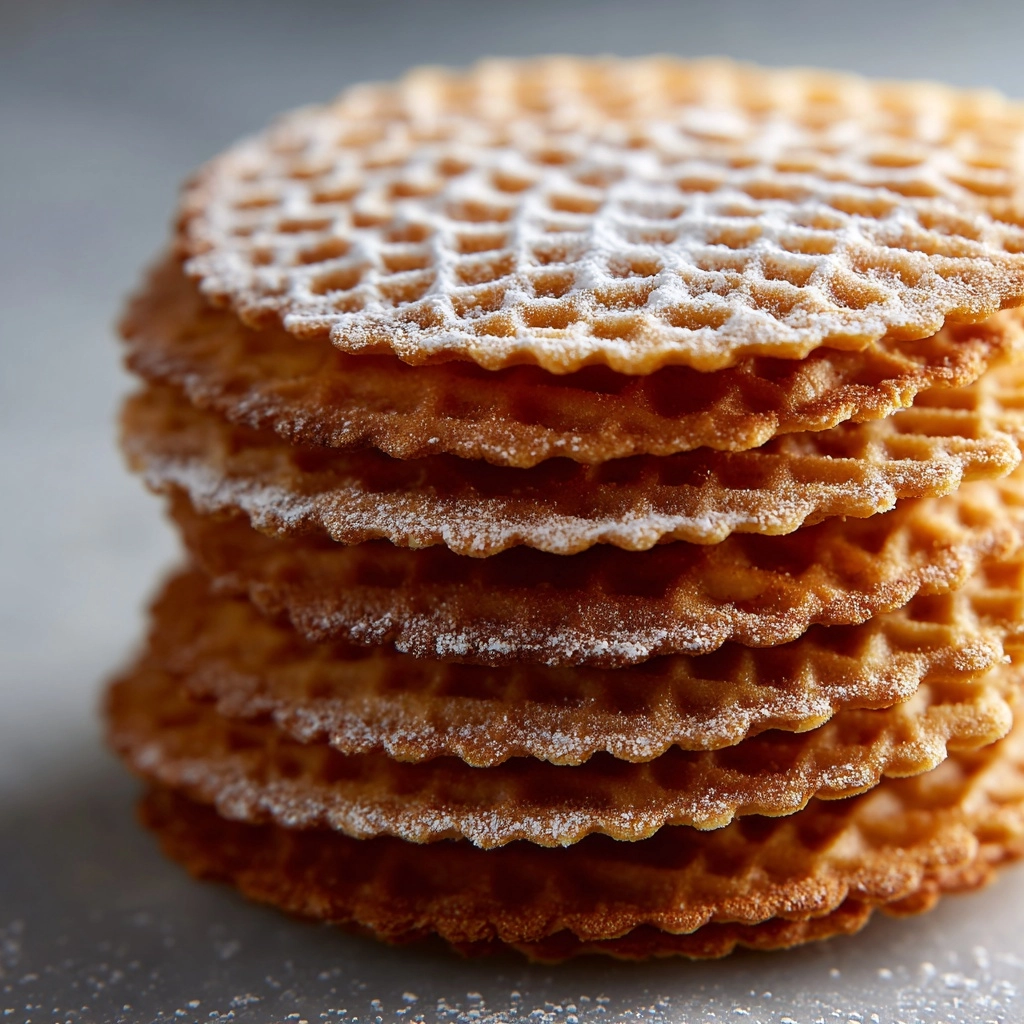
If there’s one treat that can instantly transport you to an Italian family holiday, it’s the Classic Pizzelle. These beautiful waffle cookies—thin, crisp, and lightly perfumed with vanilla and anise—are pure nostalgia for anyone who loves traditional baking. The charming snowflake patterns and delicate flavor in every bite make them perfect for gifting, serving alongside coffee, or adding a personal touch to your dessert table. Whether you’re a seasoned pizzelle pro or about to try your first batch, this recipe captures the essence of classic pizzelle in all their golden glory!
Ingredients You’ll Need
The magic of classic pizzelle is in their simplicity. Each ingredient plays a starring role: eggs add richness and structure, the flavorings create the signature aroma, and the balance of dry ingredients gives these cookies their irresistible crisp texture and pale gold color.
- Eggs: Three large eggs form the backbone of the batter, giving the pizzelle their signature lightness and delicate crumb.
- Granulated Sugar: Three-quarters of a cup sweetens the pizzelle just enough to feel indulgent, while helping them crisp as they bake.
- Unsalted Butter: Melt half a cup for a rich, buttery flavor and a melt-in-your-mouth finish—let it cool so it mixes seamlessly.
- Vanilla Extract: Adds warmth and a familiar sweet aroma that is classic to these Italian cookies.
- Anise Extract (optional): Half a teaspoon gives the pizzelle their unmistakable, slightly licorice-like hint—skip it if you prefer a pure vanilla flavor.
- All-Purpose Flour: At 1 3/4 cups, flour gives the cookies their structure without making them dense.
- Baking Powder: Two teaspoons help the pizzelle puff just enough to be crisp, not hard.
- Salt: Just a pinch brings all the other flavors into focus, highlighting both the sweetness and aromatics.
How to Make Classic Pizzelle
Step 1: Whip Up the Eggs and Sugar
Start by grabbing a large mixing bowl and your favorite hand mixer. Beat the eggs and granulated sugar together until the mixture is lightened in color and delightfully fluffy—about 2 to 3 minutes is perfect. This step gives the classic pizzelle their signature airy texture and a subtle sheen.
Step 2: Add the Flavorings and Butter
Drizzle in the melted (and cooled!) unsalted butter, then add the vanilla extract. If you love a traditional Italian touch, now’s the time to include the anise extract. Mix until everything is just blended and aromatic—the batter should smell so inviting you’ll be tempted to sneak a taste.
Step 3: Mix the Dry Ingredients
In a separate bowl, whisk together the all-purpose flour, baking powder, and just a pinch of salt. This quick whisk ensures even distribution and means you won’t end up with any pockets of baking powder or salt. It’s a tiny step, but it makes a huge flavor difference.
Step 4: Combine Wet and Dry
Now it’s time to bring everything together! Gradually stir the dry ingredients into the wet mixture, gently folding just until the flour disappears. You want a smooth, thick batter—it should hold its shape when dropped but not be overly stiff or runny.
Step 5: Heat Up the Pizzelle Iron
Plug in your pizzelle iron and let it preheat according to the manufacturer’s instructions. A well-heated iron is essential for those classic pizzelle patterns and even crisping. While it heats, get your tablespoon measure and wire rack ready for the baking fun ahead.
Step 6: Cook the Pizzelle
Spoon a generous tablespoon of batter into the center of each pizzelle iron mold, then close the lid and count 30 to 45 seconds. Peek inside—they’re ready when they turn golden and release that unmistakably sweet, toasty scent. Remove with a delicate spatula and cool the pizzelle on a wire rack to keep their crispy bite.
Step 7: Repeat and Cool
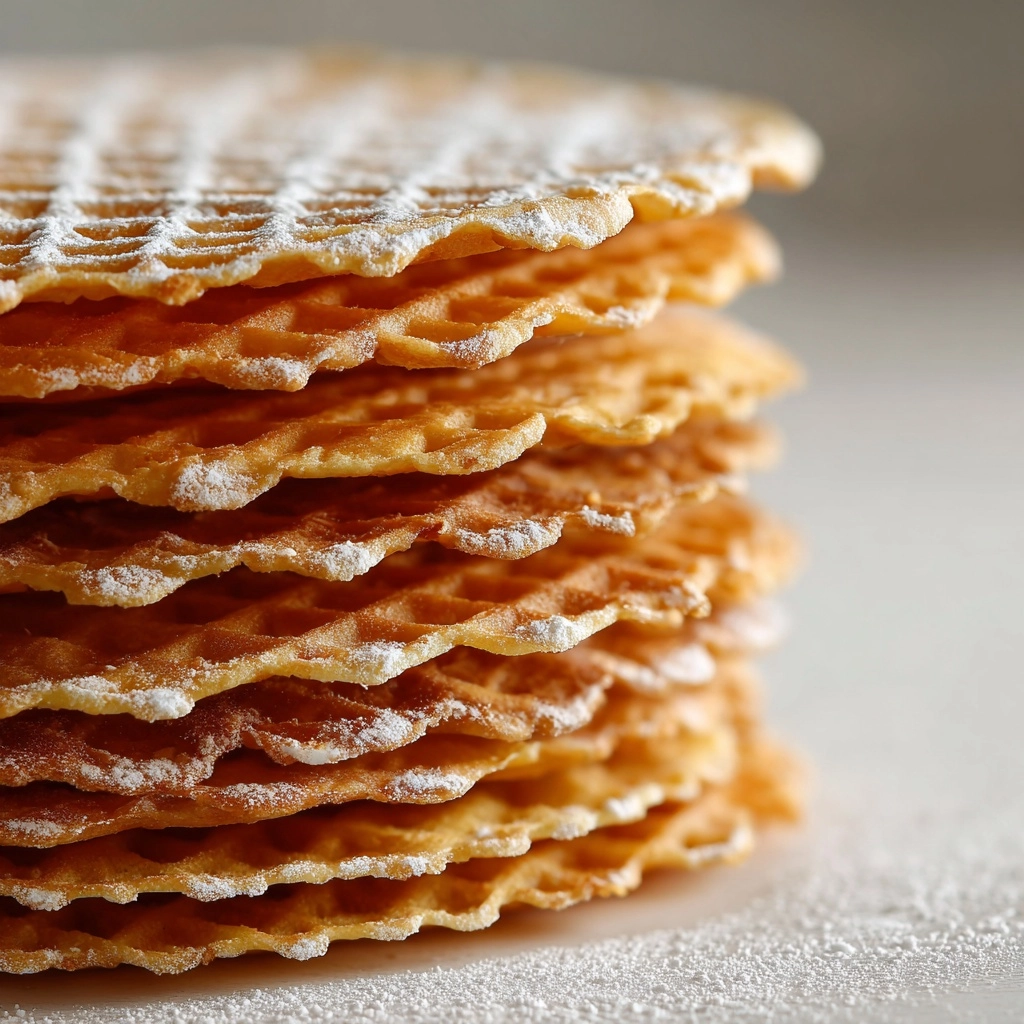
Continue scooping, baking, and cooling until all the batter is used. Spread the baked cookies out so air circulates—this guarantees that classic pizzelle crunch, especially when stacking or storing them. Admire your ever-growing stack of lacy, golden cookies and resist eating them all before they cool!
How to Serve Classic Pizzelle

Garnishes
Dress up classic pizzelle with a light shower of powdered sugar for that old-world charm. If you’re feeling festive, dip the edges in melted chocolate or add a sprinkle of rainbow nonpareils—each garnish adds flavor and a special touch for birthdays or holidays.
Side Dishes
Pizzelle shine beside a scoop of vanilla gelato or a bowl of fresh berries. For brunch, try stacking them with whipped ricotta and honey, or simply enjoy with espresso or hot chocolate for an afternoon pick-me-up.
Creative Ways to Present
Classic pizzelle are as versatile as they are beautiful. Shape them into cones while still warm and fill with pastry cream for “pizzelle cannoli,” or mold into cups for mini ice cream sundaes. Bundle them in cellophane bags with a ribbon for heartfelt homemade gifts—the possibilities are endless!
Make Ahead and Storage
Storing Leftovers
Let your classic pizzelle cool completely, then store in an airtight container at room temperature. Layering them between sheets of parchment helps prevent sticking and breakage; they’ll stay fresh and crisp for at least a week—if they last that long!
Freezing
Classic pizzelle freeze surprisingly well. Stack cooled cookies in a heavy-duty freezer bag or airtight container, separating layers with parchment. Tucked away in the freezer, they’ll keep for up to two months. Thaw at room temperature, uncovered, to preserve their delicate texture.
Reheating
If pizzelle lose a bit of their crispness, pop them in a warm (not hot) oven—about 250 degrees Fahrenheit—for just 3 to 5 minutes. Let them cool, and you’ll have that signature crunch back, making them taste freshly baked all over again!
FAQs
Can I make classic pizzelle without anise extract?
Absolutely! While anise is traditional and beloved in many Italian families, you can omit it for a pure vanilla classic pizzelle or swap in other extracts like almond or lemon for something new and delicious.
Do I need a special pizzelle iron?
Yes, a pizzelle iron is essential for achieving that classic look and texture. Most modern electric models are affordable, easy to use, and worth the investment if you love Italian cookies!
Can I make the batter in advance?
Definitely. You can make the pizzelle batter a day ahead and keep it covered in the refrigerator. Let it come to room temperature and give it a quick stir before using for best results.
Why are my pizzelle not crisp?
The key to crisp classic pizzelle is to let them cool fully on a wire rack before storing. Stacking or sealing them while warm traps steam, making them soft, so patience pays off!
Can pizzelle be gluten-free?
Yes! Substitute your favorite cup-for-cup gluten-free flour blend. The classic pizzelle pattern and flavor will still shine through, making them just as irresistible.
Final Thoughts
These classic pizzelle are more than just cookies—they’re a joyful tradition, baked with love and meant for sharing. There’s something truly special about their delicate crunch and nostalgic flavor, so gather your ingredients, fire up the pizzelle iron, and create sweet memories with every batch. Give classic pizzelle a try and watch them become a cherished favorite in your kitchen too!
Print
Classic Pizzelle Recipe
- Prep Time: 10 minutes
- Cook Time: 20 minutes
- Total Time: 30 minutes
- Yield: 30 pizzelle
- Category: Dessert
- Method: Waffle Iron
- Cuisine: Italian
- Diet: Vegetarian
Description
Learn how to make classic pizzelle, traditional Italian waffle cookies that are light, crispy, and subtly sweet. These delicate treats are perfect for holiday gatherings or any time you crave a simple yet elegant dessert.
Ingredients
Eggs
- 3 large eggs
Sugar
- 3/4 cup granulated sugar
Butter
- 1/2 cup unsalted butter, melted and cooled
Extracts
- 1 teaspoon vanilla extract
- 1/2 teaspoon anise extract (optional)
Flour Mixture
- 1 3/4 cups all-purpose flour
- 2 teaspoons baking powder
- Pinch of salt
Instructions
- Beat Eggs and Sugar: In a large mixing bowl, beat the eggs and sugar together until light and fluffy, about 2–3 minutes.
- Add Butter and Extracts: Add the melted butter, vanilla extract, and anise extract (if using), and mix until combined.
- Combine Dry Ingredients: In a separate bowl, whisk together the flour, baking powder, and salt.
- Mix Wet and Dry Ingredients: Gradually add the dry ingredients to the wet ingredients, stirring just until a smooth batter forms.
- Cook Pizzelle: Heat a pizzelle iron, drop batter into molds, and cook for 30–45 seconds until golden and crisp.
- Cool and Serve: Remove pizzelle, cool on a wire rack, and repeat with remaining batter.
Notes
- For extra crisp pizzelle, allow them to cool completely before storing.
- You can shape warm pizzelle into cones or cups for desserts.
- Store in an airtight container to maintain crispness.
Nutrition
- Serving Size: 1 pizzelle
- Calories: 70
- Sugar: 5g
- Sodium: 25mg
- Fat: 3g
- Saturated Fat: 2g
- Unsaturated Fat: 1g
- Trans Fat: 0g
- Carbohydrates: 9g
- Fiber: 0g
- Protein: 1g
- Cholesterol: 20mg
