
“`html
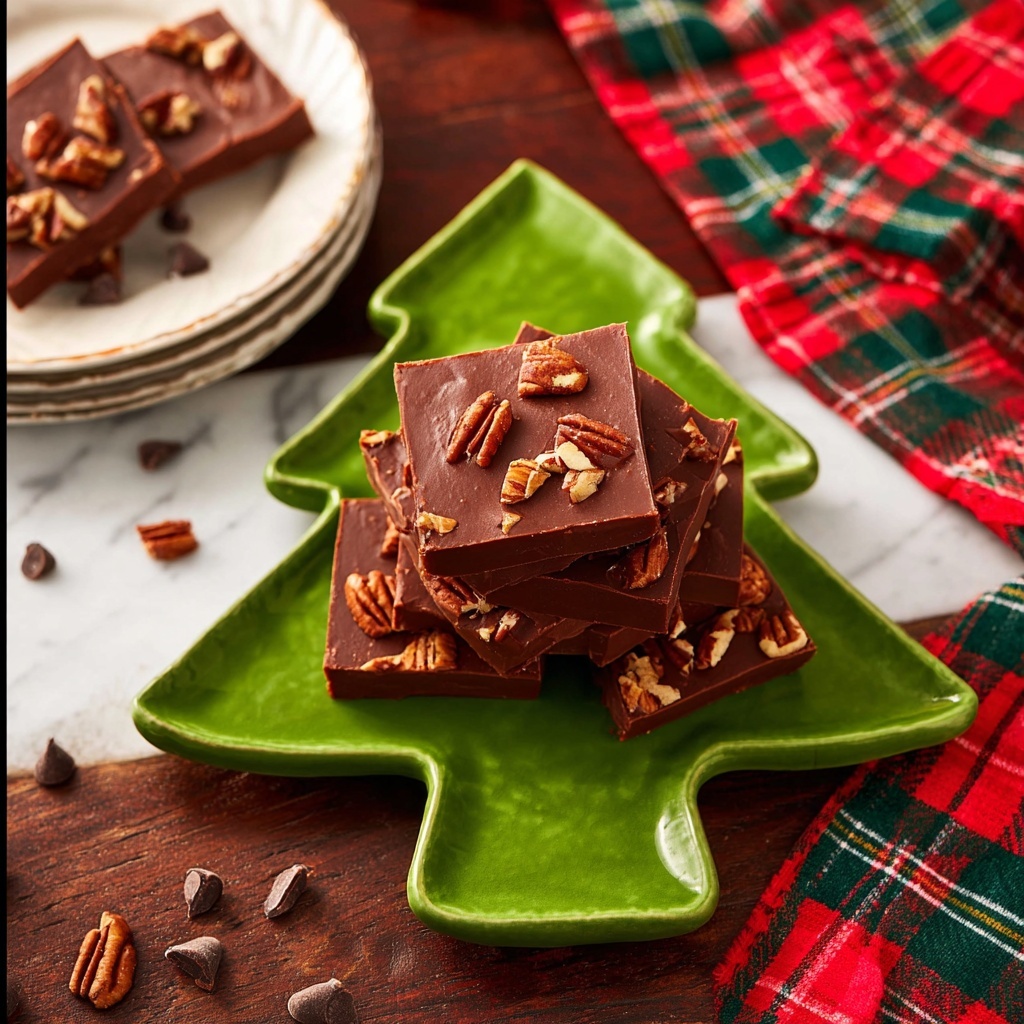
If you’ve ever dreamed of creating rich, melt-in-your-mouth chocolate treats without fuss or fancy equipment, this Easy Chocolate Fudge Recipe is the perfect answer. It’s that comforting, indulgent dessert that satisfies your sweet tooth with just a handful of simple ingredients, coming together in under 20 minutes and delivering a luscious, creamy fudge you’ll want to share with everyone you love. I promise you, once you try this version, it’ll become your go-to for special occasions, last-minute gifts, or whenever you simply need a sweet moment to yourself.
Ingredients You’ll Need
Getting the ingredients right is the first step toward truly irresistible fudge. Each element here plays a crucial role: some bring richness, others add smoothness, and a few introduce subtle flavor notes that make each bite unforgettable.
- 3 cups semi-sweet chocolate chips: The star of the show, these melt easily and provide the perfect balance of sweetness and chocolaty depth.
- 1 (14-oz) can sweetened condensed milk: This adds creaminess and helps unify the texture into that classic fudge consistency.
- 1/4 teaspoon salt: Just enough to enhance the chocolate’s complexity without overpowering the sweetness.
- 2 tablespoons butter: Adds a silky richness that makes the fudge luxuriously smooth.
- 1/2 teaspoon vanilla extract: A touch of warmth and fragrance that elevates every bite.
- 1 cup chopped pecans or walnuts (optional): For a delightful crunch and an earthy contrast that pairs beautifully with the chocolate.
How to Make Easy Chocolate Fudge Recipe
Step 1: Prep Your Workspace and Ingredients
Before you start melting chocolate, it’s super helpful to have everything within reach and your pan ready. Using an 8×8 inch pan will give your fudge the perfect thickness—don’t go bigger, or it might turn out too thin. Gather all your ingredients to keep the process smooth and joyful.
Step 2: Prepare Your Baking Pan
Line your pan with foil or parchment paper, making sure to leave an overhang on the sides for easy removal later on. A light buttering of the lining helps the fudge release cleanly after setting. This small extra step makes a big difference in the final presentation.
Step 3: Melt the Chocolate and Condensed Milk Together
Combine your semi-sweet chocolate chips and sweetened condensed milk in a medium saucepan. Place over medium-low heat and stir constantly as the chocolate starts to melt. When it reaches a half-melted stage, remove it from the heat to proceed carefully to the next step. This slow, careful melting ensures the mixture stays smooth and doesn’t scorch.
Step 4: Finish Melting with Flavor and Texture Boosters
Stir in the salt, butter, and vanilla extract, then place the pan back on medium-low heat. Keep stirring diligently until all the chocolate has fully melted and the mixture gleams with smoothness. This is the trickiest part—be careful not to overcook, as that will make your fudge grainy or crumbly rather than silky. If you’re adding nuts, fold them in right after you remove the mixture from heat.
Step 5: Pour and Spread in Pan
Pour your warm fudge into the prepared pan right away. Because the fudge thickens quickly, spread it efficiently to all corners, but don’t worry about getting a perfectly smooth top. Leaving some sweet swirls on the surface adds a homemade charm and makes it look just as tasty as it tastes.
Step 6: Let It Set
Allow the fudge to sit at room temperature for 4 to 6 hours until fully firm. This slow setting develops the ideal chewy texture. When it’s ready, cut into squares—the size is up to you! Whether you want 16 larger pieces or tiny morsels, this recipe adapts beautifully to your sweet cravings.
How to Serve Easy Chocolate Fudge Recipe

Garnishes
Though the fudge itself is divine, adding a few garnishes can make it pop visually and flavor-wise. Try sprinkling a pinch of sea salt flakes on top for a salty-sweet finish, or shave some extra chocolate to decorate the surface. Toasted nuts or a dusting of cocoa powder can also enhance the look and texture.
Side Dishes
This fudge pairs wonderfully with a warm cup of coffee or a bold cup of black tea, balancing the sweetness with a slightly bitter contrast. For a more indulgent treat, serve alongside fresh berries or a scoop of vanilla ice cream—each bite becomes a little celebration.
Creative Ways to Present
Present your fudge in charming little boxes lined with parchment paper as a thoughtful homemade gift. You can also stack small fudge squares on a dessert platter layered with wax paper between each piece for a party. Wrapping individual pieces in colorful foil elevates these choco-bites to festive treats everyone will adore.
Make Ahead and Storage
Storing Leftovers
Once your fudge is set and cut, keep leftovers in an airtight container at room temperature. It keeps beautifully for up to two weeks, maintaining its creamy texture. Just be sure to store it away from heat and humidity to prevent melting.
Freezing
If you want to extend the life of this Easy Chocolate Fudge Recipe, freezing works wonderfully. Wrap the fudge squares tightly in plastic wrap, then place them in a freezer-safe zip bag. Frozen fudge lasts for up to three months and thaws quickly at room temperature when you’re ready to indulge again.
Reheating
This fudge is best enjoyed as-is without reheating, but if you prefer a softer texture, let the pieces come to room temperature naturally. Avoid microwaving, as it can alter the smooth consistency and cause the chocolate to seize.
FAQs
Can I use a different type of chocolate chip?
Absolutely! While semi-sweet chocolate chips offer a balanced flavor, you can experiment with dark, milk, or even white chocolate chips. Just keep in mind that different chocolates have varying sweetness levels and melting points, which might slightly change the taste and texture.
Do I have to add nuts to the fudge?
Nuts are totally optional. They add a nice crunch and complement the chocolate perfectly, but if you prefer smooth fudge or have nut allergies, simply leave them out. The fudge will still be deliciously creamy.
How thick should the fudge layer be in the pan?
An 8×8 inch pan is ideal because it makes your fudge about half an inch thick. This thickness strikes the perfect balance between firmness and softness. Using a larger pan can make the fudge too thin and less satisfyingly chewy.
Can I speed up the setting process?
While this fudge sets best at room temperature, you can put it in the fridge to firm up faster if you’re in a hurry. Just be aware that chilling might slightly change the texture, making it a bit harder rather than tenderly chewy.
Why is my fudge grainy or crumbly?
This usually happens if the chocolate mixture overheats or if it’s stirred too vigorously at the wrong moment. Make sure to melt the chocolate slowly on low heat and avoid overcooking. Also, add the butter and vanilla at the right time to keep that silky smooth texture.
Final Thoughts
Making this Easy Chocolate Fudge Recipe is such a joyful experience, and the results are endlessly rewarding. It’s simple enough for beginners but delicious enough to impress even the toughest dessert critics in your life. So go ahead—give it a try, share it with friends, and watch how this classic chocolate fudge becomes your new favorite treat to make and savor.
“`
Print
Easy Chocolate Fudge Recipe
- Prep Time: 5 minutes
- Cook Time: 10 minutes
- Total Time: 15 minutes active, plus 4-6 hours setting time
- Yield: 1 batch (16 to 36 pieces depending on cut size)
- Category: Dessert
- Method: Stovetop
- Cuisine: American
Description
This easy chocolate fudge recipe delivers a rich, creamy treat with minimal ingredients and effort. Made with semi-sweet chocolate chips, sweetened condensed milk, butter, and a hint of vanilla, it comes together quickly on the stovetop and sets at room temperature. Optional chopped pecans or walnuts add a delightful crunch, making this fudge perfect for gift-giving or indulgent snacking.
Ingredients
Fudge Base
- 3 cups semi-sweet chocolate chips
- 1 (14-oz) can sweetened condensed milk
- 1/4 teaspoon salt
- 2 tablespoons butter
- 1/2 teaspoon vanilla extract
Optional Add-ins
- 1 cup chopped pecans or walnuts
Instructions
- Prep: This recipe works best in an 8×8-inch pan — larger pans will yield thinner fudge. Gather and measure all ingredients before starting.
- Prepare the pan: Line the 8×8-inch pan with foil or parchment paper, leaving an overhang for easy fudge removal. Lightly grease the lining with butter and set aside.
- Begin melting the chocolate: In a medium saucepan over medium-low heat, combine the semi-sweet chocolate chips and sweetened condensed milk. Stir constantly until the chocolate is about half melted, then remove from heat.
- Finish melting the chocolate: Stir in the salt, butter, and vanilla extract. Return the saucepan to medium-low heat and continue stirring until the chocolate melts fully and the mixture becomes smooth and shiny. Be careful not to overcook, as this can cause the fudge to seize and become crumbly. If using, fold in the chopped nuts at this stage.
- Pour into pan: Immediately pour the thick fudge mixture into the prepared pan. Spread evenly into the corners. For a decorative touch, you can swirl the surface instead of smoothing it completely.
- Set the fudge: Let the fudge set at room temperature for 4 to 6 hours until completely firm. Once set, lift it out using the foil or parchment overhang and cut into squares. You can make 16 larger pieces (4×4 grid), 25 medium pieces (5×5 grid), or 36 smaller pieces (6×6 grid) depending on your preference.
Notes
- Use an 8×8-inch pan for optimal thickness; larger pans will produce thin fudge.
- Do not overcook the chocolate mixture to avoid a grainy, crumbly texture.
- Chopped pecans or walnuts add crunch but can be omitted for a nut-free version.
- Fudge sets best at room temperature; avoid refrigerating to preserve the best texture.
- For easy removal, use foil or parchment with an overhang to lift the fudge from the pan after setting.


