“`html
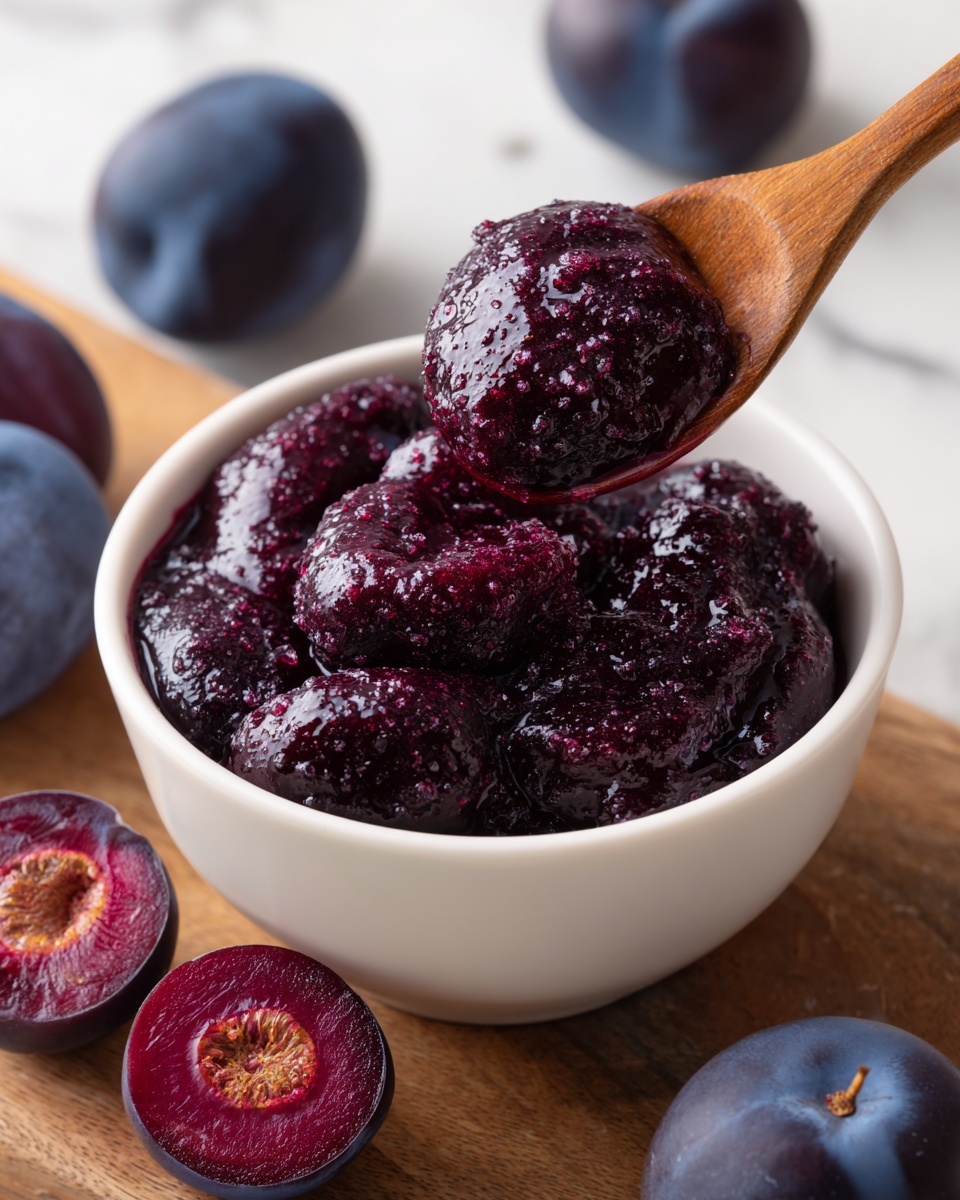
If you are craving a delightful homemade spread that captures the vibrant, sweet-tart flavor of fresh plums, look no further than this Easy Plum Jam Recipe. It transforms simple, juicy plums into a luscious jam that’s perfect for breakfast toast, dolloping on desserts, or even stirring into yogurt. This recipe is straightforward and surprisingly quick, making it a perfect pick for both jam-making beginners and experienced preservers who want a reliable, delicious result every time.
Ingredients You’ll Need
Gathering the right ingredients is the foundation of any great jam, and this Easy Plum Jam Recipe keeps it simple with just a few essentials that work harmoniously to deliver mouthwatering flavor and perfect texture.
- 2 pounds fresh plums: Choose ripe, juicy plums for the best flavor and natural sweetness.
- 1 1/2 cups granulated sugar: Balances the tartness and helps the jam set beautifully.
- 1 tablespoon lemon juice: Adds brightness and preserves the color of the jam.
- 1/4 teaspoon ground cinnamon (optional): A subtle warm spice that enhances the plum’s natural flavors.
How to Make Easy Plum Jam Recipe
Step 1: Prepare the Plums
Start by washing the plums thoroughly, then pit and chop them into small pieces to help release their juices. This simple prep step sets the stage for a jam bursting with fresh fruit flavor and a lovely texture.
Step 2: Combine Ingredients
In a large saucepan, combine the chopped plums, sugar, and lemon juice. Let this mixture sit for 15 minutes to allow the sugar to draw out the plum juices and create a naturally sweet base before heating.
Step 3: Cook the Jam
Bring the mixture to a boil over medium heat, stirring frequently to avoid sticking. Once boiling, reduce the heat to a simmer and cook for 25 to 30 minutes. Stir occasionally, mashing or blending the fruit slightly if you prefer a smoother jam texture.
Step 4: Test Consistency
To check if your jam is ready, perform the wrinkle test: spoon a bit of jam onto a chilled plate and let it cool for a minute. Push the edge with your finger—if it wrinkles and doesn’t flood back, it’s set perfectly. If not, let it simmer a little longer and test again.
Step 5: Cool and Store
Once the jam reaches the right consistency, remove it from heat and let it cool slightly. Transfer the jam into sterilized jars, seal them, and let cool completely at room temperature before refrigerating. This ensures the jam stays fresh and flavorful for weeks.
How to Serve Easy Plum Jam Recipe
Garnishes
A sprinkle of chopped fresh mint or a tiny dusting of cinnamon makes a lovely garnish for your plum jam when serving it with desserts or breakfast dishes, enhancing its fruity vibrance and adding an inviting aroma.
Side Dishes
This jam pairs wonderfully with toasted breads, warm scones, or buttery biscuits. It also elevates a simple cheese platter, especially alongside mild cheeses like brie or cream cheese, creating a harmonious flavor contrast that guests will adore.
Creative Ways to Present
Try layering the Easy Plum Jam Recipe in parfait glasses with yogurt and granola for a fresh breakfast treat, or use it as a filling for thumbprint cookies. You can even swirl it into frosting for cupcakes to add a fruity surprise inside your baked goods.
Make Ahead and Storage
Storing Leftovers
Store leftover jam in airtight glass jars in the refrigerator, where it will stay fresh for up to three weeks. Proper storage preserves the natural plum flavors and keeps the texture just right for your enjoyment.
Freezing
For longer storage, you can freeze the jam in freezer-safe containers or bags for up to 6 months. Just thaw it overnight in the fridge before use, and give it a good stir to bring back its luscious consistency.
Reheating
If you want to warm the jam before use, gently reheat it in a small saucepan over low heat, stirring occasionally. Avoid boiling to maintain the fresh, vibrant flavor and texture you worked so hard to achieve.
FAQs
Can I use frozen plums for this Easy Plum Jam Recipe?
Yes, frozen plums can be a convenient substitute. Make sure to thaw and drain any excess water before cooking to maintain the jam’s thickness and flavor balance.
Do I really need lemon juice in the recipe?
Lemon juice is important because it adds acidity that helps the jam set and preserves its bright color, preventing the plums from darkening during cooking.
How do I know when my jam is fully cooked?
The wrinkle test is a reliable way to check for doneness. When a small spoonful cools and wrinkles upon touching it, the jam has reached the proper thickness and can be removed from heat.
Can I skip the cinnamon in the Easy Plum Jam Recipe?
Absolutely! The cinnamon is optional and adds a warm note, but the jam will be just as delicious without it, allowing the pure plum flavor to shine.
How long does homemade plum jam last?
When stored properly in sterilized jars in the refrigerator, homemade plum jam lasts up to three weeks. Freezing can extend its shelf life further, maintaining quality and flavor.
Final Thoughts
I can’t recommend this Easy Plum Jam Recipe enough for anyone who wants to savor the wonderful flavors of summer plums all year round. It’s simple to make, delivers delicious results, and promises to become a treasured staple in your kitchen. Give it a try, and you’ll see how rewarding homemade jam can be!
“`
Print
Easy Plum Jam Recipe
- Prep Time: 15 minutes
- Cook Time: 30 minutes
- Total Time: 45 minutes
- Yield: About 3 cups (48 tablespoons) of plum jam
- Category: Jam / Preserve
- Method: Stovetop
- Cuisine: American
Description
This easy plum jam recipe transforms fresh, ripe plums into a luscious, homemade preserve perfect for spreading on toast or adding to desserts. With simple ingredients and straightforward steps, you can enjoy the natural sweetness and rich flavors of plum jam made from scratch.
Ingredients
Ingredients
- 2 pounds fresh plums, pitted and chopped
- 1 1/2 cups granulated sugar
- 1 tablespoon lemon juice
- 1/4 teaspoon ground cinnamon (optional)
Instructions
- Prepare the Plums: Wash the plums thoroughly, then pit and chop them into small pieces to prepare for cooking.
- Combine Ingredients: In a large saucepan, mix the chopped plums, granulated sugar, and lemon juice together. Allow the mixture to sit for 15 minutes so the sugar begins to dissolve and the plums release their juices.
- Cook the Jam: Bring the mixture to a boil over medium heat, stirring frequently to avoid sticking. Once boiling, reduce the heat and simmer for 25-30 minutes, stirring occasionally. If you prefer a smoother jam, mash the fruit directly in the pot or use a blender carefully at this stage.
- Test Consistency: To check if the jam is ready, perform the wrinkle test. Spoon a small amount onto a chilled plate and let it cool for a minute; push the jam with your finger—if it wrinkles, it has reached the proper consistency. If not, continue cooking a few minutes longer and test again.
- Cool and Store: Remove the pot from heat, let the jam cool slightly, then transfer it into sterilized jars. Seal the jars and allow the jam to cool completely at room temperature before refrigerating for storage.
Notes
- Using ripe plums will enhance the natural sweetness and flavor of the jam.
- The optional ground cinnamon adds a warm note but can be omitted if desired.
- Ensure jars are sterilized to prevent spoilage and extend shelf life.
- This jam can be stored in the refrigerator for up to 3 weeks.
- For longer storage, consider canning the jars using proper water bath methods.


