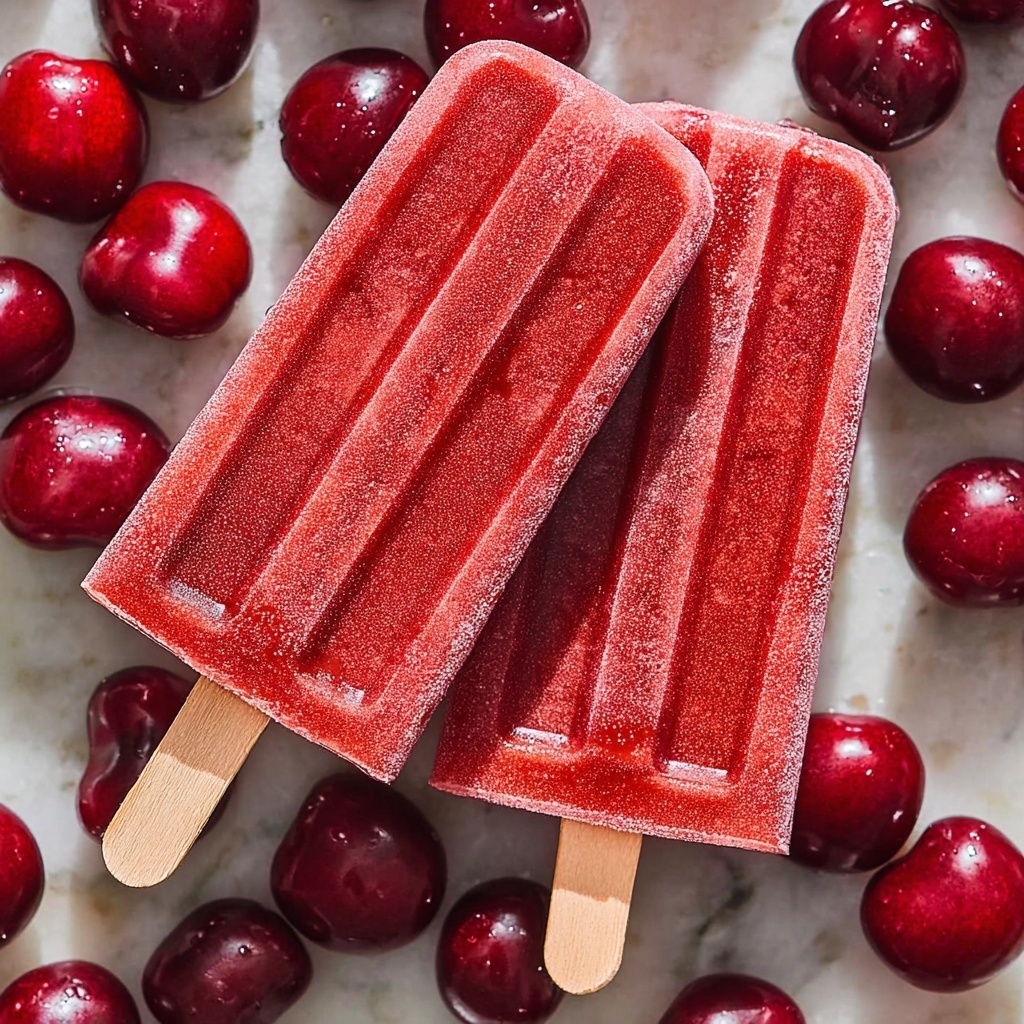
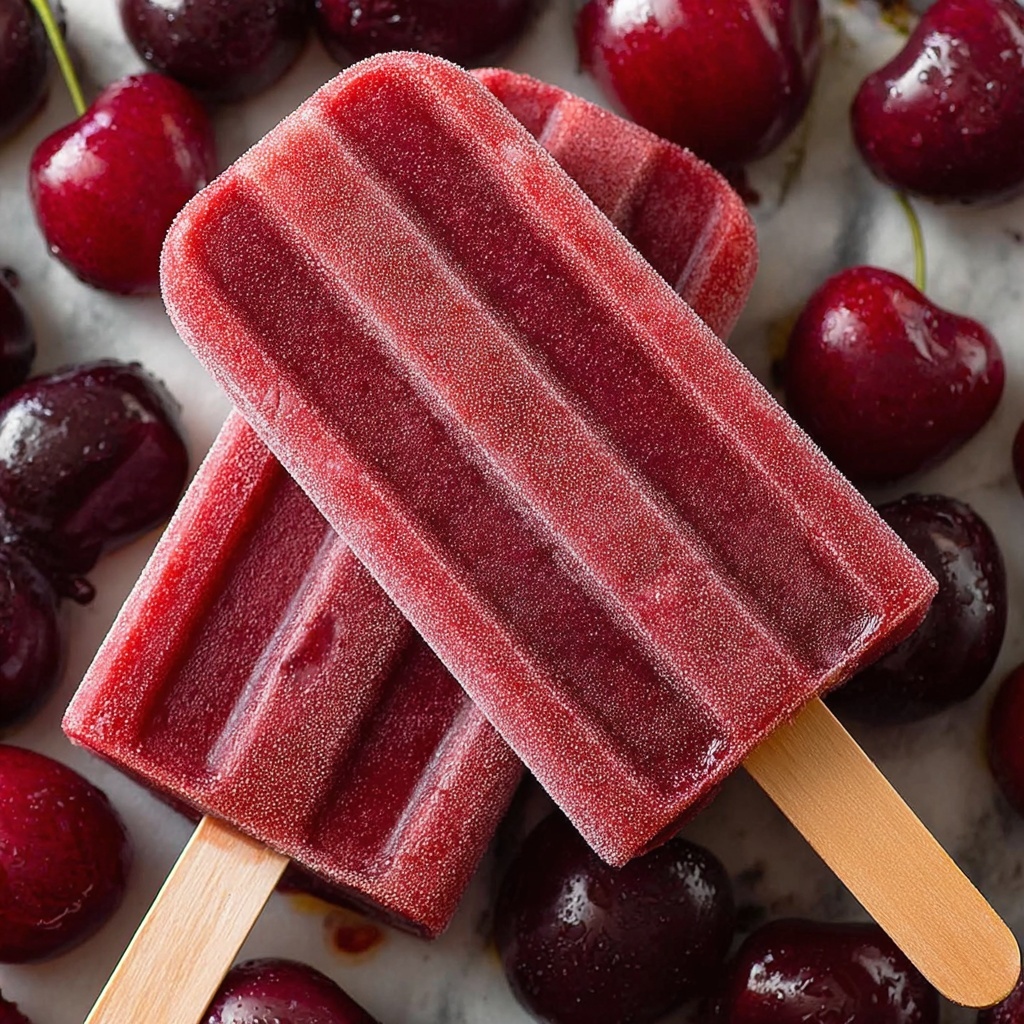
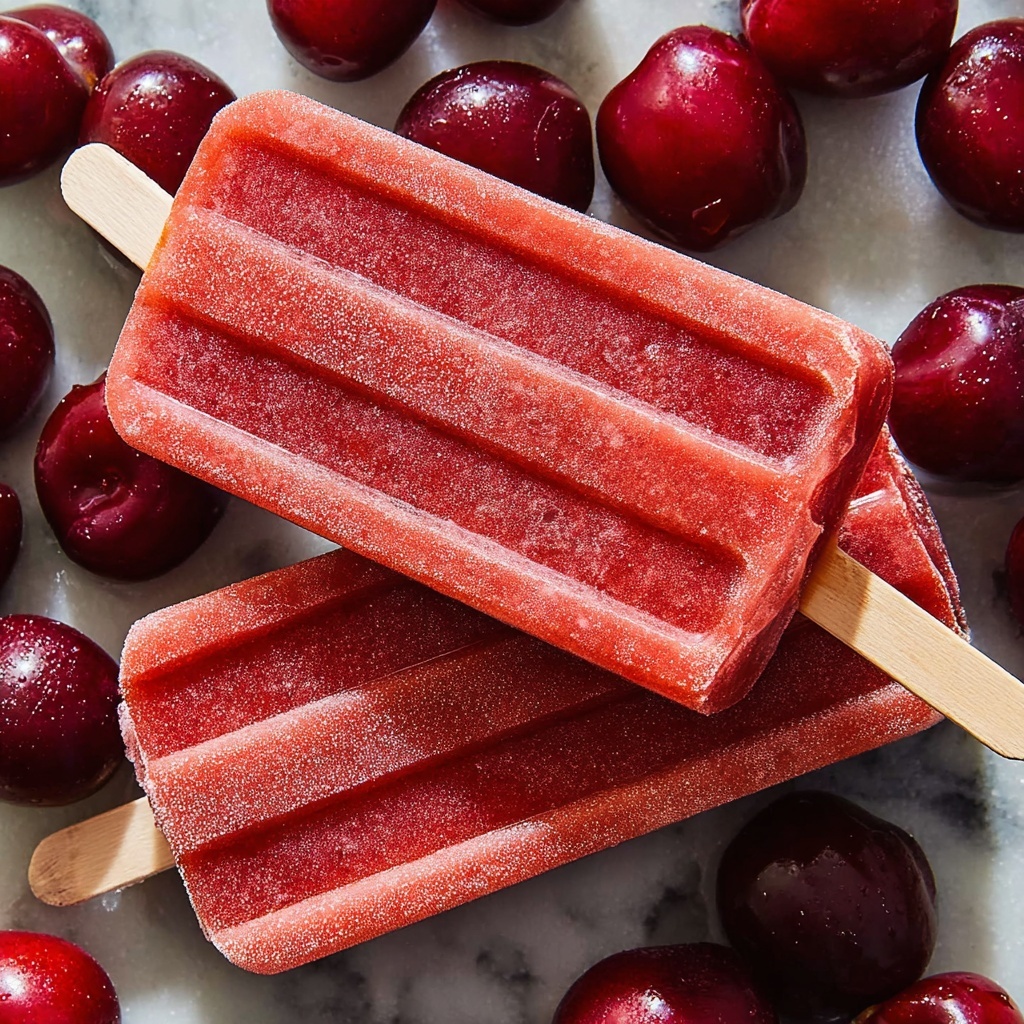
If you’ve been on the hunt for a refreshing treat that’s as simple to make as it is delicious, look no further than this Homemade Cherry Ice Pops Recipe. Bursting with vibrant cherry flavor, these ice pops blend just a few wholesome ingredients into a naturally sweet, icy snack that’s perfect for cooling off on a sunny day or delighting kids and adults alike. No artificial colors or preservatives—just pure, fruity bliss you can feel good about. Trust me, once you taste how fresh and juicy these pops are, they’ll quickly become a summertime staple in your home.
Ingredients You’ll Need
The beauty of this Homemade Cherry Ice Pops Recipe lies in its simplicity. Each ingredient plays a crucial role in creating that perfect balance of sweetness, texture, and bold cherry color, resulting in a treat that’s both satisfying and naturally vibrant.
- Frozen cherries: These provide the intense cherry flavor and a rich, beautiful red hue that’s irresistible.
- Water: Essential to help blend the cherries smoothly and create the icy consistency of the pops.
- Honey (or alternative sweeteners): Just a touch to enhance natural sweetness without overpowering the fresh cherry taste; feel free to swap with agave syrup, maple syrup, or sugar.
How to Make Homemade Cherry Ice Pops Recipe
Step 1: Blend the Ingredients
Grab your high-speed blender and combine the frozen cherries, water, and your chosen sweetener. Blitz until ultra smooth and creamy, making sure there are no large chunks left. This mixture is your cherry goodness ready to transform into ice pops.
Step 2: Pour into Molds
Carefully pour the luscious cherry mixture into your ice pop molds, but remember to leave a little space at the top for the liquid to expand when freezing. This ensures your pops don’t overflow or crack.
Step 3: Freeze for Firmness
Pop the molds into the freezer for at least four hours, or even better, overnight. This guarantees your Homemade Cherry Ice Pops Recipe will be perfectly firm and ready to enjoy whenever you crave a chilled, fruity bite.
Step 4: Unmold and Enjoy
When it’s time to serve, run warm water briefly over the outside of the molds to loosen the ice pops. Then, gently wiggle them out and get ready to savor that delicious, refreshing cherry treat.
How to Serve Homemade Cherry Ice Pops Recipe
Garnishes
Sprinkle a few fresh mint leaves on the side or serve with a small bowl of fresh cherries to elevate the presentation and add a pop of freshness that complements the icy sweetness perfectly.
Side Dishes
These ice pops pair wonderfully with a light, summery fruit salad or a fluffy scoop of vanilla yogurt for dipping, balancing creamy richness with bright, fruity flavors.
Creative Ways to Present
Try layering the cherry mixture with swirls of Greek yogurt before freezing for a beautiful marbled effect. Or embed tiny whole cherries inside the molds for a fun surprise inside your Homemade Cherry Ice Pops Recipe.
Make Ahead and Storage
Storing Leftovers
If you happen to have some ice pops left after your first round, keep them in an airtight container or sealed plastic bag in the freezer to prevent freezer burn and preserve their fresh flavor.
Freezing
These pops freeze exceptionally well, making them a fantastic make-ahead treat. Just ensure your molds are covered or stored in a secure place so they keep their shape and delicious taste.
Reheating
Since these are ice pops, reheating is not necessary. Instead, rely on the simple trick of running warm water on the mold to unmold the pops easily and enjoy chilled every time.
FAQs
Can I use fresh cherries instead of frozen?
Absolutely! Fresh cherries work well but you might need to add some ice cubes or chill the mixture longer to achieve the perfect icy pop consistency.
What if I don’t have ice pop molds?
You can use small paper cups or a silicone muffin tray with popsicle sticks inserted once partially frozen to create a similar treat.
Can I make these sugar-free?
Yes! You can omit the sweetener entirely or use a sugar substitute like stevia to keep them naturally sweet yet suitable for lower sugar diets.
How long do Homemade Cherry Ice Pops Recipe last in the freezer?
For the best taste and texture, consume them within 2-3 weeks, though they can safely stay frozen for up to 2 months.
Can I customize the flavor?
Definitely! Mix in other berries like blueberries or raspberries for a mixed fruit version, or add a splash of lemon juice for a zesty twist.
Final Thoughts
Making these Homemade Cherry Ice Pops Recipe is such a joyful and effortless way to enjoy fresh, fruity treats any time you please. They’re sweet, vibrant, and downright refreshing—a perfect way to bring a little summer magic to your day. I can’t wait for you to try making them and watch how quickly they disappear!
Print
Homemade Cherry Ice Pops Recipe
- Prep Time: 5 minutes
- Cook Time: 0 minutes
- Total Time: 4 hours 5 minutes
- Yield: 6 ice pops (approximately 6 servings)
- Category: Dessert
- Method: No-Cook
- Cuisine: American
- Diet: Vegan
Description
This homemade cherry ice pops recipe is a refreshing and naturally sweet frozen treat made with frozen cherries, water, and a touch of honey or your preferred sweetener. Perfect for hot days, these ice pops are easy to prepare and require no cooking, delivering a deliciously fruity and cooling snack for all ages.
Ingredients
Ingredients
- 2 cups frozen cherries
- 1 cup water
- 1–2 teaspoons honey (or agave syrup, maple syrup, or sugar)
Instructions
- Blend the ingredients: In a high-speed blender, combine the frozen cherries, water, and your choice of sweetener until the mixture is smooth and well combined.
- Pour into molds: Carefully pour the blended cherry mixture into ice pop molds, leaving some space at the top of each mold to allow for expansion as they freeze.
- Freeze the pops: Place the molds in the freezer and freeze for at least 4 hours or preferably overnight to ensure the ice pops are firm and fully set.
- Remove and serve: When ready to serve, run warm water over the outside of the molds briefly to loosen the ice pops, then gently remove them from the molds and enjoy.
Notes
- Adjust the sweetness to your preference by adding more or less honey or alternative sweeteners.
- You can substitute frozen cherries with other frozen berries or fruits for different flavors.
- If you don’t have ice pop molds, small paper cups and popsicle sticks can be used as a substitute.
- Running warm water over the mold briefly helps release the ice pops easily without melting them too much.
- These ice pops are naturally dairy-free and vegan-friendly if agave syrup or maple syrup is used as the sweetener.


