
“`html
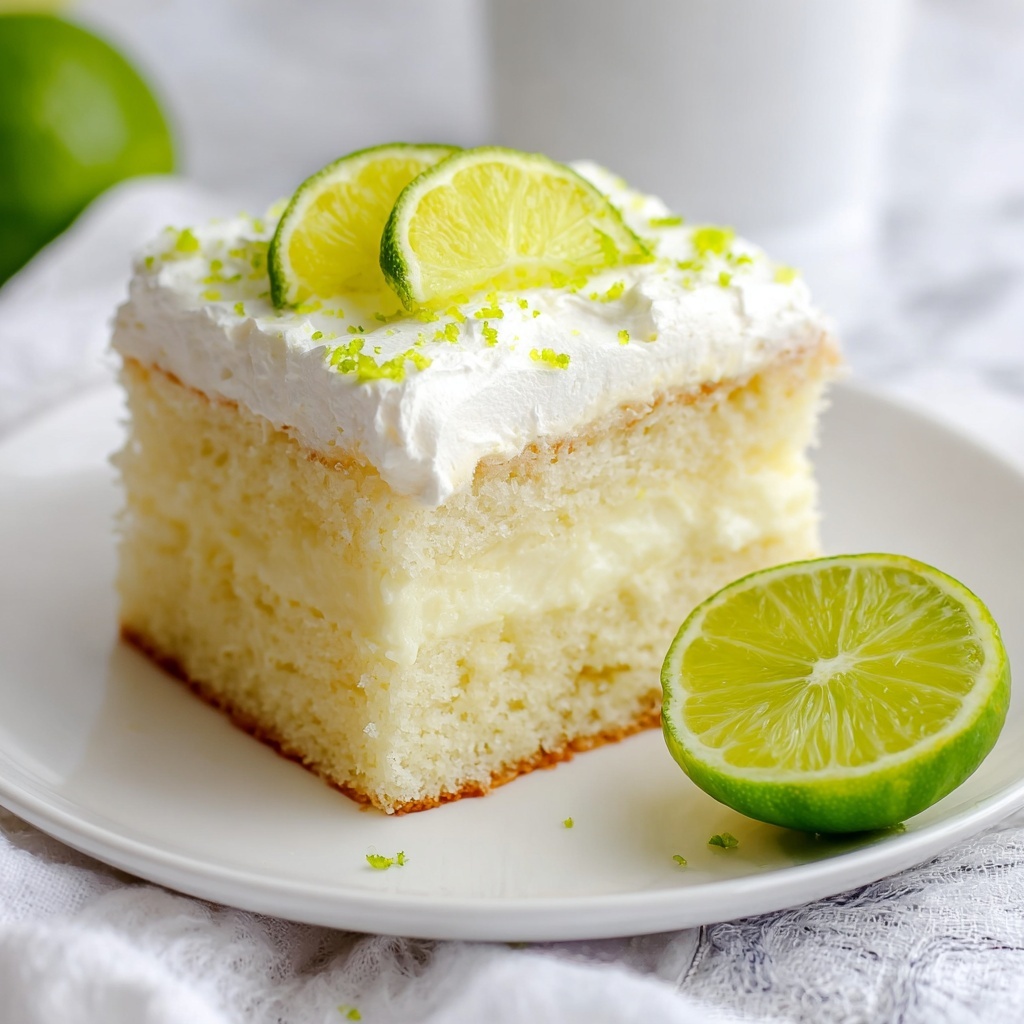
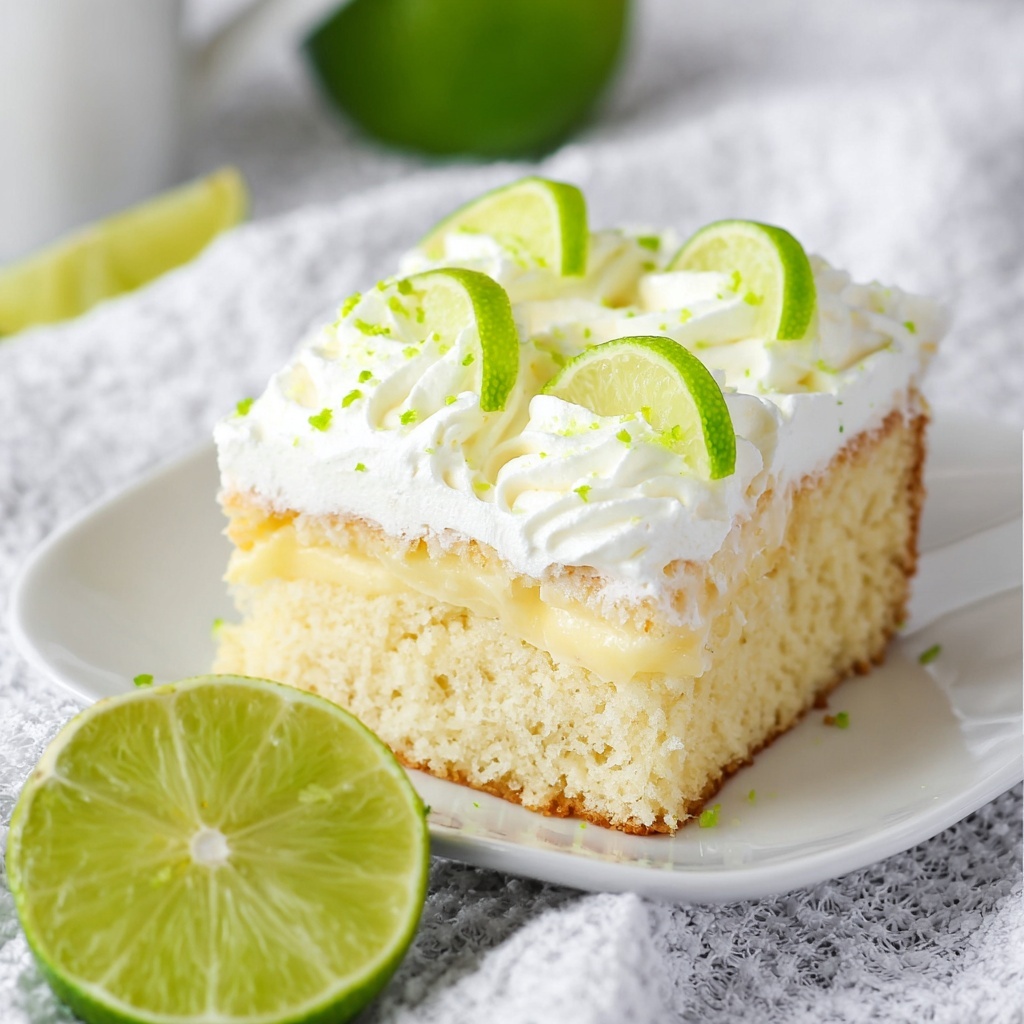
If you’re craving a dessert that perfectly captures the bright, tangy essence of fresh limes with a moist, melt-in-your-mouth texture, this Key Lime Poke Cake Recipe is your new best friend. Imagine a luscious white cake, baked to golden perfection, then “poked” and soaked with a creamy, zesty lime filling that bursts with flavor in every bite. It’s sweet, tart, and incredibly refreshing—a truly delightful treat that’s easier to make than you’d think and guaranteed to impress anyone lucky enough to try it.
Ingredients You’ll Need
The magic of this Key Lime Poke Cake Recipe lies in its simple yet essential ingredients, each carefully chosen to build layers of flavor and texture. From the fluffy cake base to the creamy lime-infused filling and the light whipped topping, every element paints a perfect picture of classic zestiness and indulgence.
- 1 15.25 ounce box white cake mix: Provides a tender, fluffy base that is subtly sweet and perfect for soaking up the lime filling.
- 3 eggs: Adds moisture and structure to give the cake its soft crumb.
- 1/2 cup vegetable oil: Keeps the cake moist and rich without overpowering its light flavor.
- 3/4 cup water: Keeps the batter smooth and helps create the perfect texture.
- 1 14 oz can sweetened condensed milk: The soul of the filling—adds creaminess and sweetness while blending beautifully with lime juice.
- ¾ cup whipping cream: Gives the filling a luscious creaminess and light texture.
- ½ cup Key lime juice: The star ingredient, delivering that authentic, tangy lime flavor that defines this recipe.
- 1 teaspoon grated lime peel: Infuses fresh citrus oils for vibrant aroma and extra zing.
- Neon green food coloring: A fun touch to visually enhance the vivid lime theme (optional but festive!).
- 1 8 oz container whipped topping: Creates a fluffy, cloud-like layer that balances the tangy filling with just the right sweetness.
- Lime zest and slices for garnish: Adds a fresh, pretty finishing touch that’s as inviting to the eyes as it is to the palate.
How to Make Key Lime Poke Cake Recipe
Step 1: Prepare the Oven and Pan
Start by preheating your oven to 350 degrees Fahrenheit. Greasing a 9×13 inch baking dish ensures your cake releases easily after baking without sticking.
Step 2: Mix the Cake Batter
In a large bowl, whisk together the white cake mix, eggs, vegetable oil, and water. This combination creates a smooth, luscious batter that will bake into a perfectly tender cake base.
Step 3: Bake the Cake
Pour your batter into the prepared pan and bake for 25 to 30 minutes. Keep an eye on it, but your cake is ready when a toothpick inserted in the center comes out clean—moist crumbs are a good sign!
Step 4: Poke and Prepare the Filling
Once your cake has cooled slightly, use a large straw or the end of a wooden spoon to poke holes all over the surface. This technique allows the luscious filling to soak deeply into the cake, ensuring every bite bursts with zesty moisture.
Step 5: Make the Key Lime Filling
In a large mixing bowl, whisk together the sweetened condensed milk, fresh Key lime juice, whipping cream, lime zest, and a few drops of neon green food coloring if you’d like a bright, fun color. This tangy filling is what makes the cake truly unforgettable.
Step 6: Pour the Filling and Add Whipped Topping
Slowly pour the filling over the cake, using a spoon to press the liquid into all the holes you poked earlier. Then spread a smooth layer of whipped topping evenly across the cake’s surface, creating a cool, creamy cap that balances all the bright lime flavors.
Step 7: Garnish and Chill
Sprinkle additional lime zest over the whipped topping for a fresh burst of citrus aroma. Refrigerate the cake for at least one hour before serving to allow the flavors to meld and the texture to perfectly set.
Step 8: Slice and Enjoy!
After chilling, slice your Key Lime Poke Cake Recipe into squares and serve. Get ready to delight in a slice of pure sunshine and creamy indulgence.
How to Serve Key Lime Poke Cake Recipe
Garnishes
Lime zest and fresh lime slices make for stunning, aromatic garnishes that not only bring a pop of color but also enhance the citrusy brightness of the cake. For added texture, consider sprinkling lightly toasted coconut flakes or finely chopped pistachios over the top before serving.
Side Dishes
This cake pairs wonderfully with light, refreshing accompaniments such as fresh berries, a simple mixed green salad with citrus vinaigrette, or even a scoop of cool vanilla ice cream if you’re in the mood for something extra indulgent. The goal is to complement the lime’s tang without overpowering it.
Creative Ways to Present
For a festive touch, serve individual portions in clear dessert cups layered with crushed graham crackers and a dollop of whipped cream for a poke cake parfait twist. Alternatively, add edible flowers or mint leaves atop each slice for an elegant presentation perfect for special occasions.
Make Ahead and Storage
Storing Leftovers
Keep any leftover Key Lime Poke Cake Recipe covered tightly with plastic wrap or stored in an airtight container in the refrigerator. This will maintain its moisture and freshness for up to 3 days, making it perfect for prepping ahead or enjoying over several days.
Freezing
You can freeze this cake by first wrapping it carefully in plastic wrap then aluminum foil. Freeze for up to 1 month. When ready to enjoy, thaw overnight in the refrigerator and finish with fresh whipped topping and garnishes to retain the cake’s best texture.
Reheating
This cake is best served chilled, so reheating is not recommended. Instead, bring it to room temperature for 15–20 minutes if you prefer it less cold, but keep in mind the creamy filling shines brightest when cool and refreshing.
FAQs
Can I use regular lime juice instead of Key lime juice?
Absolutely! While Key lime juice gives the most authentic tangy flavor, regular lime juice can be a great substitute if that’s what you have on hand. Just keep in mind the flavor will be slightly different but still refreshing.
Is this cake very sweet or balanced?
This Key Lime Poke Cake Recipe strikes a beautiful balance between sweet and tart. The sweetened condensed milk and whipped topping provide sweetness, while the lime juice injects a bright, tangy contrast that keeps it lively and not overly sugary.
Can I make this recipe gluten-free?
Yes, by using a gluten-free white cake mix, you can enjoy this delicious dessert without gluten. Just be sure all other ingredients like toppings and mix-ins are gluten-free as well.
What can I use instead of whipped topping?
You can substitute whipped topping with homemade whipped cream or even mascarpone cheese for a richer variation. Both will blend beautifully with the lime flavors and add creamy texture.
How long should I chill the cake before serving?
Chilling for at least one hour is essential for the flavors to meld and the filling to set perfectly in the cake holes. Longer chilling, up to 4 hours, only improves the texture and taste, so feel free to prepare it a day ahead.
Final Thoughts
I cannot recommend this Key Lime Poke Cake Recipe enough—it’s one of those desserts that feels like a special occasion in every bite, yet it comes together so effortlessly. Whether you’re serving it at a summer gathering, a birthday, or just treating yourself, it’s guaranteed to bring smiles and happy sighs all around. Go ahead, grab those limes, and get started on a truly unforgettable dessert experience!
“`
Print
Key Lime Poke Cake Recipe
- Prep Time: 15 minutes
- Cook Time: 25 minutes
- Total Time: 40 minutes plus 1 hour chilling
- Yield: 12 servings
- Category: Dessert
- Method: Baking
- Cuisine: American
- Diet: Vegetarian
Description
This vibrant and tangy Key Lime Poke Cake is a refreshing twist on traditional poke cakes, featuring a moist white cake infused with a luscious blend of sweetened condensed milk, fresh Key lime juice, and whipped cream. Finished with whipped topping and garnished with lime zest and slices, this dessert is perfect for summer gatherings or anytime you crave a bright, citrusy treat.
Ingredients
Cake Ingredients
- 1 15.25 ounce box white cake mix
- 3 eggs
- 1/2 cup vegetable oil
- 3/4 cup water
Filling
- 1 14 oz can sweetened condensed milk
- 3/4 cup whipping cream
- 1/2 cup Key lime juice
- 1 teaspoon grated lime peel
- Neon green food coloring (a few drops)
Topping & Garnish
- 1 8 oz container whipped topping
- Lime zest and lime slices for garnish
Instructions
- Preheat Oven: Preheat your oven to 350 degrees Fahrenheit to prepare for baking the cake.
- Prepare Baking Dish: Grease a 9×13-inch baking dish thoroughly to prevent the cake from sticking.
- Mix Cake Batter: In a large bowl, whisk together the white cake mix, eggs, vegetable oil, and water according to the box instructions until smooth and well combined.
- Pour Batter: Pour the prepared batter evenly into the greased baking dish.
- Bake Cake: Bake for 25 to 30 minutes, or until a toothpick inserted into the center of the cake comes out clean, indicating it’s fully cooked.
- Cool Cake Slightly: Let the cake cool slightly to make it easier to poke holes without crumbs falling apart.
- Poke Holes: Using a large straw or the end of a wooden spoon, poke holes all over the surface of the cake to allow the filling to soak in.
- Prepare Filling: In a large mixing bowl, whisk together the sweetened condensed milk, Key lime juice, whipping cream, grated lime peel, and a few drops of neon green food coloring until smooth.
- Apply Filling: Pour the lime filling evenly over the cake, using a spoon to push the liquid into all the holes for maximum flavor absorption.
- Add Whipped Topping: Spread the container of whipped topping evenly over the entire surface of the cake for a creamy finish.
- Garnish: Sprinkle additional lime zest and decorate with fresh lime slices on top for a vibrant and decorative finish.
- Chill: Refrigerate the cake for at least 1 hour to allow the flavors to meld and the filling to set.
- Serve: Once chilled, slice the cake into 12 servings and enjoy your refreshing Key Lime Poke Cake!
Notes
- To get the best Key lime flavor, use fresh Key lime juice if possible.
- If you prefer a less sweet cake, reduce the amount of sweetened condensed milk by a couple of tablespoons.
- The neon green food coloring is optional but adds a fun and festive look to the filling.
- Make sure to refrigerate the cake long enough so the filling fully absorbs and the cake is nicely chilled before serving.
- This cake stores well in the refrigerator for up to 3 days.


