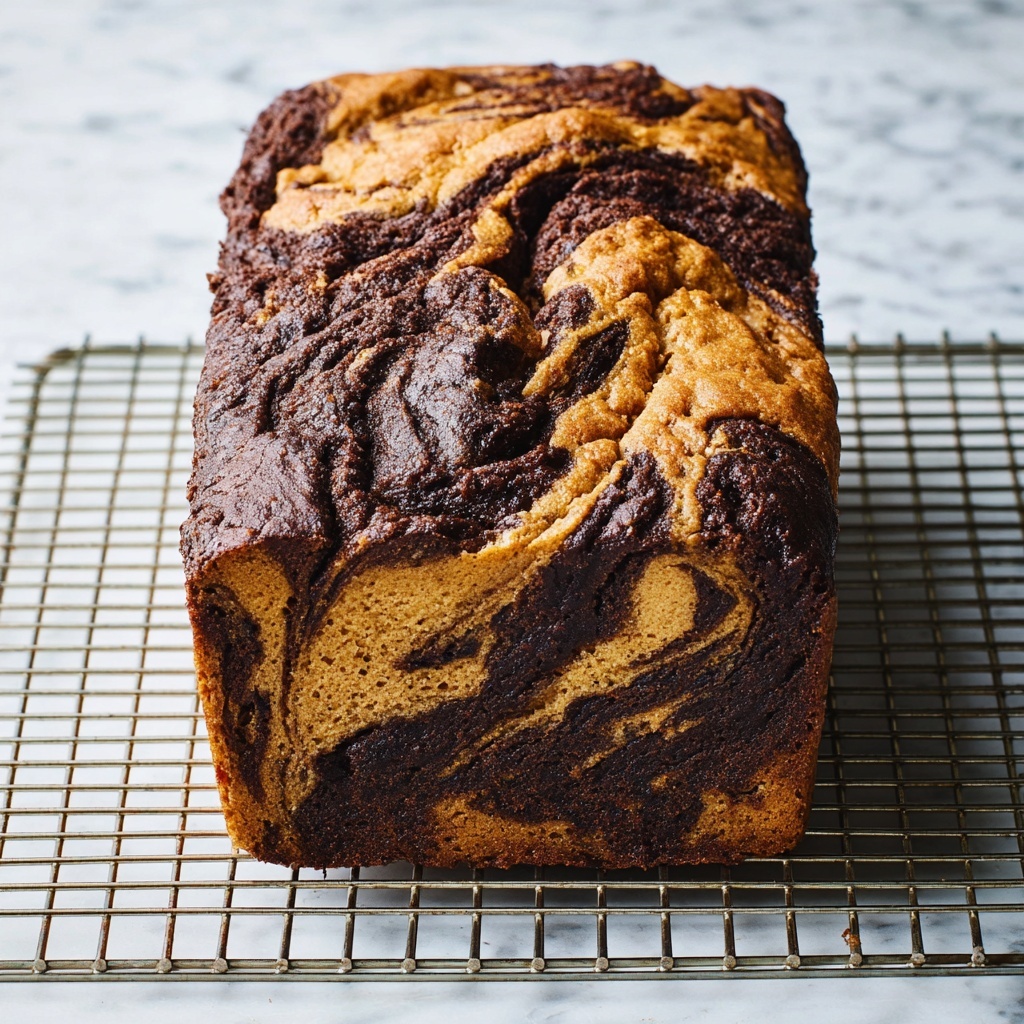
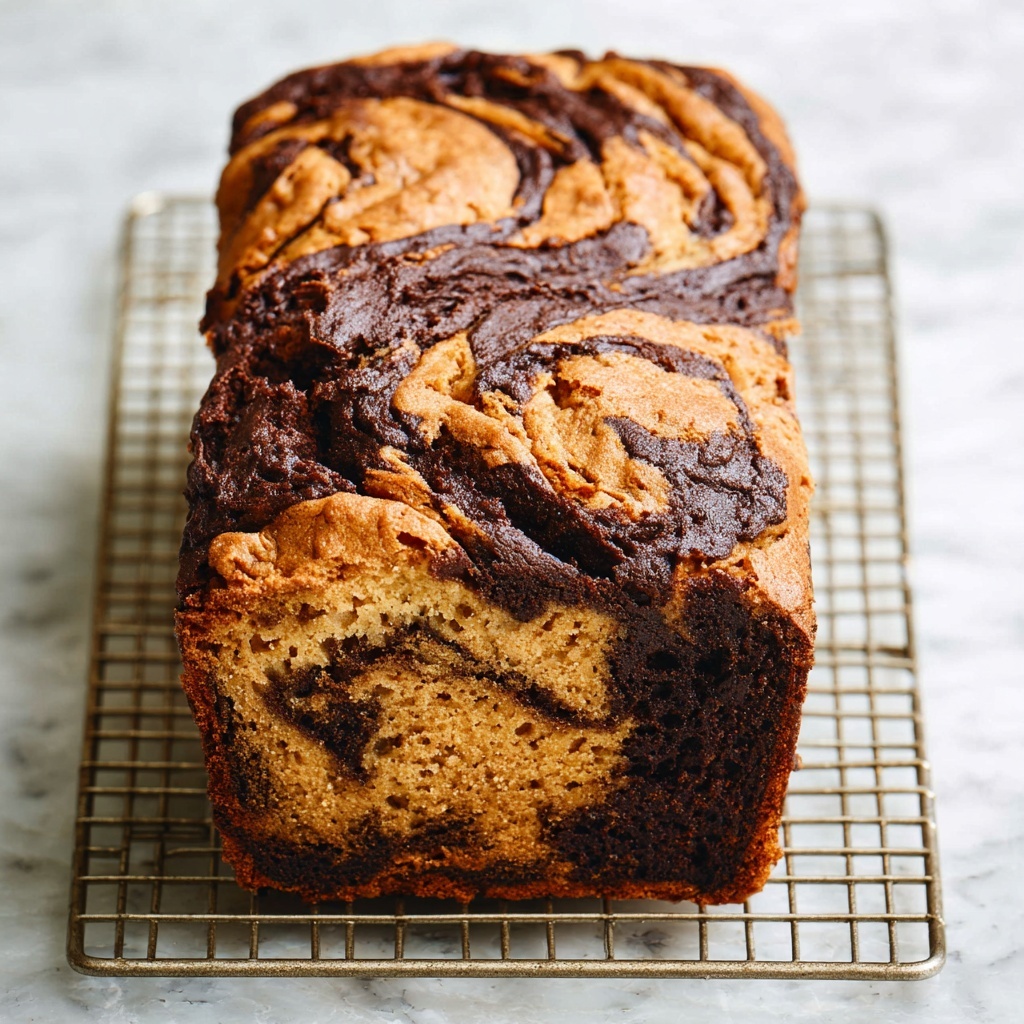
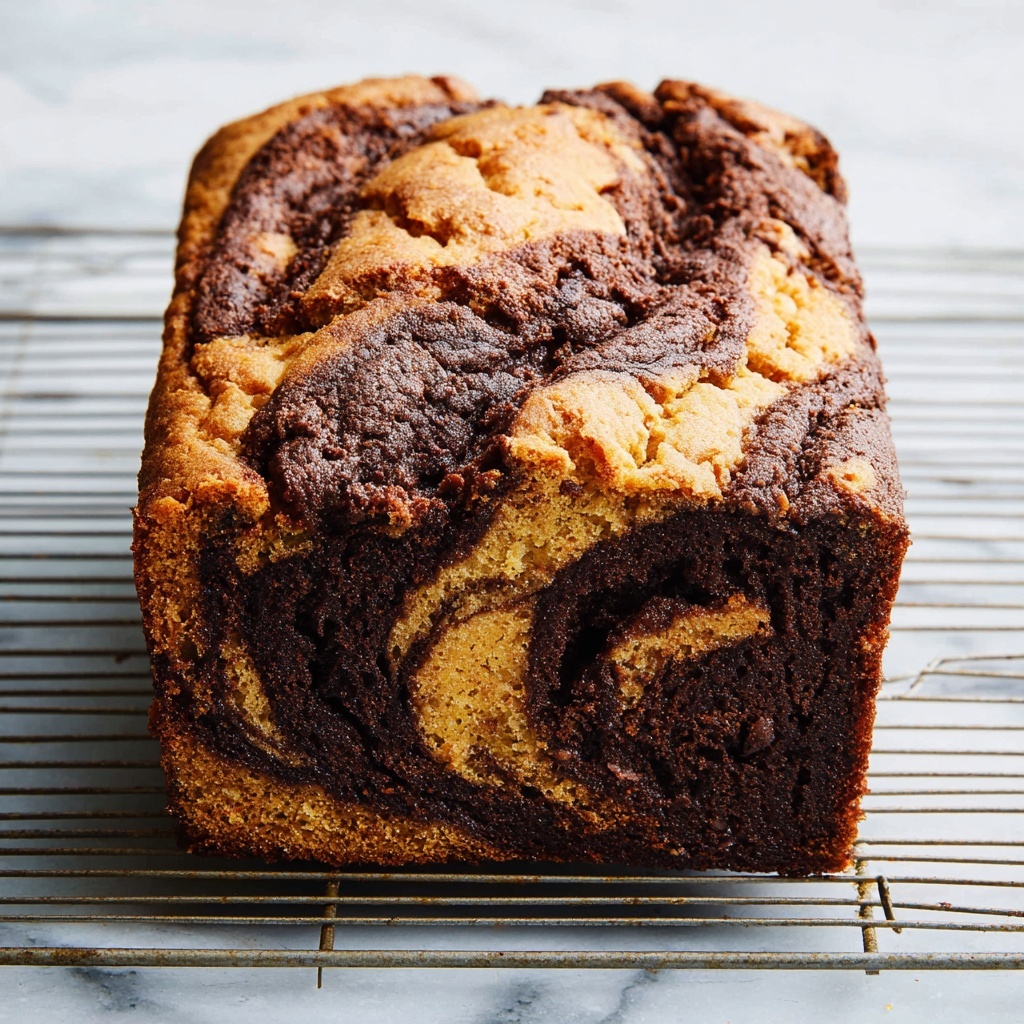
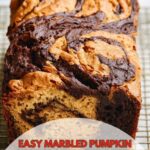
If you’re craving the perfect blend of festive warmth and decadent chocolate, this Marbled Chocolate Pumpkin Bread Recipe is exactly what you need. It combines the rich earthiness of pumpkin with the deep, comforting flavor of cocoa into a gorgeous marbled loaf that’s as beautiful as it is delicious. Whether you’re baking for autumn gatherings or simply want a treat that feels like a big, cozy hug, this bread will quickly become your go-to favorite. The moist texture, spiced aroma, and chocolate swirls make every bite an absolute delight that’s hard to resist.
Ingredients You’ll Need
To whip up this Marbled Chocolate Pumpkin Bread Recipe, you’ll rely on a handful of simple, trustworthy pantry staples. Each ingredient plays its own starring role in creating that perfect balance of flavor, texture, and color — making the bread both moist and eye-catching.
- Butter (1/2 cup, melted): Adds richness and keeps the bread wonderfully tender.
- Sugar (1 cup): Sweetens the loaf and helps create a lovely golden crust during baking.
- Eggs (2): Bind everything together while adding structure and moisture.
- Pumpkin puree (15 ounces): Brings moistness along with that signature autumnal flavor and beautiful orange tint.
- Flour (2 3/4 cups, divided): The foundation for the bread’s structure and crumb.
- Whole milk (1 cup): Adds moisture and a slight creaminess, balancing the dry ingredients.
- Lemon juice (1 tablespoon): Enhances flavor complexity and reacts with the leaveners to give rise.
- Baking powder (1 1/2 teaspoons): Helps the bread rise with a light, airy crumb.
- Baking soda (1 1/2 teaspoons): Works with acidic components to create lift and tenderness.
- Cinnamon (3 teaspoons): Delivers warm, spicy notes that complement pumpkin perfectly.
- Ground cloves (1/2 teaspoon): Adds a subtle hint of bold spice depth.
- Nutmeg (1/2 teaspoon): Enhances the warm spice character with a nutty, sweet flavor.
- Ground ginger (1/2 teaspoon): Brings a gentle zing to elevate the pumpkin spices.
- Salt (1/2 teaspoon): Balances the sweetness and intensifies other flavors.
- Cocoa powder (1/2 cup): Creates the luscious chocolate swirl and adds richness with a hint of bitterness.
How to Make Marbled Chocolate Pumpkin Bread Recipe
Step 1: Preheat and Prepare
Start by preheating your oven to 350 degrees Fahrenheit. This ensures the oven is the perfect temperature when your batter is ready. Prepare two loaf pans by buttering them lightly; this will prevent sticking and help your bread come out beautifully smooth.
Step 2: Combine Butter and Sugar
In a large bowl, stir together the melted butter and sugar briskly until fully combined. This mixture is the key to a tender crumb and sets the stage for the rich flavors to come.
Step 3: Incorporate Eggs
Add the eggs one at a time, stirring well after each addition. Eggs provide structure and moisture, helping to hold everything together while keeping the bread soft.
Step 4: Mix in Pumpkin Puree
Blend in the pumpkin puree until the batter is smooth and uniform. This ingredient not only provides moisture but also imparts that irresistible pumpkin flavor and moist texture that defines this bread.
Step 5: Prepare Milk and Lemon Juice Mixture
In a smaller bowl, combine the milk and lemon juice. The lemon juice adds a slight acidity that reacts with the leavening agents to help your bread rise perfectly and enhances flavor complexity.
Step 6: Alternate Adding Flour and Milk Mixture
Reserve half a cup of the flour for later use with cocoa powder. To the main batter, gradually add the remaining flour alternated with the milk and lemon juice mixture. This step ensures a smooth, well-incorporated batter without lumps.
Step 7: Add Spices and Leaveners
Mix in baking powder, baking soda, cinnamon, cloves, nutmeg, ginger, and salt until everything is fully combined. These spices build that classic pumpkin bread warmth and flavor, while the leaveners give the loaf its perfect rise.
Step 8: Divide Batter
Transfer half of the batter to a second large bowl. Don’t worry about exact measurements—eyeballing is perfectly fine for this step.
Step 9: Create Chocolate Batter
Add the reserved 1/2 cup of flour into one bowl and cocoa powder to the other bowl, stirring each until smooth. This forms the two batters that you’ll swirl together to create the marbled effect.
Step 10: Layer the Batter in Loaf Pans
Begin spooning alternating dollops of pumpkin and chocolate batter into the prepared loaf pans. Layer once, then add a second alternating layer on top. The striking contrast of the batters is what makes this bread such a showstopper.
Step 11: Marble the Batter
Use a small spatula or knife to gently swirl through the batters in a figure 8 pattern twice. This technique creates the beautiful marble look without overmixing, so each slice looks as stunning as it tastes.
Step 12: Bake to Perfection
Bake for 65 to 75 minutes, or until a toothpick inserted in the center comes out clean. Baking low and slow ensures the bread cooks evenly and stays wonderfully moist.
Step 13: Cool Before Serving
Once out of the oven, let the loaves cool on a wire rack for about 10 minutes before gently removing them from the pans. This resting period lets the structure set nicely, making slicing easier and cleaner.
How to Serve Marbled Chocolate Pumpkin Bread Recipe
Garnishes
A light dusting of powdered sugar or a drizzle of cream cheese glaze can elevate the Marbled Chocolate Pumpkin Bread Recipe to an elegant treat. For a cozy touch, serve with a pat of softened butter or a smear of whipped honey butter that melts into each warm slice.
Side Dishes
This bread is wonderful on its own but pairs beautifully with a hot cup of chai tea, coffee, or even a creamy latte. For a heartier brunch, serve alongside scrambled eggs or roasted autumn fruits for a comforting spread.
Creative Ways to Present
For parties or gifts, cut the bread into thick slices and stack them on a festive platter with sprigs of fresh rosemary or cinnamon sticks. You can also slice and toast pieces, then top them with mascarpone and a sprinkle of chopped toasted nuts for a fun twist.
Make Ahead and Storage
Storing Leftovers
Keep your Marbled Chocolate Pumpkin Bread Recipe fresh by storing leftovers in an airtight container at room temperature for up to 3 days. For longer freshness, refrigeration is fine but be sure to bring slices to room temperature before serving.
Freezing
This bread freezes beautifully. Wrap it tightly in plastic wrap and then in aluminum foil, or place slices in a freezer-safe bag. Freeze for up to 3 months, then thaw overnight in the fridge or at room temperature for several hours before enjoying.
Reheating
Warm slices gently in a toaster oven or microwave for 15-20 seconds to revive the soft, moist texture. A quick warm-up enhances the flavors and melts any butter or toppings you choose to add.
FAQs
Can I use canned pumpkin pie filling instead of pumpkin puree?
It’s best to stick with plain pumpkin puree, as the pie filling contains added spices and sugars which can throw off the balance of flavors and sweetness in this Marbled Chocolate Pumpkin Bread Recipe.
What if I don’t have cocoa powder? Can I substitute it?
If you don’t have cocoa powder, you can’t quite replicate the chocolate swirl effect, but you could try melted chocolate chips mixed into half the batter for a different but delicious chocolate touch.
Can I make this recipe vegan?
To make this Marbled Chocolate Pumpkin Bread Recipe vegan, substitute the butter for plant-based butter, use a flax egg or chia egg in place of eggs, and swap the milk for any plant-based milk. The texture may vary slightly, but it will still be wonderful.
Why is lemon juice added to the batter?
The lemon juice adds acidity which reacts with the baking soda to help the bread rise nicely. It also brightens the flavors, balancing the sweetness and enhancing the pumpkin spice notes.
How long will this bread stay fresh at room temperature?
Stored in a covered container, your Marbled Chocolate Pumpkin Bread Recipe should stay fresh and moist for about 3 days at room temperature before it starts to dry out.
Final Thoughts
You really can’t beat the cozy, spiced comforts of this Marbled Chocolate Pumpkin Bread Recipe. It’s a beautiful and delicious way to bring pumpkin and chocolate together in one unforgettable loaf. Whether you’re sharing it with loved ones or keeping it all to yourself, it promises happiness with every bite. Give it a try soon and savor the magic of homemade pumpkin bread like never before!
Print
Marbled Chocolate Pumpkin Bread Recipe
- Prep Time: 20 minutes
- Cook Time: 1 hour 5 minutes
- Total Time: 1 hour 25 minutes
- Yield: 2 loaves
- Category: Bread
- Method: Baking
- Cuisine: American
Description
This Marbled Chocolate Pumpkin Bread is a delightful blend of rich chocolate and spiced pumpkin flavors, perfect for fall or any time you crave a moist, flavorful quick bread. The marbling technique creates an attractive swirl pattern, making each slice visually stunning and delicious. With warming spices and a tender crumb, this bread is ideal for breakfast, snacks, or dessert.
Ingredients
Wet Ingredients
- 1 stick (1/2 cup) butter, melted
- 1 cup sugar
- 2 eggs
- 1 can (15 ounces) pumpkin puree
- 1 cup whole milk
- 1 tablespoon lemon juice
Dry Ingredients
- 2 3/4 cups all-purpose flour, divided
- 1 1/2 teaspoons baking powder
- 1 1/2 teaspoons baking soda
- 3 teaspoons ground cinnamon
- 1/2 teaspoon ground cloves
- 1/2 teaspoon ground nutmeg
- 1/2 teaspoon ground ginger
- 1/2 teaspoon salt
- 1/2 cup cocoa powder
Instructions
- Preheat Oven: Preheat your oven to 350 degrees Fahrenheit to ensure it’s hot and ready for baking the bread.
- Mix Butter and Sugar: In a large bowl, combine the melted butter and sugar. Stir briskly until the mixture is well combined and slightly creamy.
- Add Eggs: Crack in the eggs and stir thoroughly until fully incorporated into the butter and sugar mixture.
- Add Pumpkin Puree: Mix in the pumpkin puree until the batter is smooth and consistent.
- Prepare Milk and Lemon Juice: In a small bowl, combine the lemon juice and whole milk; this acts as a buttermilk substitute for tenderness.
- Add Flour and Milk Mixture: Reserve 1/2 cup of the flour to use later with cocoa. Gradually add the remaining flour alternately with the milk-lemon mixture, stirring gently as you go to combine.
- Add Spices and Leavening: Stir in baking soda, baking powder, cinnamon, cloves, nutmeg, ginger, and salt until fully incorporated.
- Divide Batter: Split the batter into two roughly equal portions, placing each into separate large bowls.
- Mix Cocoa Batter: To one bowl, add the reserved 1/2 cup flour and the cocoa powder; mix well until the batter is uniform and chocolatey.
- Prepare Pans: Butter two 1-pound loaf pans, approximately 8 1/2 by 4 1/2 inches, to prevent sticking.
- Layer Batters: Spoon alternating spoonfuls of the pumpkin and chocolate batters into each pan, creating layers. Add a second alternating layer on top.
- Create Marble Effect: Using a small spatula or knife, swirl through the batter in each pan in a figure 8 pattern twice to create beautiful marbling.
- Bake Bread: Place the pans in the preheated oven and bake for 65 to 75 minutes, or until a toothpick inserted in the center comes out clean.
- Cool Bread: Remove the pans from the oven and cool on a wire rack for 10 minutes before carefully removing the loaves from the pans.
- Store: Once fully cooled, store the bread in a covered container. It can be frozen for longer storage as well.
Notes
- Make sure to alternate adding flour and milk mixture gradually to prevent lumps in the batter.
- Eyeballing the batter division is acceptable; exact measurements are not critical for marbling effect.
- Ensure the loaf pans are well buttered to ease removal of the bread after baking.
- Use a toothpick to test doneness; if it comes out clean, the bread is fully baked.
- Let the bread cool slightly before removing from the pan to prevent breaking.
- This bread freezes well; wrap tightly in plastic wrap and foil before freezing.

