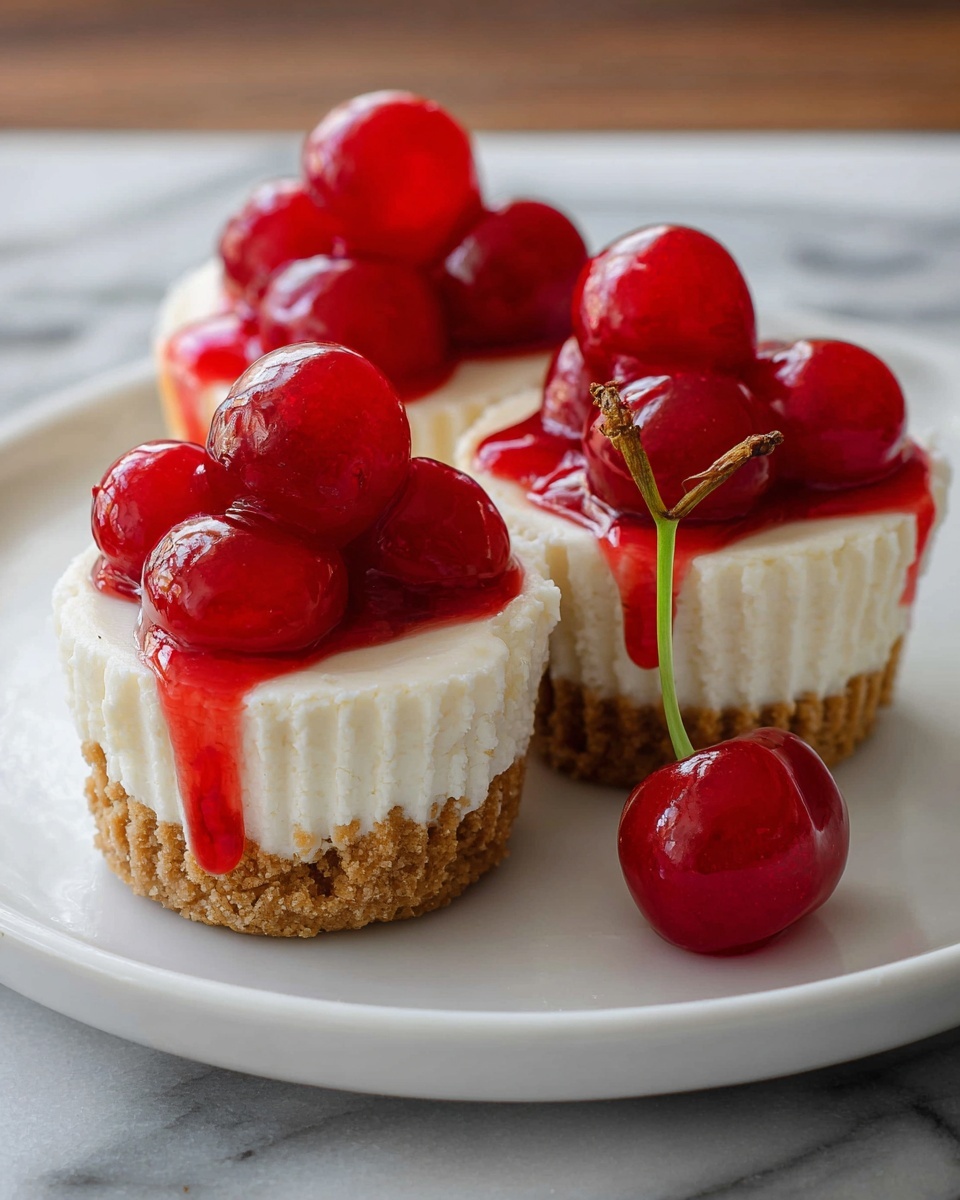
If you’re craving a dessert that’s elegant, delicious, and incredibly easy to make, these No Bake Mini Cheesecakes with Cherry Topping Recipe are exactly what you need. These little delights combine a buttery graham cracker crust with a luxuriously smooth, tangy cream cheese filling topped with a vibrant cherry sauce that adds just the right pop of sweetness and color. Perfect for when you want something impressive without turning on the oven, these mini cheesecakes are a family favorite that vanish quickly at any gathering.
Ingredients You’ll Need
Don’t let the simplicity of the ingredients in this No Bake Mini Cheesecakes with Cherry Topping Recipe fool you. Each one plays a crucial role in creating the irresistible taste and texture that make these cheesecakes so unforgettable.
- Graham cracker crumbs: Provide the classic crunchy base that balances the soft cheesecake filling.
- Granulated sugar: Sweetens the crust and the filling just right to enhance every bite.
- Unsalted butter: Melted and mixed with crumbs to form the perfect buttery crust.
- Cream cheese: The star of the filling, delivers that creamy and tangy flavor we all love in cheesecakes.
- Sour cream: Adds a touch of smooth acidity to keep the filling fresh and light.
- Lemon juice: Brightens the flavor with a subtle citrus zing that cuts through the richness.
- Heavy whipping cream: Whipped to stiff peaks to fold in for that clouds-of-fluff texture.
- Cherry topping: The jewel on top, providing sweetness and a beautiful pop of color.
How to Make No Bake Mini Cheesecakes with Cherry Topping Recipe
Step 1: Prepare Your Base
Start by lining your muffin tin with paper liners. If you don’t have a muffin tin for all 14 cheesecakes, ramekins are a great alternative for the extras. This step ensures you have perfectly sized individual portions that are easy to handle and look adorable.
Step 2: Create the Crust
In a medium bowl, combine the graham cracker crumbs and sugar, then stir in the melted butter until every crumb is moistened. Divide the crust mixture evenly into the liners and press firmly to make an even base. This simple process sets the foundation for the perfect crunch against the soft filling to come.
Step 3: Whip the Cream Cheese Filling
Beat together the cream cheese and sugar on medium-high speed for about 3 minutes until the mixture is fluffy and without lumps — this step is key for a silky smooth cheesecake. Add in the sour cream and lemon juice and continue mixing to marry all the flavors beautifully.
Step 4: Whip the Cream
Clean your mixer attachments and whip the heavy cream in a separate bowl until stiff peaks form. This whipped cream adds lightness to the cheesecake filling, turning it from dense to delightfully airy.
Step 5: Combine Filling and Portion
Fold the whipped cream gently into the cream cheese mixture until fully incorporated with no streaks left. Divide this luscious filling evenly over the graham cracker crusts using a scoop or spoon, and smooth the tops for a clean finish. The filling should fill the liners to the brim.
Step 6: Chill Thoroughly
Refrigerate your mini cheesecakes for at least 6 hours or overnight to allow them to set perfectly. After a couple of hours, cover them with plastic wrap to prevent any fridge odors from sneaking in.
Step 7: Prepare the Cherry Topping
While the cheesecakes chill, make your cherry sauce. Cool it to room temperature before covering and refrigerating until you’re ready to serve. This vibrant topping brings a fresh and fruity contrast to the creamy base.
Step 8: Serve with Cherry Sauce
Remove the paper liners from the mini cheesecakes—waiting until serving lets them soften slightly for easier removal. Spoon the cherry topping generously over each mini cheesecake and prepare for compliments to flood in!
How to Serve No Bake Mini Cheesecakes with Cherry Topping Recipe
Garnishes
Extra flair can make these mini cheesecakes stand out. Consider adding fresh mint leaves for a pop of green that brightens each bite or a sprinkle of finely chopped dark chocolate for a bittersweet contrast. Chopped nuts like pistachios add texture and a nutty note to compliment the cherry topping.
Side Dishes
Pair these cheesecakes with light and refreshing sides like mixed berry salads or a simple fruit sorbet to keep the dessert course exciting without overpowering the delicate flavors. A cup of strong coffee or herbal tea also balances sweetness perfectly.
Creative Ways to Present
Turn your No Bake Mini Cheesecakes with Cherry Topping Recipe into a holiday centerpiece by arranging them on a tiered dessert stand. For a casual gathering, place them on rustic wooden boards or serve them in clear glass ramekins to show off their layers. Even individual jars layered with extra cherry sauce and whipped cream can steal the show.
Make Ahead and Storage
Storing Leftovers
Leftover mini cheesecakes can be stored covered in the refrigerator for up to 3 days. Keeping them chilled preserves the texture and prevents the delicate cherry topping from losing its freshness.
Freezing
You can freeze these mini cheesecakes by wrapping them individually in plastic wrap and placing them in an airtight container. For best results, thaw in the fridge overnight before serving so they maintain their smooth texture.
Reheating
Since this is a no bake dessert, reheating isn’t necessary or recommended. Enjoy these cheesecakes chilled to get the full taste experience and perfect texture.
FAQs
Can I use a different fruit topping instead of cherries?
Absolutely! This No Bake Mini Cheesecakes with Cherry Topping Recipe is very versatile. Blueberries, raspberries, or even a mixed berry compote would make delicious alternatives.
Do I need special equipment to make these mini cheesecakes?
Not at all! The essentials are a mixer for beating the filling and a muffin tin or ramekins for portioning. A simple spatula and bowls will cover the rest.
Can I make these cheesecakes vegan or dairy-free?
While this recipe relies on dairy products for its creamy texture, you can experiment with vegan cream cheese and coconut cream. Just keep in mind the flavor and texture might differ slightly from the original.
How long do these mini cheesecakes take to set?
They need a minimum of 6 hours in the fridge to firm up properly, but overnight refrigeration is always best for the perfect texture.
Is there a way to speed up the chilling process?
To speed it up, you can place the cheesecakes in the coldest part of your fridge or even pop them in the freezer for 1-2 hours, but watch carefully so they don’t freeze solid.
Final Thoughts
If you want a dessert that tastes like it took hours yet feels effortless, this No Bake Mini Cheesecakes with Cherry Topping Recipe is your answer. Each bite is like a little celebration of creamy, tangy joy topped with fruity sweetness. Once you try it, these mini cheesecakes will become your go-to for impressing guests or simply treating yourself to something special without the fuss.
Print
No Bake Mini Cheesecakes with Cherry Topping Recipe
- Prep Time: 20 minutes
- Cook Time: 0 minutes
- Total Time: 6 hours 20 minutes
- Yield: 14 mini cheesecakes
- Category: Dessert
- Method: No-Cook
- Cuisine: American
Description
These No Bake Mini Cheesecakes are easy-to-make, creamy, and delicious treats perfect for any occasion. With a crunchy graham cracker crust and a light, fluffy no-bake cheesecake filling, topped with a homemade cherry sauce, these bite-sized delights require no oven time and are perfect for make-ahead desserts.
Ingredients
Crust
- 1 1/2 cups graham cracker crumbs (12 whole crackers)
- 1 Tbsp granulated sugar
- 8 Tbsp unsalted butter (1 stick, melted)
Filling
- 16 oz cream cheese ((2) 8-oz blocks, room temperature)
- 2/3 cup granulated sugar
- 2 Tbsp sour cream
- 2 Tbsp lemon juice (freshly squeezed)
- 1 cup heavy whipping cream
Cherry Topping
- Cherry sauce (ingredients not specified, assumed homemade cherry topping)
Instructions
- Prepare Liners: Line your muffin tin with paper liners. If you don’t have a muffin tin large enough to make 14 total cheesecakes, you can use ramekins for the extra two.
- Make the Crust: In a medium bowl, stir together graham cracker crumbs and sugar. Add the melted butter and mix until the crumbs are evenly moistened. Divide this crust mixture evenly among the paper liners, about 2 tablespoons each. Press the crumbs firmly and evenly into the bottoms of the liners to form a solid crust.
- Mix Cream Cheese Base: In a large mixing bowl, beat the cream cheese and sugar with an electric hand mixer on medium-high speed for about 3 minutes until the mixture is fluffy and completely smooth. Scrape down the sides of the bowl as needed to ensure an even mix. Add the sour cream and freshly squeezed lemon juice, then beat for another minute to combine fully.
- Whip Cream: Wash the mixer attachments. In a separate large mixing bowl, beat the heavy whipping cream on medium-high speed for about 3 minutes until stiff peaks form, indicating it is properly whipped.
- Combine Mixtures: Gently fold the whipped cream into the cream cheese mixture using a spatula. Make sure to scrape from the bottom of the bowl as you fold to combine everything evenly without deflating the whipped cream. Scoop the cheesecake filling evenly into each cupcake liner, using a trigger-release ice cream scoop for ease. Smooth out the tops with the back of a spoon so the mixture is level with the liners.
- Chill: Refrigerate the mini cheesecakes for at least 6 hours or overnight for best results. After a couple of hours in the refrigerator, cover the cheesecakes with plastic wrap to prevent drying out.
- Prepare Cherry Sauce: Make the cherry sauce (recipe not provided), then allow it to cool to room temperature before covering and refrigerating until ready to serve.
- Serve: When ready to serve, remove the paper wrappers from the mini cheesecakes—the cheesecakes soften with standing which makes removal easier. Spoon the cooled cherry sauce generously over the cheesecakes and enjoy your delightful dessert!
Notes
- Ensure cream cheese is at room temperature before mixing for a smoother filling.
- Use fresh lemon juice for the best flavor in the filling.
- Gently fold whipped cream into the cheese mixture to keep the filling light and airy.
- Chill time is crucial for the cheesecakes to set properly since there is no baking.
- If you don’t have paper liners, silicone mini cupcake liners or ramekins can be used.
- For variation, try different fruit toppings such as blueberry or raspberry sauce.

