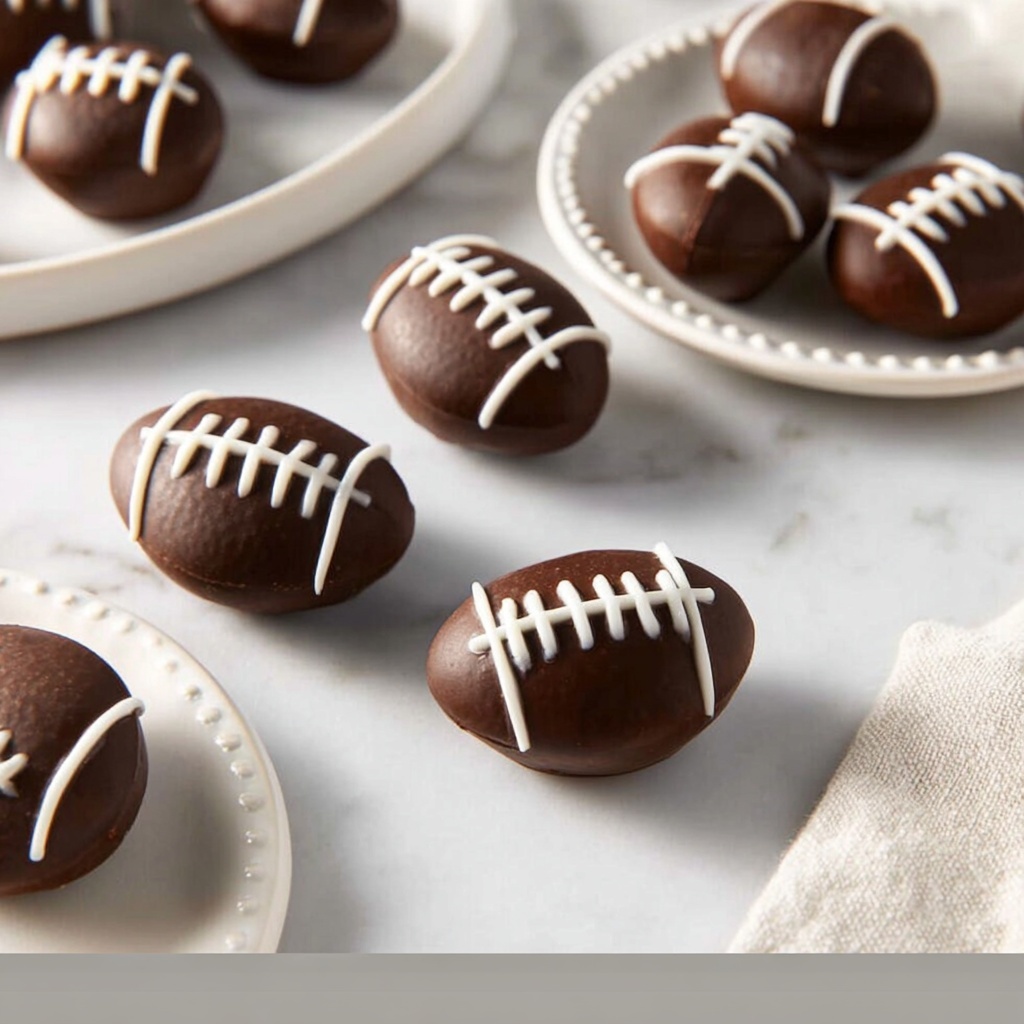
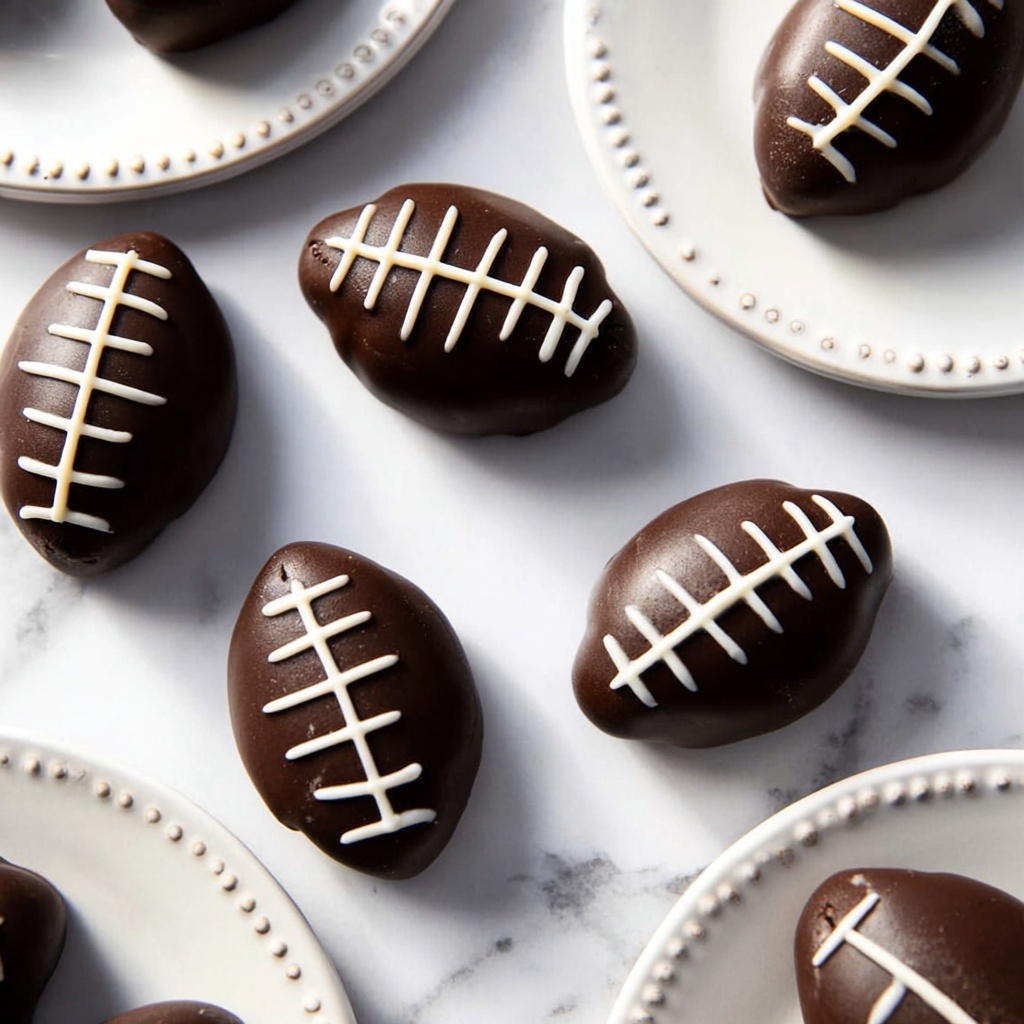
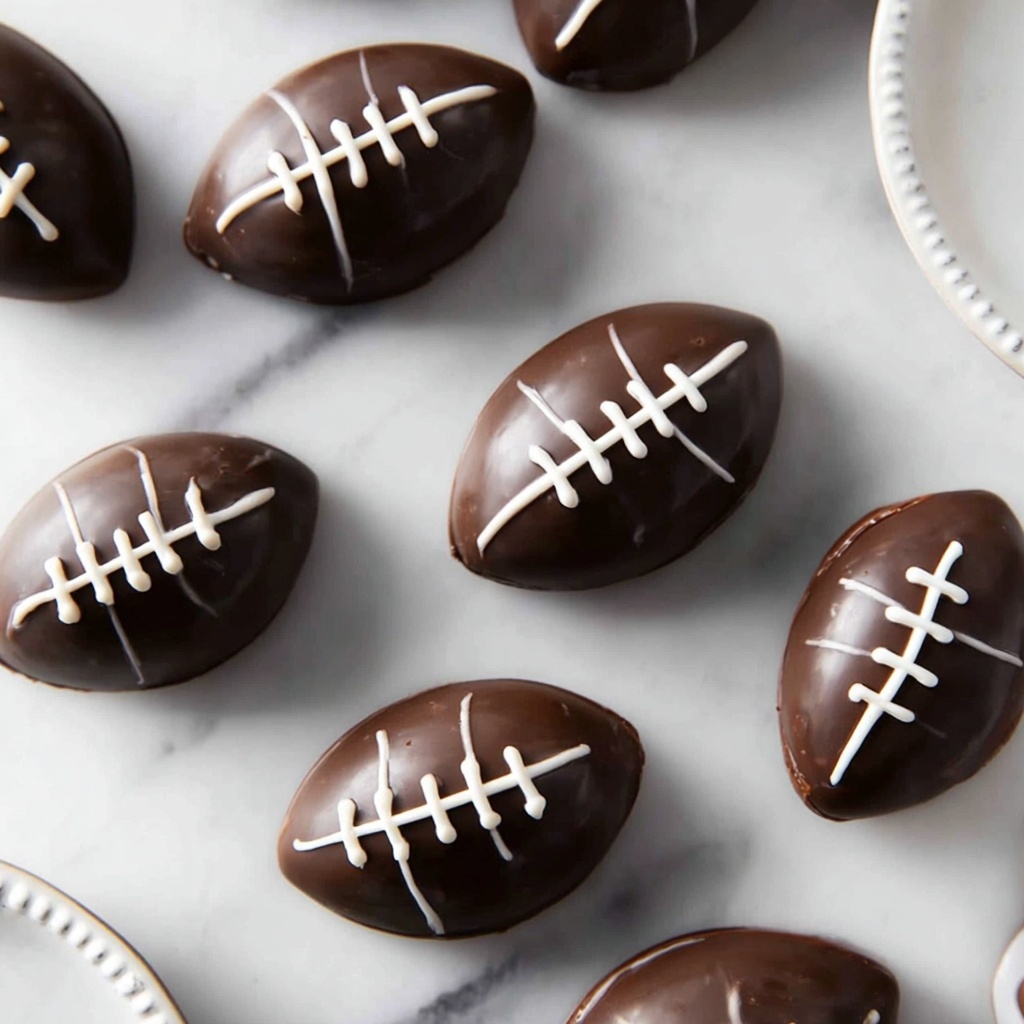
If you are looking for the ultimate game day treat that combines rich flavor with fun presentation, you have to try this Peanut Butter Chocolate Footballs Recipe. These little football-shaped delights are a perfect balance of creamy peanut butter and smooth dark chocolate, topped with playful white chocolate laces. They are easy to make, irresistible to eat, and sure to be the star of any gathering, whether you’re cheering on your team or just craving a nostalgic, homemade candy.
Ingredients You’ll Need
This Peanut Butter Chocolate Footballs Recipe calls for simple ingredients that you probably already have in your pantry. Each component plays a vital role: the creamy peanut butter adds that beloved nutty richness, the powdered sugar sweetens and firms the filling, and the combination of dark and white chocolate creates a luscious and visually striking coating that mimics real footballs.
- Creamy peanut butter: Provides the creamy, nutty base that makes these footballs melt-in-your-mouth delicious.
- Unsalted butter (room temperature): Adds richness and helps create a smooth, firm texture when combined with peanut butter.
- Powdered sugar: Sweetens and gives structure to the peanut butter filling.
- Kosher salt: Balances the sweetness and enhances all the flavors.
- Vanilla extract: Adds depth and warmth to the peanut butter mixture.
- Dark chocolate (chopped): Used for dipping to give a rich, slightly bitter contrast to the sweet filling.
- White chocolate or white candy melts: For piping the iconic football laces on top.
- Vegetable oil (or coconut oil): A little goes a long way to thin the chocolate for a smoother coating and easier dipping.
How to Make Peanut Butter Chocolate Footballs Recipe
Step 1: Prepare Your Workspace
Start by lining a baking sheet with waxed paper and set it aside. This will be your “field” where all the footballs rest and firm up. Keeping things organized upfront makes dipping and decorating so much easier!
Step 2: Mix the Peanut Butter and Butter
Using a stand mixer with a paddle attachment or a hand mixer, beat together the creamy peanut butter and unsalted butter until completely combined. This creates the luscious base that will hold everything together beautifully.
Step 3: Add Sweetness and Flavor
Next, add the powdered sugar, kosher salt, and vanilla extract. Beat until everything comes together evenly. You may notice the mixture is a bit crumbly at first, but it should form a smooth ball that sticks together when squeezed. If it’s too crumbly, just add a bit more peanut butter; if it’s too wet, add more powdered sugar until it feels just right.
Step 4: Shape the Footballs
Scoop approximately 2 tablespoons of the peanut butter mixture and form it into diamonds, mimicking the classic football shape. Place each piece on your prepared baking sheet. Once all footballs are shaped, cover the tray with plastic wrap and refrigerate for about one hour to firm up.
Step 5: Melt the Dark Chocolate
While the footballs chill, melt your dark chocolate in a microwave-safe bowl. Stir every 30 seconds to ensure the chocolate melts evenly and doesn’t burn. If it’s too thick to dip smoothly, stir in a small amount of vegetable or coconut oil to thin it out to a perfect dipping consistency.
Step 6: Dip the Peanut Butter Footballs
Carefully dip each chilled peanut butter football into the melted dark chocolate, making sure it is fully coated. Use the side of the bowl to scrape off any excess chocolate and place the dipped footballs back on the parchment-lined baking sheet, ensuring they don’t touch.
Step 7: Let the Chocolate Set
Allow the chocolate coating to set either on your countertop at room temperature or in the refrigerator to speed things up. Patience here pays off with a nice, firm shell that’s just the right amount of snap.
Step 8: Prepare the White Chocolate for Piping
Melt the white chocolate or white candy melts in the microwave, stirring every 30 seconds until completely smooth. Transfer the melted white chocolate to a disposable pastry bag or a ziplock bag. Snip a tiny corner off the bag to control the flow for piping delicate lace details.
Step 9: Decorate Your Footballs
Pipe two slightly curved lines along the edges of each chocolate-covered peanut butter football. Then, add one long lace line down the center with three or four small perpendicular lines crossing over it to imitate the iconic football stitching. For clean lines, try to avoid touching the tip of the bag to the chocolate surface. Let the white chocolate decorations set fully.
Step 10: Chill and Store
These beautiful Peanut Butter Chocolate Footballs Recipe treats are best served chilled. Store them in an airtight container in the refrigerator for up to a week, ready to satisfy your chocolate-peanut butter cravings anytime.
How to Serve Peanut Butter Chocolate Footballs Recipe
Garnishes
For an extra special touch, you can lightly dust your footballs with edible gold dust or a sprinkle of crushed peanuts for some texture contrast. These little extras elevate the presentation and make your treats look like they belong on a festive dessert table.
Side Dishes
Pair these football-shaped candies with a bowl of fresh strawberries or a nice scoop of vanilla ice cream. The fresh fruit or creamy ice cream provides a fresh counterbalance to the rich, decadent peanut butter and chocolate flavors.
Creative Ways to Present
Consider displaying your Peanut Butter Chocolate Footballs Recipe treats in mini football helmets or on a platter decorated with artificial football grass for a fun game day vibe. You can also wrap them individually in clear cellophane tied with team-colored ribbons for gift-giving or party favors.
Make Ahead and Storage
Storing Leftovers
If you happen to have leftovers (and who wouldn’t want that?), store your Peanut Butter Chocolate Footballs in an airtight container in the refrigerator. They will keep well for up to one week without losing any of their fresh flavor or texture.
Freezing
These footballs freeze beautifully! Just place them in a single layer on a baking sheet to freeze solid, then transfer them to a freezer-safe container or bag. They will last up to 2 months and thaw in the refrigerator overnight when you’re ready to enjoy them again.
Reheating
Since these are best enjoyed chilled or at room temperature, avoid microwaving. If you’d like them softer, simply let them sit a few minutes at room temperature to take the chill off before serving.
FAQs
Can I use crunchy peanut butter instead of creamy?
While crunchy peanut butter will add a nice texture, it might make shaping the footballs a bit trickier. For the smoothest, most classic taste and texture, creamy peanut butter is recommended.
What if my chocolate won’t melt smoothly?
Microwaving in short intervals and stirring frequently helps. Adding a teaspoon of vegetable or coconut oil thins the chocolate and gives it a glossy finish perfect for dipping.
Can I skip the white chocolate decoration?
Absolutely! The white chocolate laces are just for visual charm. Your Peanut Butter Chocolate Footballs Recipe will taste fantastic even without the piping.
How do I know when the peanut butter mixture is the right consistency?
It should be firm enough to hold its shape but smooth enough to mold. When squeezed, it forms a compact ball. Adjust by adding more powdered sugar to stiffen or extra peanut butter to soften as needed.
Are these footballs nut-free if I use a different butter?
Unfortunately, peanut butter is central to the flavor and texture. If nut allergies are a concern, consider alternative recipes designed to be nut-free.
Final Thoughts
Making the Peanut Butter Chocolate Footballs Recipe is more than just preparing a delicious treat; it’s about celebrating moments with family and friends in the most tasty way. These chocolate-coated, peanut butter-filled footballs bring joy, nostalgia, and irresistible flavor to your table, perfect for any occasion. Give this recipe a try—you might just find it becoming your new favorite dessert for game days and beyond!
Print
Peanut Butter Chocolate Footballs Recipe
- Prep Time: 20 minutes
- Cook Time: 0 minutes
- Total Time: 1 hour 20 minutes
- Yield: 25 footballs
- Category: Dessert
- Method: No-Cook
- Cuisine: American
Description
These Peanut Butter Chocolate Footballs are a fun and festive no-bake treat perfect for game day or parties. Creamy peanut butter combined with butter and powdered sugar forms a rich, smooth filling shaped like mini footballs, dipped in dark chocolate and decorated with white chocolate laces for an impressive and delicious dessert.
Ingredients
Peanut Butter Mixture
- 1 1/2 cups creamy peanut butter
- 1/2 cup unsalted butter, room temperature
- 3 cups powdered sugar
- 1 tsp kosher salt
- 1 tsp vanilla extract
Chocolate Coating
- 12 ounces dark chocolate, chopped
- Vegetable oil or coconut oil as needed (to thin the chocolate)
Decoration
- 2 ounces white chocolate or white candy melts
Instructions
- Prepare the workspace: Line a baking sheet with waxed or parchment paper and set aside to place your peanut butter footballs after shaping.
- Mix peanut butter and butter: In a stand mixer fitted with a paddle attachment or using a hand mixer, beat together the creamy peanut butter and unsalted butter until fully combined and smooth.
- Add powdered sugar, salt, and vanilla: Gradually add powdered sugar, kosher salt, and vanilla extract to the peanut butter mixture. Beat thoroughly until combined. The mixture should be crumbly but hold together when squeezed; adjust by adding more peanut butter or powdered sugar if needed.
- Shape the footballs: Scoop about 2 tablespoons of the peanut butter mixture and mold each into a diamond shape resembling a football. Arrange them evenly spaced on the prepared baking sheet. Cover tightly with plastic wrap and refrigerate for about one hour until firm.
- Melt dark chocolate: Place the chopped dark chocolate in a microwave-safe bowl and heat in 30-second intervals, stirring in between until smooth. If the melted chocolate is too thick for coating, stir in a small amount of vegetable or coconut oil to thin it to a dipping consistency.
- Dip the peanut butter footballs: Using a fork or dipping tool, submerge each peanut butter football into the melted dark chocolate, then scrape off excess chocolate by gently tapping the dipped ball against the side of the bowl. Return the coated footballs onto the parchment-lined baking sheet, making sure they do not touch.
- Set the chocolate coating: Allow the chocolate coating to harden at room temperature or refrigerate briefly until fully set.
- Melt white chocolate for decoration: Warm the white chocolate or candy melts in the microwave in 30-second bursts, stirring after each, until smooth. Transfer to a disposable piping bag or a ziplock bag and cut a very small tip at the corner for piping.
- Pipe football laces: Carefully pipe two slightly curved lines along the edges of each football. Then pipe one long line down the center with three small cross lines to mimic football laces. Avoid pressing the tip directly on the chocolate to keep the lines clean. Let the white chocolate decoration harden at room temperature or in the fridge.
- Serve and store: These peanut butter chocolate footballs are best served chilled. Store them in an airtight container in the refrigerator for up to one week.
Notes
- If the peanut butter mixture is too sticky, adding a little more powdered sugar will help firm it up.
- Using coconut oil to thin chocolate can add a slight tropical flavor, vegetable oil is more neutral.
- Allow enough time for the chocolate coatings to set properly to avoid smudging decorations.
- You can substitute chocolate types or candy melts depending on your preference for bittersweet or sweeter coating.
- These treats do not require baking or cooking but chilling is essential to achieve the right texture.
