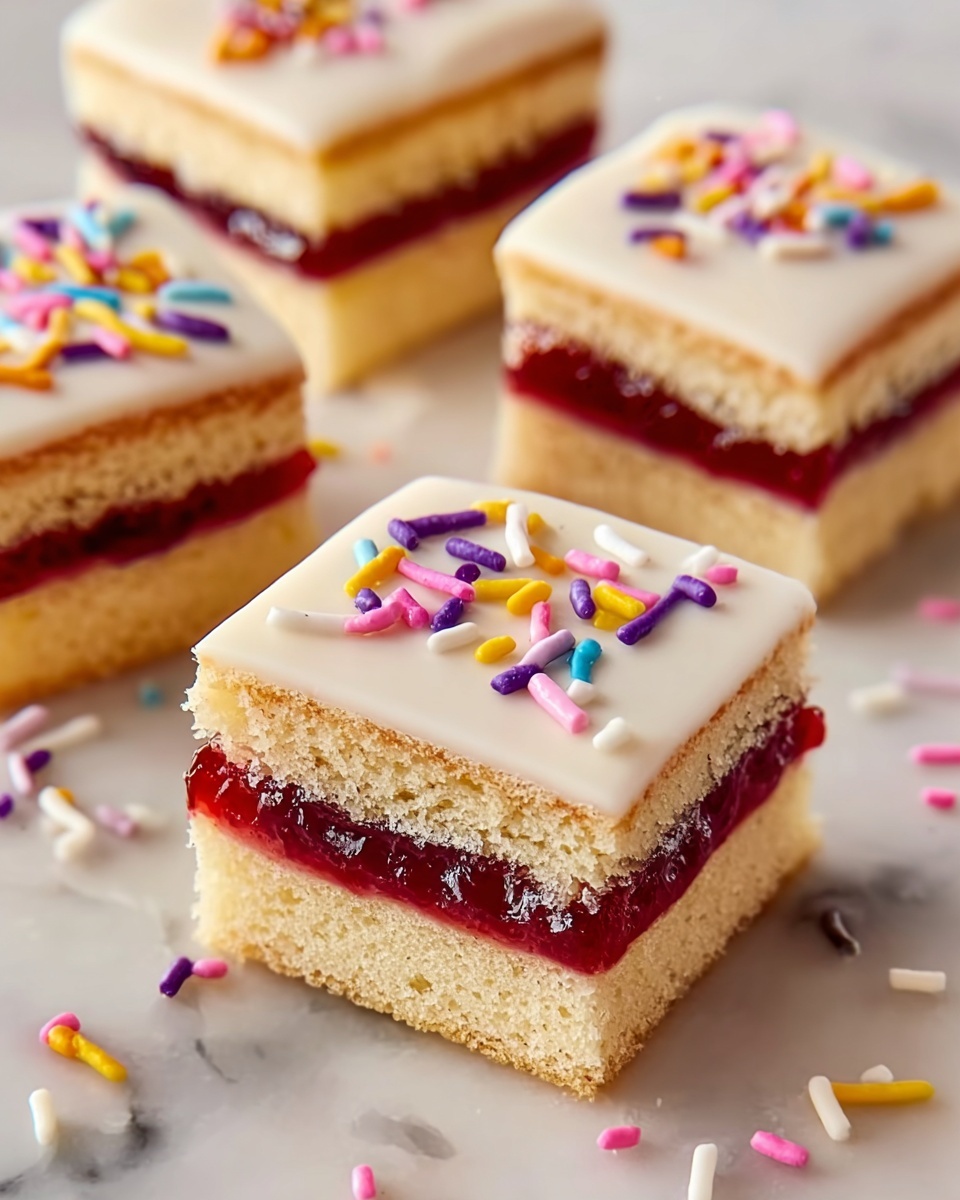
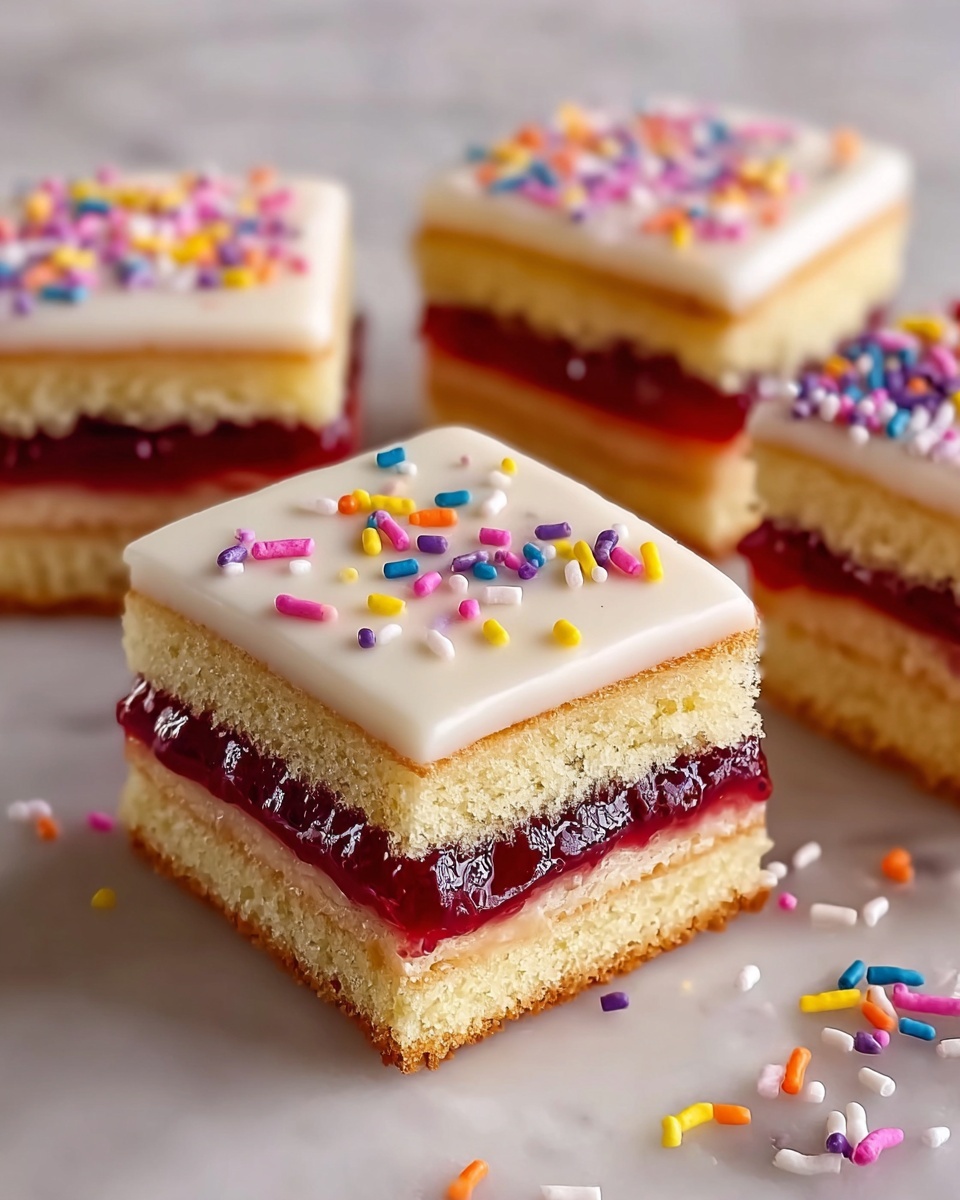
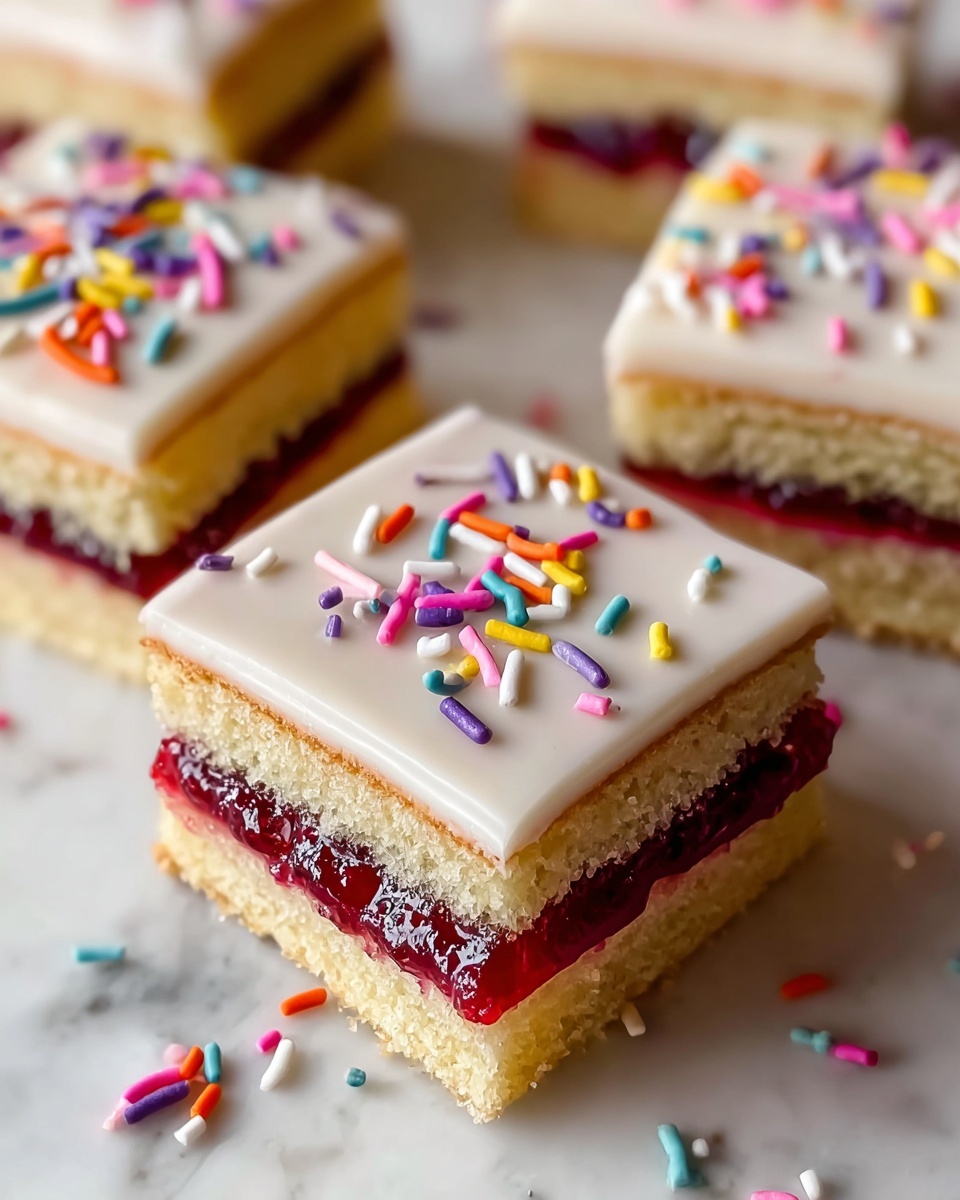
Let me share with you a truly delightful treat that beautifully captures the nostalgic flavors of childhood with a grown-up twist: the Poptart Cookie Bars Recipe. These bars combine the buttery, tender crumb of a classic cookie with a luscious layer of strawberry preserves, all topped with a sweet vanilla glaze and festive sprinkles. They are unbelievably fun to make, irresistibly tasty, and perfect for sharing at any gathering or simply enjoying with your favorite cup of tea.
Ingredients You’ll Need
This recipe shines because of its simplicity and precision. Each ingredient plays a vital role, from the creamy butter that gives the cookie bars a rich texture, to the strawberry preserves which add that perfect fruity zing. The vanilla and sprinkles make the final product feel like a celebration on a plate.
- ½ cup unsalted butter, room temperature: Soft butter ensures a tender, flavorful cookie base.
- 1 cup granulated sugar: Adds sweetness and helps create a light, airy dough.
- 2 large eggs, room temperature: Bind the dough and provide moisture for a soft, chewy texture.
- 1 teaspoon vanilla extract or vanilla bean paste: Brings warmth and depth to the flavor.
- 2 ½ cups + 2 tbsp all-purpose flour: The structural backbone for your bars; be sure to measure accurately for the perfect crumb.
- ½ teaspoon fine sea salt: Balances the sweetness and enhances all the other flavors.
- ½ teaspoon baking soda: Helps the cookie bars rise just enough to be delightfully soft, not cakey.
- 2/3 cup strawberry preserves: The luscious filling that mimics the iconic Poptart vibe.
- 1 cup powdered sugar: For the sweet, smooth glaze on top.
- 1 ½ – 2 tablespoons whole milk: Adjusts the glaze to the perfect pourable consistency.
- ½ teaspoon vanilla extract: Adds a fragrant touch to the glaze.
- Rainbow sprinkles: Because what’s a Poptart-inspired treat without a little colorful sparkle?
How to Make Poptart Cookie Bars Recipe
Step 1: Prepare Your Pan and Oven
Start by lining an 8×8 inch metal baking pan with parchment paper, making sure the paper hangs over the edges. This trick lets you lift the bars out easily once baked. Preheat your oven to 375°F (190°C) so it’s nice and ready when your dough is set.
Step 2: Cream Butter and Sugar
In your stand mixer, beat the softened butter with granulated sugar for about 3 minutes until the mixture is light, fluffy, and well combined. This step creates a wonderful base that helps your bars stay tender and moist.
Step 3: Add Eggs and Vanilla
Mix in the eggs and vanilla extract until just incorporated. Remember to scrape down the bowl to make sure everything is evenly mixed and there are no pockets of unmixed dough.
Step 4: Incorporate Dry Ingredients
Slowly add the flour, salt, and baking soda to the wet mixture. Stir until the dough begins to come together, forming a cohesive mass that is easy to work with but not too sticky.
Step 5: Chill the Dough
Transfer the dough to the fridge for about 20 minutes. Chilling firms it up, making it easier to handle and less likely to get messy when you press it into the pan.
Step 6: Press Half the Dough into Pan
Once chilled, take half the dough (about 348 grams) and press it evenly into your prepared baking pan. This forms the bottom cookie layer of your bars.
Step 7: Freeze the First Layer
Carefully lift your parchment with the dough and move it to a baking sheet, then pop it into the freezer. This step is genius for keeping your layers neat and prevents the filling from mixing into the bottom dough.
Step 8: Press Remaining Dough into Pan
Replace the parchment in the pan and press the remaining dough evenly over it, creating the second cookie layer that will hold the preserves inside.
Step 9: Spread the Strawberry Preserves
Spread the strawberry preserves smoothly over the dough layer in the pan. Make sure to cover the surface right to the edges for that classic jammy center.
Step 10: Assemble the Bars
Take the frozen dough layer from the freezer, peel off the parchment, and gently place this on top of the preserves layer. Press down firmly but gently to seal the layers together beautifully.
Step 11: Bake
Bake your assembled bars in the preheated oven for 25 to 28 minutes or until the top is golden and inviting. Your kitchen will be filled with the most amazing aroma by now!
Step 12: Cool Completely
Remove from the oven and let the bars cool fully on a wire rack. This step helps the layers to set so they cut cleanly without crumbling.
Step 13: Flip the Bars
Once completely cooled, use the parchment edges to lift the bars from the pan. Flip them upside down carefully, so the smooth bottom becomes the top for glazing.
Step 14: Prepare the Glaze
Whisk together powdered sugar, whole milk, and vanilla extract until silky smooth and just pourable. Your glaze should coat the bars with a shiny, sweet finish.
Step 15: Glaze and Decorate
Pour the glaze evenly over the inverted bars and quickly scatter rainbow sprinkles on top for that signature playful look.
Step 16: Let the Glaze Set and Slice
Allow the bars to sit at room temperature for 1-2 hours so the glaze firms up beautifully. Then cut into 15 squares and prepare to be delighted by every bite!
How to Serve Poptart Cookie Bars Recipe
Garnishes
A few extra rainbow sprinkles just before serving add even more whimsy, or a light dusting of powdered sugar can give a delicate, snowy touch. Fresh strawberry slices on the side complement the preserves wonderfully.
Side Dishes
These bars pair delightfully with a scoop of vanilla ice cream or a dollop of whipped cream for an extra indulgent dessert experience. For a lighter tea time, serve alongside fresh berries and a cup of herbal tea or milk.
Creative Ways to Present
Try cutting the bars into fun shapes using cookie cutters before glazing for themed parties. Present them stacked in clear jars as charming gifts, or arrange them on a colorful platter surrounded by fresh fruit for an eye-catching dessert table.
Make Ahead and Storage
Storing Leftovers
Keep any leftovers stored in an airtight container at room temperature for up to three days to maintain the perfect balance of softness and flavor.
Freezing
You can freeze the bars before glazing, wrapped tightly in plastic wrap and foil, for up to one month. Thaw overnight in the fridge, then glaze just before serving for a fresh taste.
Reheating
If you prefer your bars slightly warm, reheat them briefly in a low oven (300°F) for about 5 minutes, but avoid the microwave to prevent the glaze from melting too much and becoming overly sticky.
FAQs
Can I use other fruit preserves instead of strawberry?
Absolutely! Raspberry, apricot, or blueberry preserves would work beautifully and bring a new flavor twist while still maintaining the essence of this Poptart Cookie Bars Recipe.
Is it necessary to chill the dough?
Yes, chilling firms up the dough so it’s easier to handle and helps create a clean layered effect without the preserves mixing into the cookie bases.
What makes this recipe different from regular cookies?
This recipe features a unique layered construction that mimics traditional Poptarts but with a soft cookie texture and a rich glaze, making it a fun hybrid dessert.
Can I make these bars gluten-free?
With the right gluten-free flour blend that mimics all-purpose flour, you can make this Poptart Cookie Bars Recipe gluten-free, though texture may vary slightly.
How long do these bars stay fresh?
Stored properly in an airtight container, these bars stay fresh and delicious for up to three days, though they rarely last that long because they’re so good!
Final Thoughts
If you’re looking for a magical dessert that everyone will rave about, the Poptart Cookie Bars Recipe is your new best friend in the kitchen. It’s fun to make, full of flavor, and perfect for every occasion. Give it a try and watch smiles appear as you share this charming treat with your favorite people.
Print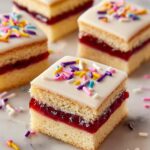
Poptart Cookie Bars Recipe
- Prep Time: 2 hours
- Cook Time: 25 minutes
- Total Time: 2 hours 25 minutes
- Yield: 15 bars
- Category: Dessert
- Method: Baking
- Cuisine: American
Description
These Poptart Cookie Bars are a delightful twist on classic pop tarts, featuring layers of buttery cookie dough and sweet strawberry preserves, all topped with a smooth vanilla glaze and colorful rainbow sprinkles. Perfectly baked to golden perfection, they offer a nostalgic, handheld treat in bar form that’s ideal for parties, snacks, or dessert.
Ingredients
Cookie Dough
- ½ cup unsalted butter, room temperature
- 1 cup granulated sugar
- 2 large eggs, room temperature
- 1 teaspoon vanilla extract or vanilla bean paste
- 2 ½ cups + 2 tbsp all-purpose flour
- ½ teaspoon fine sea salt
- ½ teaspoon baking soda
Filling
- 2/3 cup strawberry preserves
Glaze
- 1 cup powdered sugar
- 1 ½ – 2 tablespoons whole milk
- ½ teaspoon vanilla extract
Decoration
- Rainbow sprinkles for decorating
Instructions
- Prepare Pan and Oven: Line an 8×8 inch square metal baking pan with parchment paper, allowing the paper to hang over all sides for easy removal later. Preheat your oven to 375°F (190°C).
- Cream Butter and Sugar: In a stand mixer bowl, cream the unsalted butter and granulated sugar together for 3 minutes until light and fluffy. Scrape down the sides of the bowl to ensure even mixing.
- Add Eggs and Vanilla: Add the eggs and vanilla extract to the creamed mixture, mixing just until combined. Scrape down the bowl again for uniformity.
- Mix Dry Ingredients: Gradually mix in the all-purpose flour, fine sea salt, and baking soda. Stir until the dough begins to come together into a cohesive mass.
- Chill Dough: Place the dough in the refrigerator for 20 minutes to firm up, making it easier to handle and press into the pan.
- First Layer: Take half of the chilled dough (approximately 348 grams) and press it evenly into the prepared baking pan.
- Freeze First Layer: Carefully lift the parchment paper to transfer the pressed dough layer onto a baking sheet. Place this sheet in the freezer to chill while you prepare the next layer.
- Second Layer Base: Replace the parchment strips in the baking pan, ensuring coverage on all sides. Press the remaining half of the cookie dough evenly into the pan.
- Add Filling: Evenly spread the strawberry preserves over the dough layer in the pan.
- Top Layer Assembly: Remove the frozen dough layer from the baking sheet by peeling off the parchment paper. Place it on top of the preserves layer and press firmly to seal the layers together.
- Bake Bars: Bake the assembled cookie bars in the preheated oven for 25-28 minutes, or until the top is golden brown.
- Cool Completely: Remove from the oven and allow to cool completely on a wire rack.
- Invert Bars: Pull the parchment paper to lift the bars out of the pan. Flip them upside down so that the bottom becomes the top surface.
- Prepare Glaze: Whisk together powdered sugar, whole milk, and vanilla extract until smooth and pourable.
- Glaze and Decorate: Pour the glaze over the top of the inverted bars and immediately sprinkle with rainbow sprinkles for decoration.
- Set Icing and Serve: Let the bars sit at room temperature for 1-2 hours until the icing sets. Cut into 15 bars and enjoy!
Notes
- Make sure to measure flour correctly by spooning into the measuring cup and leveling off for accurate results.
- Use room temperature ingredients to ensure proper mixing and texture.
- Press the dough evenly to ensure uniform baking and layering.
- The freezing step for the first layer helps the bars hold their shape when assembling and baking.
- Store leftover bars in an airtight container at room temperature for up to 3 days.
