If you’ve ever wished your whipped cream could hold its perfect, fluffy shape for hours without melting or weeping, you’re about to discover a game-changer: the Stabilized Whipped Cream Recipe. This version is wonderfully silky, airy yet firm, and incredibly easy to make with just a few simple ingredients. Not only does it stay beautifully stable on cakes, pies, or fruit, but it also tastes rich and decadent—making every dessert moment feel extra special. Trust me, once you try this recipe, you’ll never go back to plain whipped cream.
Ingredients You’ll Need
One of the best things about this Stabilized Whipped Cream Recipe is how straightforward and accessible the ingredients are. Each one plays a vital role, ensuring perfect texture, delicious flavor, and that lasting hold you crave.
- Water (1½ tsp): A small but essential amount to bloom the gelatin properly for smooth incorporation.
- Unflavored powdered gelatin (½ tsp): The magic fixer that keeps your whipped cream light and stable without affecting flavor.
- Heavy cream (1½ cups, cold): The rich base that whips into perfection; make sure it’s very cold for best volume.
- Powdered sugar (2 tsp): Provides sweetness and a silky smooth texture, blending in beautifully without any gritty feel.
- Pure vanilla extract (½ tsp, optional): Adds a gentle warmth and aromatic lift, elevating the taste subtly but wonderfully.
How to Make Stabilized Whipped Cream Recipe
Step 1: Bloom the Gelatin
Start by sprinkling the powdered gelatin over the measured water in a microwave-safe bowl. Stir gently to combine and let it sit for about 3 minutes. This resting period allows the gelatin to absorb the water and swell. Then, microwave in short bursts—5 seconds at a time—stirring between each burst until the gelatin fully dissolves into a clear liquid. Setting this aside to cool prevents it from scrambling the cream later.
Step 2: Begin Whipping the Cream
Pour your cold heavy cream into the bowl of a stand mixer fitted with a whisk attachment. Add the powdered sugar and vanilla extract if using. Whip on low speed just until you start to see tiny bubbles forming. This careful start prepares the cream, keeping it from overwhipping and separating.
Step 3: Add in the Gelatin Mixture
Once the cream begins to thicken and leaves behind gentle trails, increase your mixer’s speed to medium. Very slowly drizzle in the cooled, liquefied gelatin while continuing to whip. This gradual addition ensures the gelatin incorporates evenly without clumping.
Step 4: Whip to Medium Peaks
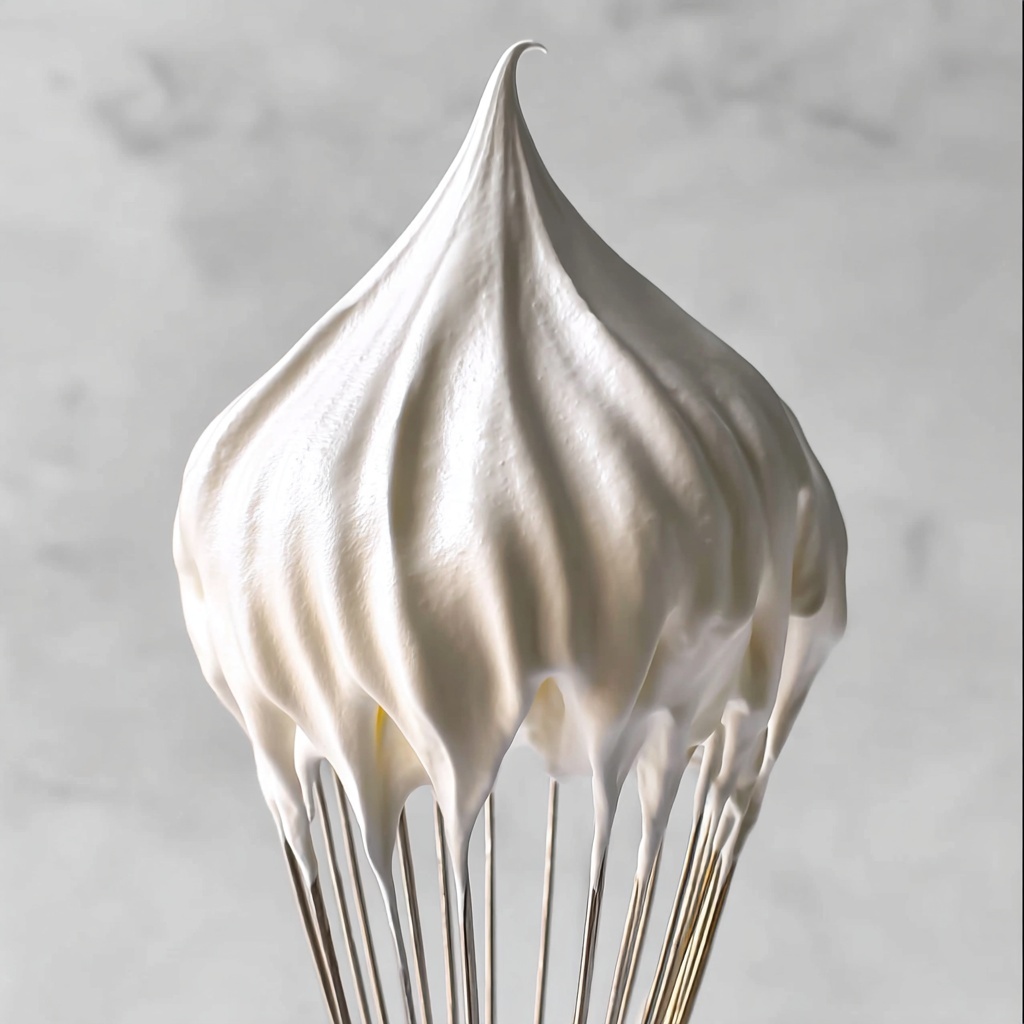
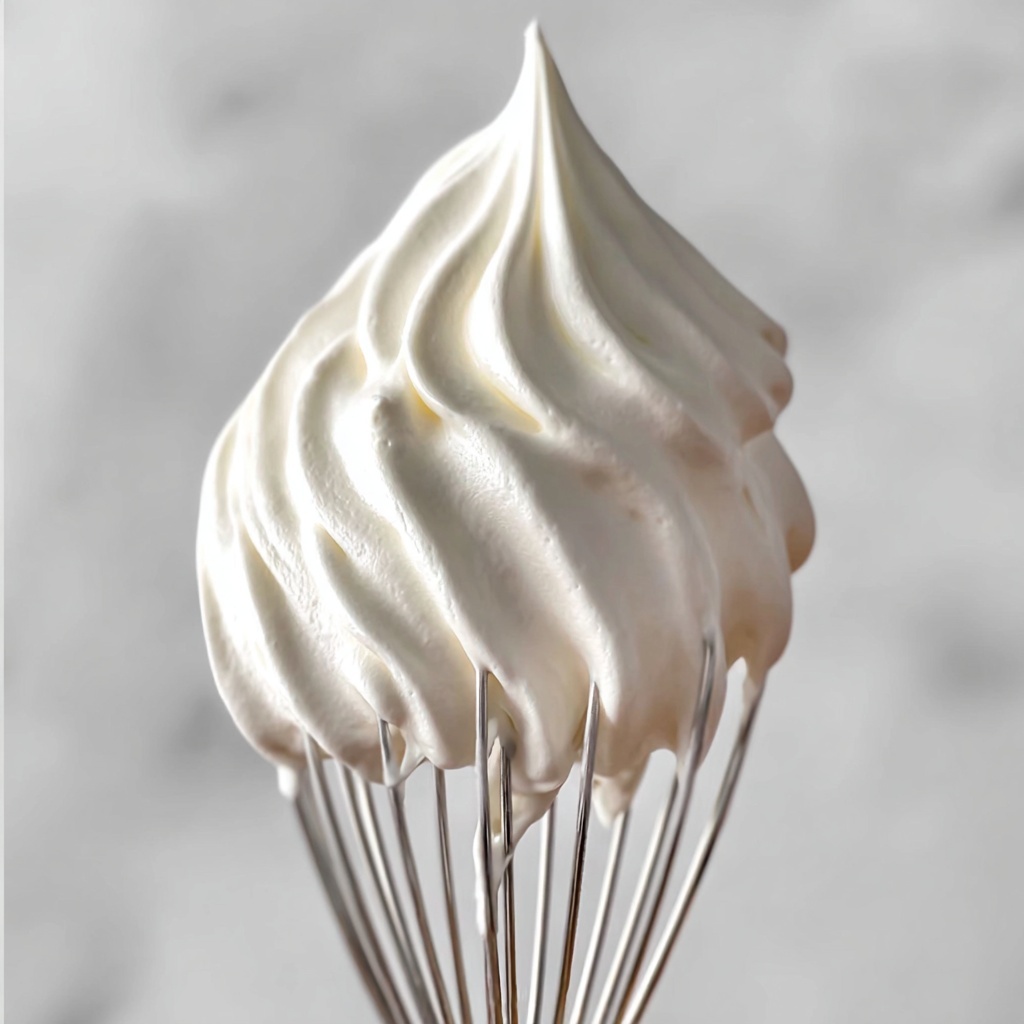
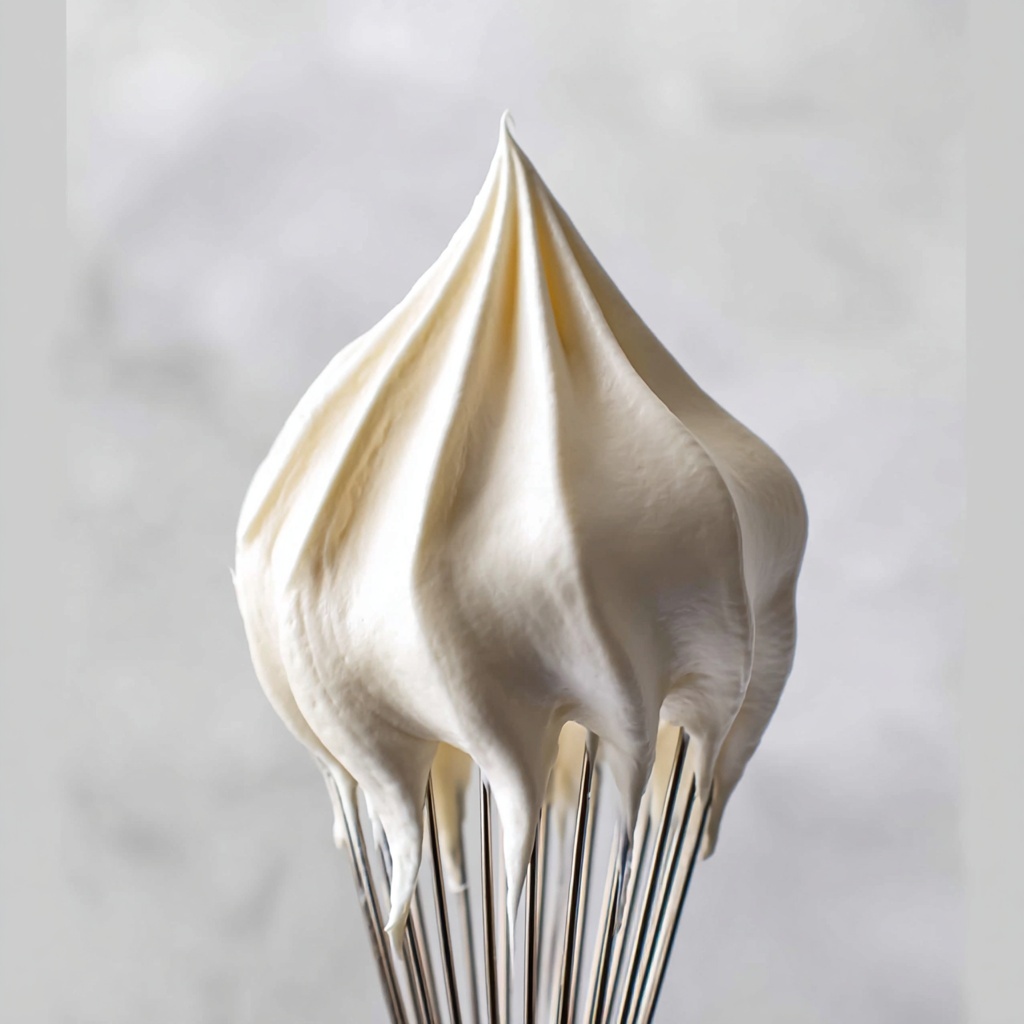
Turn the speed up to high and continue whipping until medium peaks form—when the cream stands up with a soft but firm tip. At this stage, your stabilized whipped cream is perfectly fluffy and incredibly stable, ready to hold its shape for hours.
Step 5: Store Properly Until Use
Transfer your stabilized whipped cream to an airtight container and keep it refrigerated until you’re ready to enjoy. This step is key to maintaining its smooth texture and fresh flavor, making it wonderfully versatile for any dessert project.
How to Serve Stabilized Whipped Cream Recipe
Garnishes
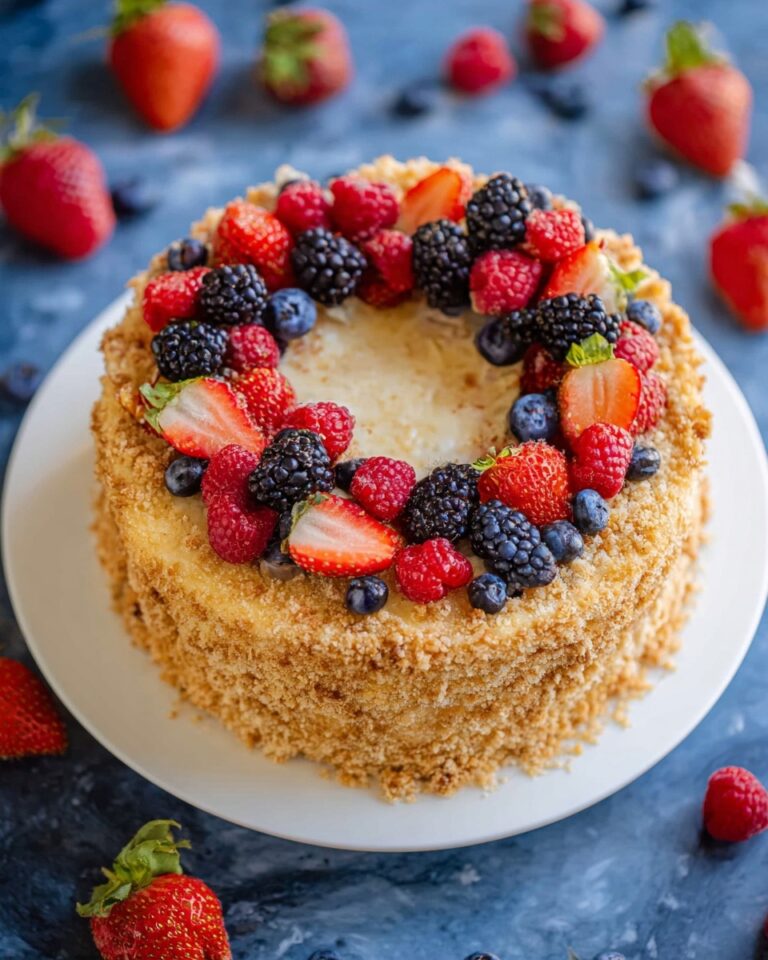
This whipped cream shines when dolloped or piped atop any dessert. Try adding a sprinkle of fresh cocoa powder, colorful sprinkles, or a few berries for an eye-catching and flavor-packed garnish. Its stability makes intricate piping designs possible, perfect for impressing guests.
Side Dishes
Serve alongside warm fruit crisps, pies, or even a rich hot chocolate. Because this stabilized whipped cream holds up, it’s fantastic with desserts that sit on the table a while or are enjoyed outdoors where heat might be a challenge.
Creative Ways to Present
Take your presentation to the next level by layering the stabilized whipped cream between fresh fruit and cake to make trifles or parfaits. You can also tint small portions with natural food colors for festive themes or whip in complementary flavors like espresso or mint extract for a surprising twist.
Make Ahead and Storage
Storing Leftovers
Leftovers can be stored in an airtight container in the refrigerator for up to 3 days. The stabilization means it won’t weep or lose its shape quickly, so you can prepare in advance and still have stunning whipped cream ready for your desserts.
Freezing
You can freeze stabilized whipped cream in a sealed container for up to 1 month. When thawing, do so slowly in the refrigerator to maintain texture. While the texture might be slightly less airy after freezing, it’s still deliciously useful for frostings or dessert toppings.
Reheating
There’s no need to reheat stabilized whipped cream. It’s best enjoyed cold or at room temperature. For frozen leftovers, simply thaw and gently re-whip if needed before serving to refresh its lightness.
FAQs
What makes this a stabilized whipped cream recipe?
This recipe uses gelatin, which is a natural stabilizer, to keep the whipped cream firm and prevent it from melting or weeping, unlike traditional whipped cream that can quickly deflate.
Can I use flavored gelatin instead of unflavored?
It’s best to stick with unflavored gelatin to avoid unintended tastes. Flavoring your whipped cream is better done with extracts or lemon zest.
Do I have to use a stand mixer?
While a stand mixer makes whipping easier and more consistent, you can use a hand mixer or whisk by hand if you’re patient and careful, especially to avoid overwhipping.
Is this stabilized whipped cream recipe suitable for piping decorations?
Absolutely! The gelatin stabilization holds peaks well, making it perfect for piping borders, rosettes, and other decorative touches on cakes and cupcakes.
Can I substitute gelatin with another stabilizer?
Other stabilizers like cream of tartar or cornstarch are sometimes used, but gelatin provides the best texture and stability for whipped cream without altering the flavor or mouthfeel.
Final Thoughts
Once you make this Stabilized Whipped Cream Recipe, you’ll wonder how you ever managed without it. It’s an easy little upgrade that guarantees your whipped cream stays luscious and elegant, whether it’s adorning a celebration cake or just enhancing a cozy dessert at home. Give it a try—you’ll love the creamy, dependable results every single time!
Print
Stabilized Whipped Cream Recipe
- Prep Time: 10 minutes
- Cook Time: 0 minutes
- Total Time: 10 minutes
- Yield: 16 servings
- Category: Dessert Topping
- Method: Stovetop
- Cuisine: American
- Diet: Low Salt
Description
This Stabilized Whipped Cream recipe creates a fluffy, creamy topping that holds its shape longer than regular whipped cream. By incorporating gelatin, the whipped cream remains stable and perfect for decorating cakes, cupcakes, or serving with desserts without wilting or weeping quickly.
Ingredients
Gelatin Mixture
- 1½ tsp water (7 grams)
- ½ tsp unflavored powdered gelatin
Whipped Cream
- 1½ cups heavy cream (341 grams, cold)
- 2 tsp powdered sugar (5 grams)
- ½ tsp pure vanilla extract (2 grams, optional)
Instructions
- Bloom Gelatin: Add the water to a microwave-safe bowl and sprinkle the gelatin on top. Stir gently and let it sit for 3 minutes to allow the gelatin to absorb the water and soften.
- Dissolve Gelatin: After 3 minutes, stir the gelatin mixture and microwave on high for 5 seconds. Stir again and microwave for another 5 seconds. If the gelatin isn’t fully dissolved, microwave an additional 3-5 seconds until liquefied. Set aside to cool slightly.
- Whip Cream Mixture: In the bowl of a stand mixer fitted with the whisk attachment, whip the heavy cream, powdered sugar, and vanilla extract on low speed until small bubbles appear. Be careful not to overwhip or the cream will separate.
- Add Gelatin: Increase the mixer speed to medium. Once the cream thickens and begins leaving trails when the whisk lifts, slowly drizzle in the cooled gelatin mixture while continuing to whip.
- Finish Whipping: Raise the speed to high and beat the cream until it forms medium peaks, firm and stable enough for decoration or serving.
- Store: Transfer the stabilized whipped cream to an airtight container and refrigerate until ready to use. It will hold its shape well for several hours or overnight when chilled.
Notes
- Ensure the heavy cream is very cold before whipping for best volume.
- Do not overwhip the cream before adding gelatin to prevent separation.
- The gelatin mixture should not be hot when added—cool it slightly to avoid melting the cream.
- Stabilized whipped cream lasts longer than regular whipped cream and is perfect for decorating desserts ahead of time.
- Optional: For flavor variations, substitute vanilla extract with other flavored extracts or add a dash of cocoa powder for chocolate whipped cream.


