
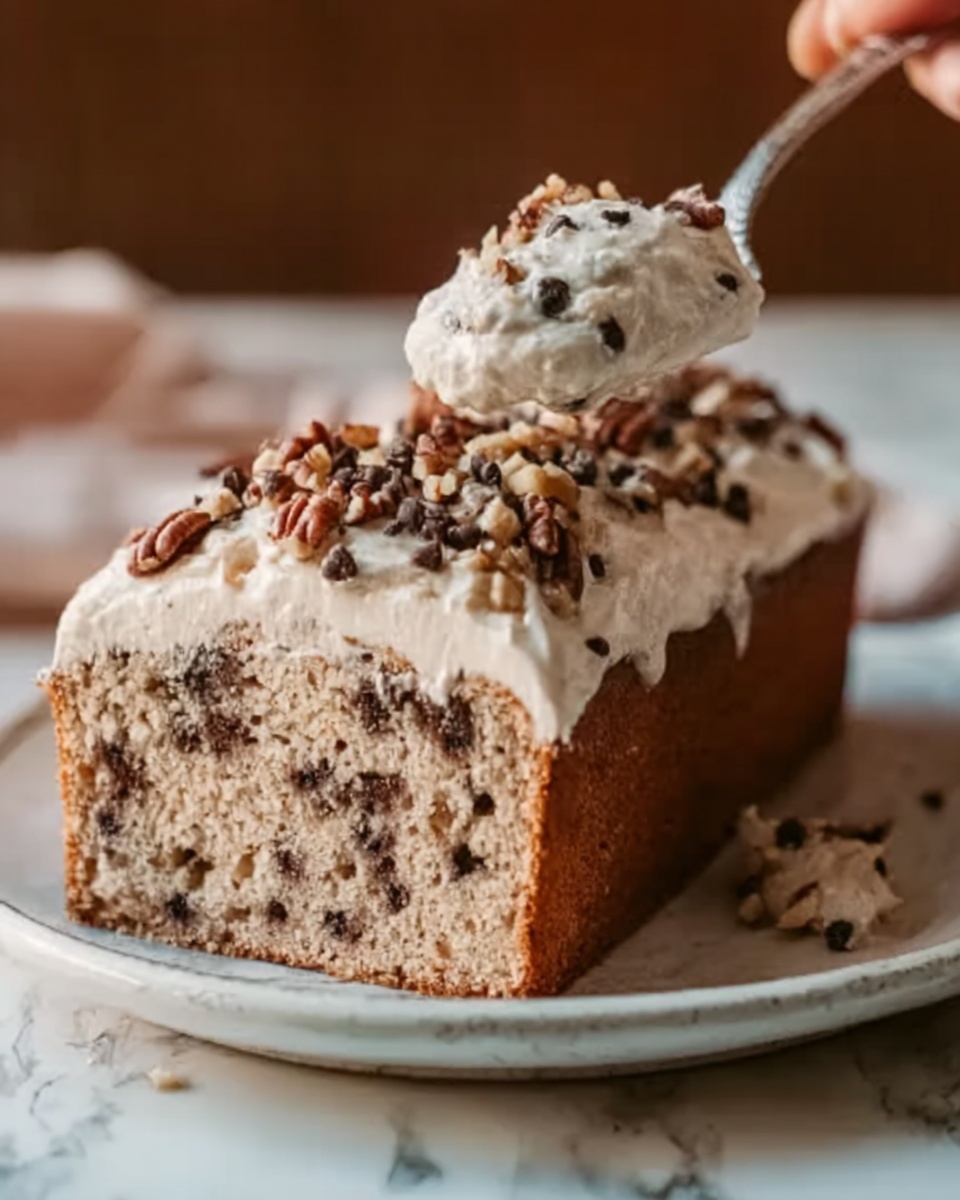
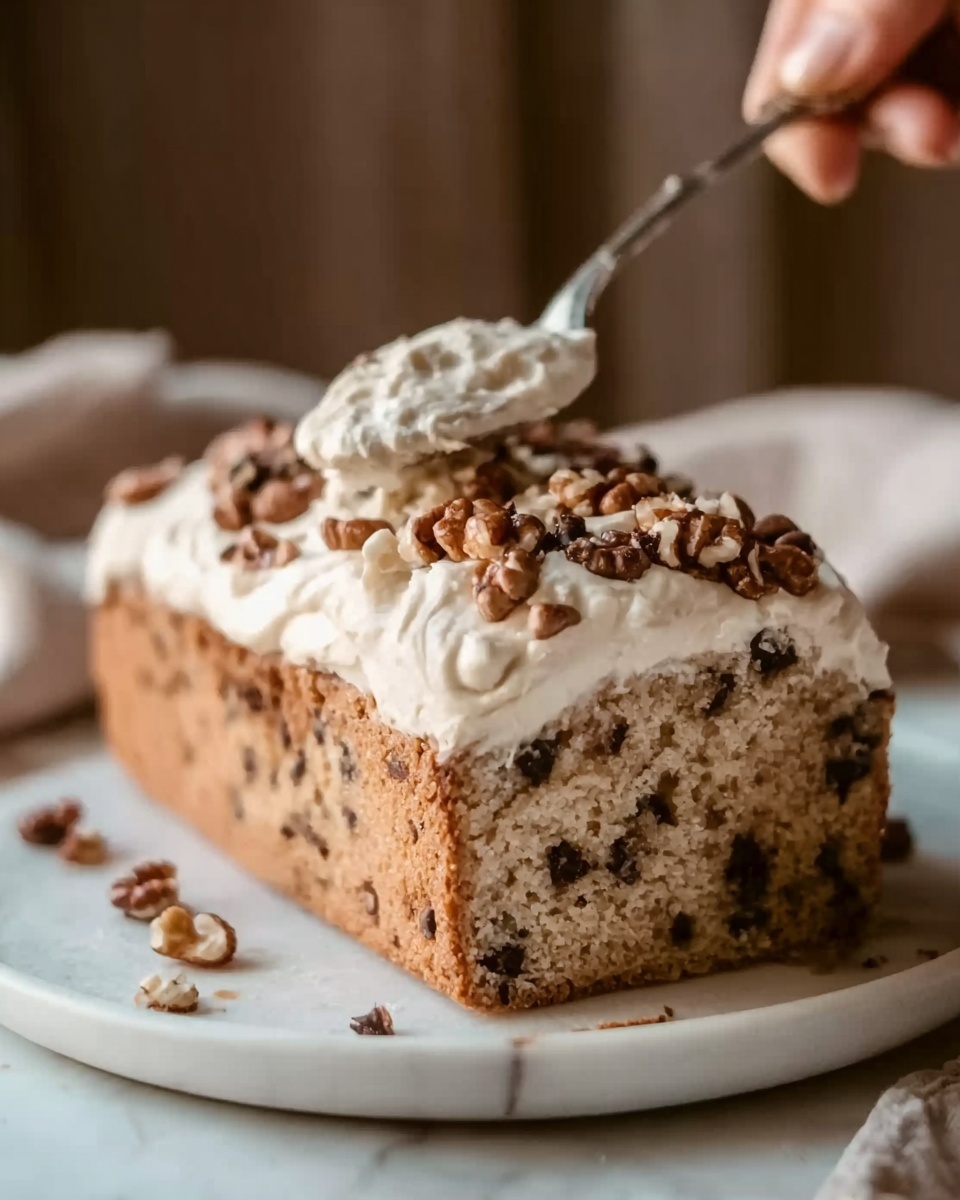
If you’ve ever dreamt of a cozy, nostalgic treat that feels like a delicious secret from grandma’s kitchen, this Vintage Ice Cream Bread Recipe is your new best friend. Imagine the sweet, creamy richness of ice cream magically transforming into a soft, moist bread with just a few simple ingredients. This recipe is so wonderfully easy and surprisingly charming, capturing that classic, old-fashioned comfort with a modern twist that anyone can whip up in no time. It’s perfect for satisfying your sweet tooth and delighting guests with something uniquely heartwarming.
Ingredients You’ll Need
Don’t let the simplicity fool you—each ingredient in this recipe plays a vital role in creating the perfect texture and flavor. With just two main components, you’ll see how easy it is to bake this vintage classic that’s as delightful as it is straightforward.
- 2 cups ice cream (any flavor, softened): The creamy base that adds sweetness, moisture, and a hint of the chosen flavor, making every loaf unique.
- 1 1/2 cups self-rising flour: This special flour gives the bread its rise and tender crumb without any fuss or additional leavening agents.
How to Make Vintage Ice Cream Bread Recipe
Step 1: Prepare Your Oven and Pan
Start by preheating your oven to 350°F (175°C), ensuring it’s at the perfect temperature to bake your bread evenly. Grease a loaf pan generously with butter or non-stick spray so your bread will come out effortlessly and keep those beautiful edges intact.
Step 2: Mix the Ingredients
In a large bowl, combine the softened ice cream and self-rising flour. Stir gently but thoroughly until the mixture looks like a thick batter. This step is key because the ice cream brings moisture and flavor, while the flour gives structure, and together they create a wonderfully dense yet tender bread.
Step 3: Transfer to Loaf Pan
Pour the batter into your prepared loaf pan. Use a spatula to smooth the top out evenly. This helps the bread bake in a nice, uniform shape and ensures that the crust develops beautifully golden and inviting.
Step 4: Bake to Perfection
Bake your loaf for 45 to 50 minutes. Keep an eye on the color—when it’s gloriously golden brown and a toothpick inserted in the middle comes out clean, you know it’s ready. This baking time allows the bread to set just right, blending the sweet creaminess with a tender crumb.
Step 5: Cool and Slice
Once out of the oven, let the bread cool in the pan for about 10 minutes. Then, transfer it to a wire rack to cool completely. Cooling fully is important because it lets the bread settle and slice cleanly without crumbling.
How to Serve Vintage Ice Cream Bread Recipe
Garnishes
Although this bread is delicious on its own, little touches can elevate it beautifully. Try sprinkling some powdered sugar, a light drizzle of honey, or a smear of softened butter to enhance its sweet, tender flavor. A dollop of whipped cream or fresh berries makes it feel like a dessert, perfect for a special treat.
Side Dishes
Pairing your Vintage Ice Cream Bread Recipe with a warm cup of coffee, chai tea, or even a cold glass of milk transforms it into an unforgettable snack or breakfast-time delight. For a brunch spread, serve alongside creamy yogurt or fresh fruit salad to balance the richness.
Creative Ways to Present
Want to impress friends or family with minimal effort? Slice the bread into thick pieces and toast them lightly for a crunchy contrast. You can also create small finger sandwiches with cream cheese and jam for an elegant tea-time presentation. The versatility of this bread makes it a charming centerpiece for many occasions.
Make Ahead and Storage
Storing Leftovers
Wrap leftover bread tightly in plastic wrap or keep it in an airtight container to prevent drying out. Stored this way, your Vintage Ice Cream Bread Recipe stays fresh for up to 2-3 days at room temperature, perfect for quick breakfasts or snacks.
Freezing
This bread freezes well. To keep it tasting its best, slice the loaf before freezing so you can thaw just what you need. Wrap slices individually in plastic wrap and place them in a freezer-safe bag. Frozen, it can last for up to a month while maintaining its delightful texture.
Reheating
To bring back that just-baked freshness, warm slices in the oven at 350°F (175°C) for about 10 minutes or toast them lightly. Microwaving works too but can make the texture a bit softer. A quick reheat will revive the aroma and taste, making each bite just as good as the first.
FAQs
Can I use any flavor of ice cream for this recipe?
Absolutely! Any flavor works wonderfully and gives the bread a distinct character. Vanilla or chocolate are classics, but fruity or nutty flavors also add exciting twists.
What if I don’t have self-rising flour?
You can make your own by combining all-purpose flour with baking powder and a bit of salt. For 1 1/2 cups self-rising flour, mix 1 1/2 cups all-purpose flour with 2 teaspoons baking powder and 1/2 teaspoon salt.
Is this recipe suitable for a quick dessert?
Definitely. Since it uses just two main ingredients and requires no yeast or proofing, you can whip it up quickly when the sweet tooth strikes.
Can this bread be made dairy-free or vegan?
Using dairy-free ice cream and a suitable flour blend might work, but the texture and flavor can change significantly. It’s worth experimenting with your favorite non-dairy ice cream for a vegan twist!
How dense or moist is the bread?
This bread has a moist, tender crumb thanks to the ice cream’s creaminess, but it’s more dense than traditional yeast bread, giving it a rich, comforting texture that’s irresistible.
Final Thoughts
Trying the Vintage Ice Cream Bread Recipe is like discovering a charming little secret that brings joy and sweetness with minimal effort. It’s a unique blend of nostalgia and simplicity that welcomes you to bake with a smile. Give it a go—you might just find your new favorite comfort food that’s as fun to make as it is to eat!
Print
Vintage Ice Cream Bread Recipe
- Prep Time: 10 minutes
- Cook Time: 45-50 minutes
- Total Time: 55-60 minutes
- Yield: 1 loaf (approximately 8 slices)
- Category: Bread
- Method: Baking
- Cuisine: American
Description
This Vintage Ice Cream Bread recipe is a simple and delightful baked treat that combines the creamy sweetness of ice cream with the soft texture of self-rising flour to create a quick, no-yeast bread. Perfect for an easy dessert or a sweet snack, this recipe requires only two main ingredients and minimal preparation.
Ingredients
Ingredients
- 2 cups ice cream (any flavor, softened)
- 1 1/2 cups self-rising flour
Instructions
- Preheat and Prepare Pan: Preheat your oven to 350°F (175°C). Grease a loaf pan thoroughly with butter or non-stick spray to prevent sticking and ensure easy removal of the bread once baked.
- Mix Ingredients: In a large mixing bowl, combine the softened ice cream and self-rising flour. Stir until the mixture is fully incorporated into a thick batter. The choice of ice cream flavor can alter the bread’s taste uniquely.
- Transfer to Pan: Pour the thick batter into the prepared loaf pan. Use a spatula to smooth out the top, creating an even surface for even baking.
- Bake the Bread: Place the loaf pan in the preheated oven and bake for 45-50 minutes. The bread is done when it turns golden brown and a toothpick inserted into the center comes out clean without batter clinging to it.
- Cool and Serve: Let the bread cool in the pan for 10 minutes to set. Then, transfer it to a wire rack and allow it to cool completely before slicing. This prevents it from becoming crumbly and helps achieve the best texture.
Notes
- Use any flavor of ice cream to customize the taste of the bread; vanilla or chocolate are classic choices, but fruit or nut-flavored ice creams add interesting twists.
- Make sure the ice cream is softened before mixing to help it blend easily with the flour.
- Self-rising flour already contains baking powder and salt, so no additional leavening agents are needed.
- Store the bread in an airtight container at room temperature for up to 2 days or refrigerate for longer freshness.
- This bread is slightly sweet and dense, making it a great base for spreads like butter, jam, or cream cheese.


