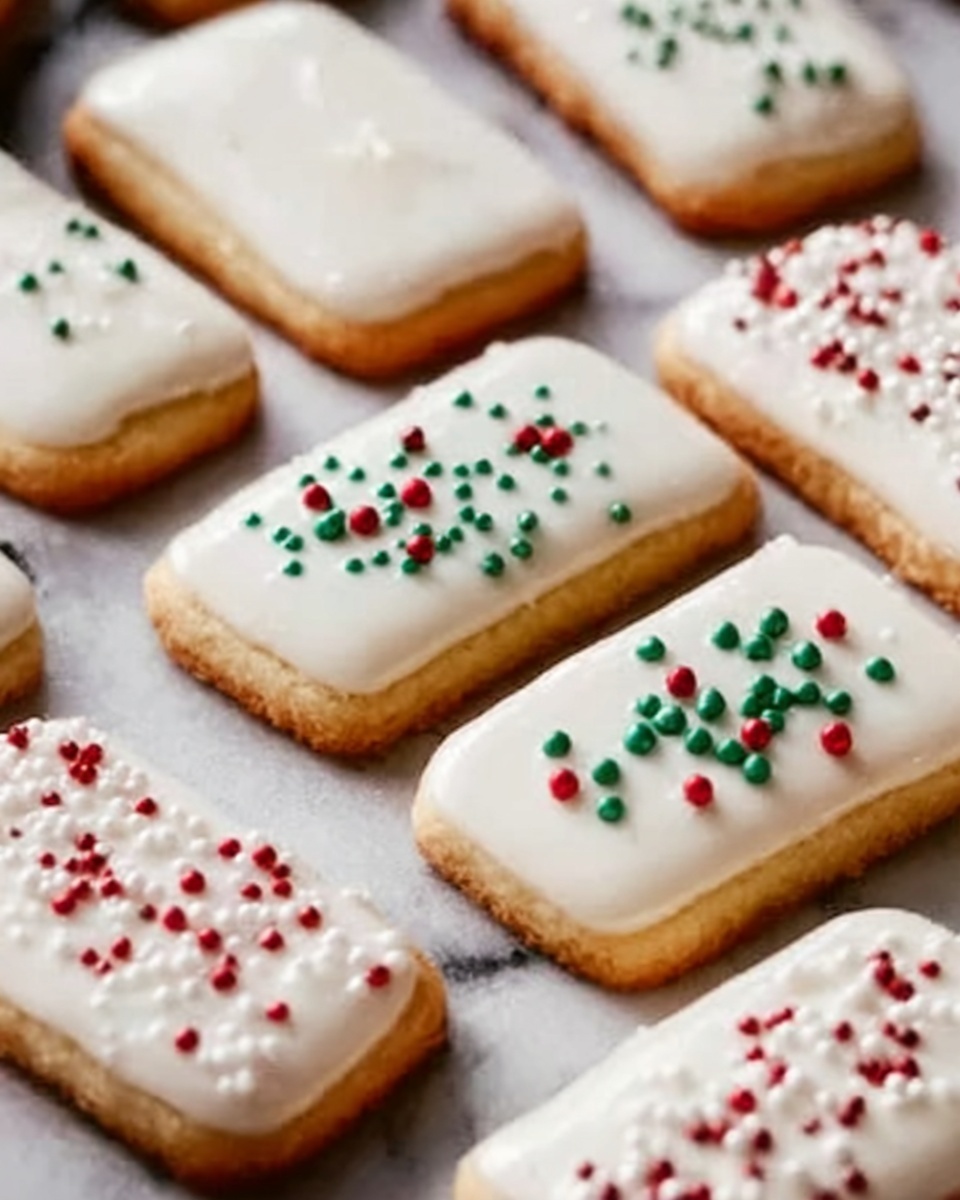
If you’re on the hunt for a festive and irresistibly sweet treat, you absolutely have to try this White Chocolate-Dipped Sugar Wafers Recipe. These delicate, crunchy sugar wafers get a luscious coating of creamy white chocolate, then dressed up with colorful sprinkles that add just the right amount of whimsy. Perfect for sharing at holiday parties, gifting to friends, or simply indulging your own sweet tooth, this recipe is a quick and joyful way to celebrate any occasion. The crisp texture paired with the smooth, melt-in-your-mouth coating makes every bite a little moment of pure happiness.
Ingredients You’ll Need
This White Chocolate-Dipped Sugar Wafers Recipe is wonderfully simple in its ingredient list, but don’t underestimate the power of each component. Every ingredient plays a crucial role, from the crisp wafers providing the perfect base to the white candy melts creating that signature glossy finish. The shortening helps achieve a smooth consistency, and the sprinkles bring that extra pop of festive color and fun texture.
- Sugar wafer cookies: These thin, crispy wafers bring the classic crunch you want for the perfect bite.
- White candy melts or white bark coating: Choose a high-quality coating that melts smoothly and hardens with a shiny finish.
- Shortening: Helps to thin the melted candy for easy dipping and a flawless coating.
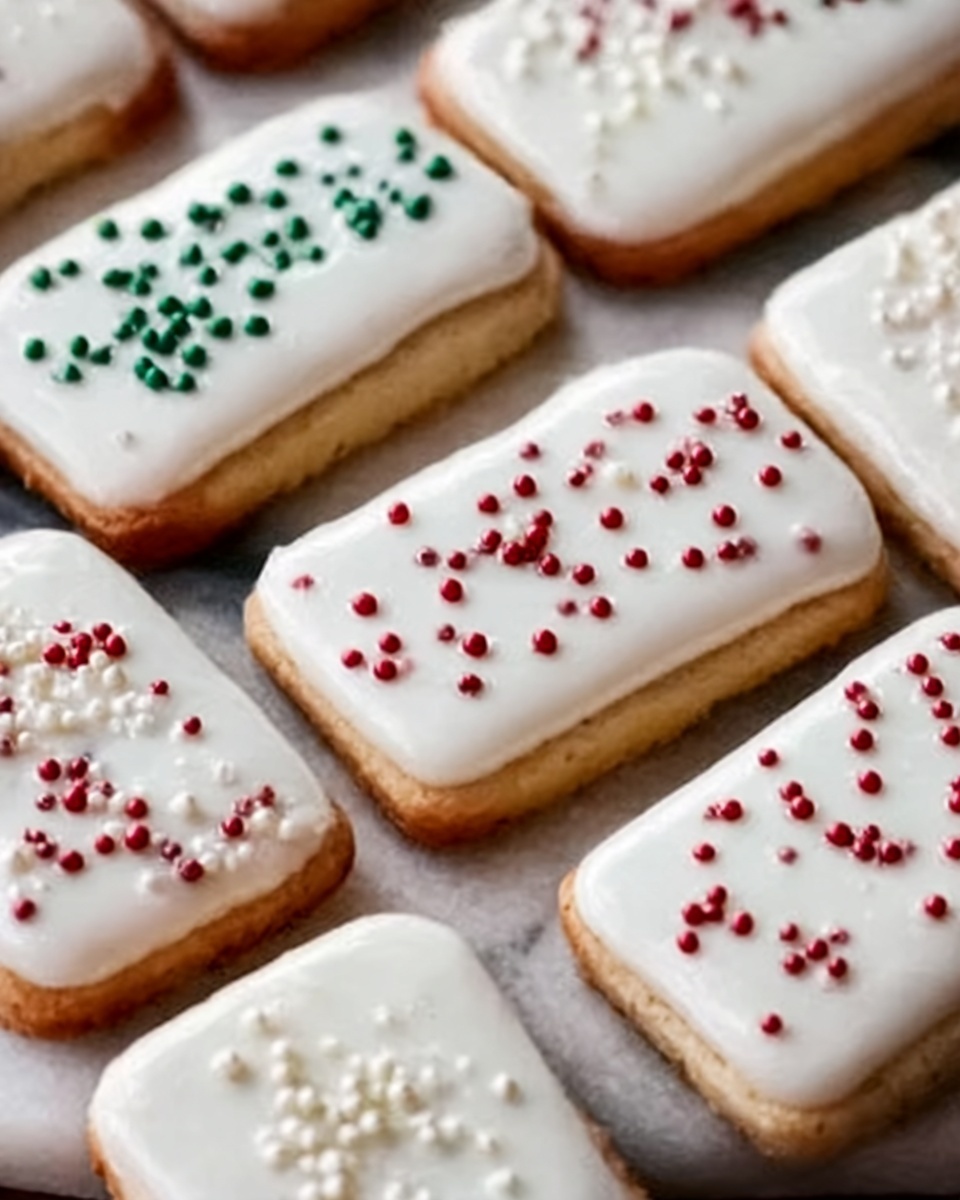
- Assorted red, green, and white sprinkles: Adds a festive look and a joyful touch, perfect for holiday vibes or any colorful celebration.
How to Make White Chocolate-Dipped Sugar Wafers Recipe
Step 1: Melt the Candy Coating
Begin by placing your white candy melts or bark coating in a microwave-safe bowl alongside the shortening. Heat them in short 30-second intervals, stirring between each to prevent scorching and to encourage even melting. Once the mixture turns velvety smooth, you’re perfectly set to begin dipping.
Step 2: Dip the Wafers
Carefully take each sugar wafer and dip it approximately three-quarters of the way into the melted white chocolate. Let any excess coating drip back into the bowl—this ensures a clean, even cover without clumps. This step is where your patience pays off with flawless results.
Step 3: Add Sprinkles
Immediately after dipping, while the coating is still wet, sprinkle your preferred holiday or themed sprinkles over the coated portion. This is the magic moment to get creative and add your signature flair before the white chocolate hardens.
Step 4: Set and Repeat
Place each dipped wafer on a sheet of wax paper to cool and harden naturally at room temperature. Repeat the process with every wafer until all are beautifully coated and decorated. Allow plenty of time for the coating to set before moving on to storage or serving.
Step 5: Store Properly
Once the white chocolate is fully firm, store these delightful wafers in an airtight container to keep them crisp and fresh. They’re best enjoyed within two weeks for maximum crunch and flavor.
How to Serve White Chocolate-Dipped Sugar Wafers Recipe

Garnishes
Extra garnishes can take your White Chocolate-Dipped Sugar Wafers Recipe from lovely to show-stopping. Try finishing touches like a drizzle of contrasting dark chocolate, crushed peppermint pieces for a minty twist, or edible glitter for a sparkling holiday treat. Garnishes not only enhance visual appeal but invite those first curious bites.
Side Dishes
Pair these wafers with a warm cup of coffee, hot cocoa, or even a chilled glass of milk for an irresistible snack experience. They also make a charming accompaniment to cheeseboards or dessert platters, adding a sweet and crunchy component that balances richer or creamier options.
Creative Ways to Present
Presentation makes all the difference when sharing this recipe with friends or loved ones. Arrange your white chocolate-dipped wafers in pretty gift boxes lined with parchment paper, or stand them upright in festive mugs or jars tied with ribbons. You can even use them as edible garnishes on cakes or cupcakes, giving your desserts an elegant yet playful touch.
Make Ahead and Storage
Storing Leftovers
Any extras from your White Chocolate-Dipped Sugar Wafers Recipe keep well when stored in an airtight container at room temperature. Avoid moisture and direct sunlight to preserve their crispness and maintain that beautiful glossy coating for up to two weeks.
Freezing
If you want to extend their shelf life, these sugar wafers freeze beautifully. Layer them with parchment paper in a freezer-safe container to prevent sticking, and freeze for up to one month. Just be sure to thaw them at room temperature before serving to keep the texture intact.
Reheating
Since these treats don’t need reheating to enjoy, simply allow frozen wafers to come back to room temperature naturally. Avoid heating them as this can soften the crisp wafers and cause the coating to melt prematurely.
FAQs
Can I use milk chocolate instead of white chocolate?
Absolutely! You can substitute milk or even dark chocolate melts, but keep in mind that the white chocolate’s creaminess and color really make this recipe pop. Milk chocolate will give a richer flavor with a different aesthetic.
What if I don’t have shortening? Can I use butter instead?
Shortening is best here because it helps thin the coating without altering the consistency. Butter can change the flavor and may cause the chocolate to seize. If you don’t have shortening, a small amount of vegetable oil can work as a substitute.
Are sugar wafers gluten-free?
Most sugar wafer cookies contain wheat flour, so they are generally not gluten-free. If you need a gluten-free option, look for specialty gluten-free wafer cookies or try dipping thin gluten-free crackers instead.
How long does it take for the coating to set?
At room temperature, the white chocolate coating usually sets within 30 minutes to an hour. For faster setting, you can place the dipped wafers in the refrigerator, but letting them set naturally helps maintain the best texture.
Can I decorate the wafers with something other than sprinkles?
Definitely! Chopped nuts, shredded coconut, crushed cookies, or even edible flowers can add interesting flavors and textures. Just sprinkle them on immediately after dipping for the best adhesion.
Final Thoughts
This White Chocolate-Dipped Sugar Wafers Recipe is a delightful little joy that’s as fun to make as it is to eat. Whether you’re whipping up a batch for a holiday gathering or just treating yourself to a sweet moment, these wafers deliver a perfect crunch and creamy sweetness every time. Don’t hesitate to get creative with your sprinkles and presentation—you might just discover your new favorite festive treat!
Print
White Chocolate-Dipped Sugar Wafers Recipe
- Prep Time: 10 minutes
- Cook Time: 10 minutes
- Total Time: 20 minutes
- Yield: 48 servings
- Category: Dessert
- Method: Melting
- Cuisine: American
Description
Delight in these festive White Chocolate-Dipped Sugar Wafers, perfect for holiday celebrations. Crisp sugar wafer cookies are dipped in smooth, melted white candy coating and adorned with colorful red, green, and white sprinkles, creating a sweet, crunchy treat that’s as visually appealing as it is delicious.
Ingredients
Cookies
- 2 (8 oz. or 9 oz.) packages sugar wafer cookies
Coating
- 1 (1 lb.) package white candy melts or 1 (24 oz.) package white bark coating
- 1 tbsp shortening
Decoration
- Assorted red, green, and white sprinkles (e.g., confetti sprinkles, nonpareils, etc.)
Instructions
- Melt the Candy Coating: Combine the white candy melts or bark coating with 1 tablespoon of shortening in a microwave-safe bowl. Heat in 30-second intervals according to package directions, stirring well between each interval until the mixture is smooth and fully melted.
- Dip the Wafers: Take each sugar wafer cookie and dip about three-quarters of its length into the melted white candy coating. Allow any excess coating to drip back into the bowl to avoid clumps.
- Add Sprinkles: Immediately after dipping, sprinkle the coated portion of each wafer with your choice of festive red, green, and white sprinkles to add color and texture.
- Repeat and Set: Place the decorated wafers on wax paper and repeat the dipping and sprinkling process with the remaining cookies. Let the wafers stand at room temperature until the candy coating is completely set and hardened.
- Store: Once the coating has set, transfer the sugar wafers to an airtight container. Store them at room temperature for up to two weeks to maintain their crispness and freshness.
Notes
- Be careful not to overheat the candy melts as they can burn easily. Stir thoroughly between heating intervals.
- The shortening helps to thin the candy coating for easier dipping and a smoother finish.
- If desired, substitute with other types of sprinkles to suit various occasions or themes.
- Store in a cool, dry place to prevent the coating from melting or becoming sticky.


